
Choosing the best Basco solar light model for your garden pathway versus your yard depends on matching the fixture’s light distribution, brightness, and mounting style to the specific physical demands of each zone. Pathways require low-glare, downward-focused illumination to mark boundaries safely, whereas open yards demand wide-angle, high-output fixtures to cover expansive areas. By evaluating key technical specifications on the product label—such as lumens, beam angles, and weatherproofing ratings—you can select the ideal Basco model that will withstand tropical conditions and deliver reliable performance.
To achieve a balanced outdoor lighting scheme, you must treat your garden as a collection of distinct functional zones. A common mistake is purchasing a single type of solar light in bulk and scattering it across the entire property. This approach often leads to pathways that are blindingly bright or large lawn areas that remain shrouded in shadow. Understanding how light behaves in different outdoor settings is the first step toward making an informed purchase that enhances both safety and visual appeal.
Assessing Your Space: Pathway Marking vs. Yard Coverage
Before browsing different Basco solar light models, you must analyze the layout and primary function of your outdoor areas. Garden pathways and walkways have highly specific lighting requirements centered on safety and navigation. The primary goal here is to guide footsteps, highlight changes in elevation or direction, and mark the physical boundaries of the path. To achieve this without causing discomfort to walkers, pathway lights must project their output downward and outward toward the ground. This localized illumination prevents glare from shining directly into a person’s eyes as they navigate the garden.
Products mentioned in this guide
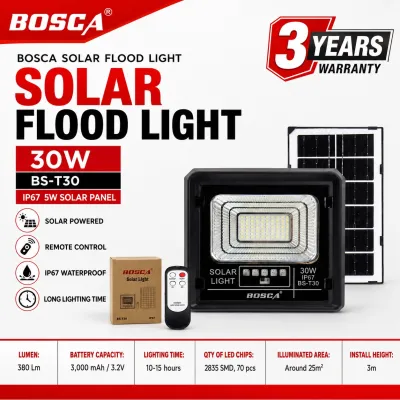
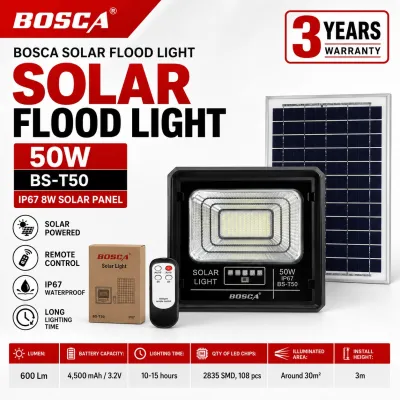
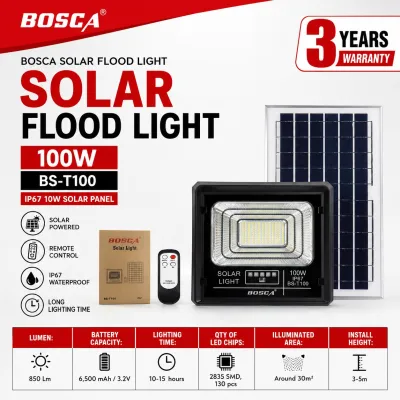
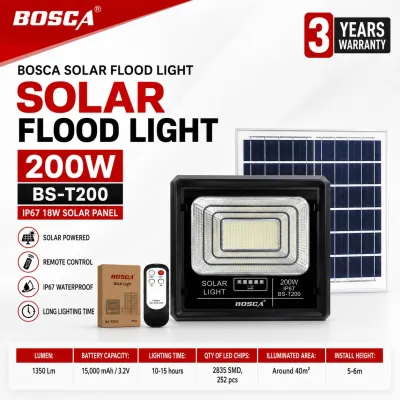
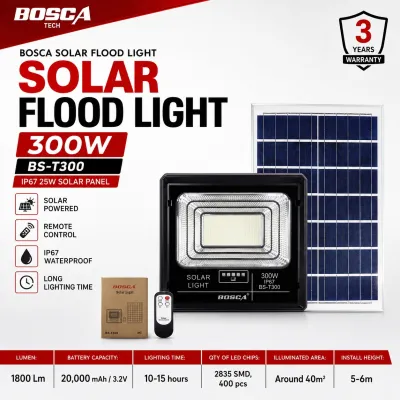
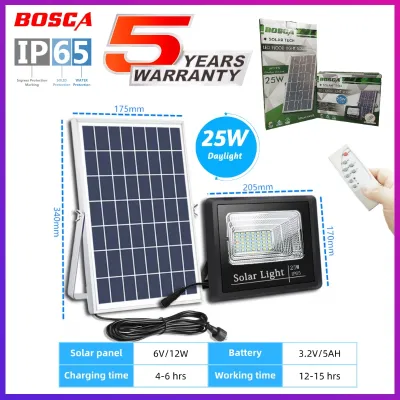
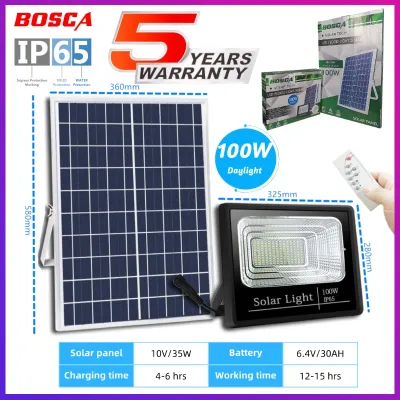
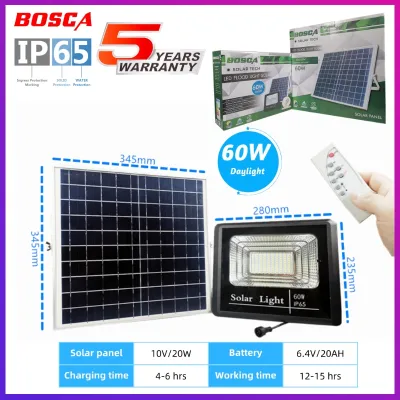
Prices are valid at publication and may change. Please refer to the product page for the latest price.
In contrast, open yards, lawns, and patios require a completely different lighting strategy. These larger spaces demand broad, ambient coverage or high-intensity illumination for security and evening activities. Instead of a series of small, low-level light pools, a yard requires fixtures that can cast light over a wide radius. This often means choosing lights with wider beam angles and higher mounting positions, such as post lights or wall-mounted floodlights, to disperse illumination across lawns, driveways, or perimeter fences.
Evaluating your space also requires looking at existing environmental factors. Take note of any ambient light spilling onto your property from streetlights or neighboring homes, as this will influence how bright your solar lights need to be. Additionally, map out the physical dimensions of your yard and pathways. A narrow, winding stone path requires closely spaced, low-profile fixtures, while a sprawling backyard lawn is better served by strategically placed, high-output fixtures that illuminate key focal points or entry barriers.
Decoding Product Labels: Specs That Matter for Each Scene
When evaluating Basco solar light models, the technical specifications listed on the packaging or product manual are your most reliable guide. The first metric to verify is the lumen rating, which measures the total amount of visible light emitted by the fixture. For garden pathways, look for models with lower outputs, typically ranging from 10 to 100 lumens. This range provides sufficient brightness to mark the path safely without overwhelming the senses. For open yards or security lighting, you will need fixtures that deliver 200 to 1,000 or more lumens to ensure adequate coverage across wide distances.

Beam angle is equally critical when matching a light to its environment. A narrow beam angle (under 60 degrees) concentrates light in a specific spot, which is useful for highlighting architectural features or specific garden plants. For pathways, a medium, downward-directed beam angle helps keep the light focused on the walking surface. For yards, look for wide-angle floodlights or omnidirectional post lights with beam angles of 120 degrees or greater to maximize the illuminated area.
Because solar lights rely entirely on stored solar energy, you must verify the solar panel capacity and battery specifications. In tropical climates like the Philippines, where heavy monsoon rains and overcast skies are common, high-efficiency monocrystalline solar panels are preferred over polycrystalline alternatives because they perform better in low-light conditions. Pair these panels with robust lithium-ion (Li-ion) or lithium iron phosphate (LiFePO4) batteries. Check the battery capacity, measured in milliampere-hours (mAh), to ensure the storage capacity is sufficient to power the light’s wattage throughout the night, even after a day of partial solar charging.
Weather resistance is non-negotiable for outdoor fixtures. Always check the Ingress Protection (IP) rating on the product label. Ground-level pathway lights are highly vulnerable to water pooling, soil moisture, and dust, meaning they require a minimum rating of IP65 to ensure they remain completely sealed against heavy downpours. Elevated yard lights, while less prone to standing water, still require robust IP65 or IP66 ratings to withstand driving wind and rain.
Finally, consider the electrical and physical compatibility of the fixtures. If you are looking at hybrid solar models that feature a backup electrical connection, you must verify the voltage, base or interface type, wattage limits, and electrical certifications to ensure safe integration with your home’s power grid. For purely solar-powered models, pay close attention to the physical dimensions and mounting hardware to ensure they can be securely installed in your intended environment.
Perceived color temperature and spatial effects should be treated as conditional preferences rather than universal performance facts. Warm white light (2700K to 3000K) creates a soft, relaxing, and inviting atmosphere that is highly suited for pathways, patios, and decorative garden features. Cool white light (4000K to 6500K) provides high-contrast, crisp illumination that improves visibility and alertness, making it the practical choice for security lighting, driveways, and open yard areas where safety is the primary concern.
Placement and Installation Rules for Optimal Performance
To get the most out of your Basco solar lights, you must follow precise placement and installation guidelines. When installing pathway lights, avoid the common mistake of placing them in a straight, perfectly symmetrical line directly opposite each other. This creates a harsh “runway effect” that can feel clinical and visually distracting. Instead, stagger the fixtures on alternating sides of the path. Space them so that the outer edges of their light pools gently overlap, creating a continuous, softly lit guide path without dark gaps or blinding hot spots.
For yard lighting, the positioning of the solar panel is the single most important factor determining performance. Solar panels must be angled to receive maximum, unobstructed direct sunlight throughout the day—ideally for at least six to eight hours. In tropical regions, position the panels to avoid shadows cast by roof overhangs, tall trees, or neighboring structures. Even partial shading on a small portion of a solar panel can drastically reduce its charging efficiency, leading to dim lights or premature shutoffs at night.
Safety and structural integrity must be prioritized during installation. When placing ground-stake pathway lights, offset them slightly from lawn edges to protect them from lawnmowers, weed trimmers, and foot traffic. For heavier yard fixtures, such as solar street lights or wall-mounted security floodlights, ensure they are securely anchored to stable posts, concrete walls, or solid masonry to withstand strong winds.
If your chosen lighting setup involves fixed electrical wiring (such as hybrid solar-grid systems), installation in damp areas, working at significant heights, or handling heavy suspended loads, you must observe strict safety boundaries. Always isolate the power source before handling any electrical connections, follow the manufacturer’s installation instructions to the letter, and consult a qualified professional to handle complex or high-risk mounting tasks.
Routine Care and Weatherproofing Checks
Regular maintenance is essential to preserve the lifespan and performance of your outdoor solar lights, especially in humid, tropical environments. Over time, dust, pollen, bird droppings, and salt residue can accumulate on the surface of the solar panels, blocking sunlight and reducing charging efficiency. Clean the panels and light covers at least once a month using a soft, damp microfiber cloth. Avoid using abrasive scrubbing pads, harsh chemical cleaners, or solvents, as these can scratch or degrade the protective plastic or glass coatings.
Periodically inspect the physical integrity of each fixture. Check the seals, gaskets, and battery compartments for any signs of moisture ingress, corrosion, or dirt accumulation, particularly after heavy tropical storms or prolonged rainy seasons. If you detect internal condensation or water pooling inside a light, turn off the unit immediately if a switch is available. Remove the battery if it is accessible, and allow all components to dry completely in a shaded, well-ventilated indoor space before reassembling the fixture.
If a solar light fails to illuminate or hold a charge after basic cleaning, check the battery connections and ensure the solar panel is not obstructed. However, you must recognize the limits of do-it-yourself troubleshooting. Do not attempt to dismantle sealed electronic drivers, modify internal circuitry, or replace non-serviceable parts yourself, as this can compromise the weatherproofing seals and void the manufacturer’s warranty. If simple cleaning and battery replacement do not resolve the issue, consult the product manual or contact a qualified professional for assistance.
Frequently Asked Questions (FAQ)
Can I use the same solar light model for both my pathway and my yard?
While you can technically use the same model, doing so usually requires significant compromises in performance or aesthetics. A high-output light designed to illuminate a wide yard will likely cause uncomfortable glare if placed at ground level along a narrow pathway. Conversely, a low-lumen pathway marker will fail to provide adequate coverage for an open lawn. If you prefer a unified design aesthetic across your entire property, look for a Basco product family that offers matching styles in different configurations, such as low-lumen ground stakes for paths and high-lumen wall mounts or post lights for the yard.
How do I know if the solar panel is getting enough sunlight in a shaded yard?
To verify if a location receives sufficient sunlight, perform a simple visual check by monitoring the area at different times of the day. A solar panel generally requires at least four to six hours of direct, unshaded sunlight daily to charge the battery fully. If trees, fences, or buildings cast shadows over the panel for most of the day, the light’s runtime will be significantly shortened. For heavily shaded yards, consider choosing solar light models that feature a detached solar panel connected to the light fixture by a cable, allowing you to mount the panel in a sunny spot while placing the light itself in the shade.
What should I do if the light stops working after a heavy storm?
Following a severe storm, perform a safe, step-by-step inspection of the fixture. First, check for obvious physical damage, such as cracked casings, loose mounts, or debris covering the solar panel. Ensure the light has not been knocked out of alignment or buried in mud. If the exterior is intact, turn off the device and inspect the battery compartment for signs of water ingress or corrosion. Clean any dirt from the light sensor and solar panel, and allow any damp internal components to dry completely in a dry, ventilated indoor space for 24 to 48 hours. If the light still fails to operate after reassembly and a full day of solar charging, consult the product manual or contact the manufacturer for support.

Community discussion
Share your experience or ask a question. Comments are reviewed before publication.