
Creating an immersive gaming room in the Philippines requires lighting that balances high-impact visual aesthetics with electrical safety, heat management, and long-term reliability. Among the options available, 12V LED lights stand out as the premier choice for ambient illumination, custom wall art, and screen-matching bias lighting. Unlike high-voltage alternatives, these low-voltage systems operate on a safe 12-volt direct current (DC) power supply, offering a highly customizable and secure DIY installation that is perfect for bedrooms and compact high-rise condo units. By choosing the right combination of 12V RGB strip lights, asymmetric light bars, flexible neon ropes, and modular panels, you can transform your gaming space into a dynamic, glare-free environment that enhances gameplay while minimizing eye strain.
Why 12V LED Lights Are Ideal for Gaming Room Ambient Lighting
Standard household electricity in the Philippines is delivered at 220V AC at 60Hz. Running 220V LED strips directly around a gaming desk, where your hands, metal PC cases, and peripherals are in constant contact, poses a significant shock and fire hazard if the thin plastic insulation of the strip is ever nicked or worn down. In contrast, 12V DC is a class 2 low-voltage system. Even if a wire is accidentally exposed, it does not carry enough electrical potential to overcome the natural resistance of human skin, making it exceptionally safe for close-contact DIY projects, under-desk mounting, and routing around metal frames.
Gaming PCs generate substantial heat, especially in the tropical climate of the Philippines, where ambient room temperatures can exceed 30°C during summer months. High-voltage LED strips or traditional incandescent bulbs generate substantial heat, raising the temperature around your desk and adding thermal strain to PC components, monitors, and consoles. 12V LED systems are highly efficient, converting the vast majority of their electrical energy into light rather than heat. This cooler operation ensures that strips mounted under desks, behind monitor casings, or inside shelving units will not warp materials, degrade adhesives, or contribute to thermal throttling in your gaming rig.
Products mentioned in this guide
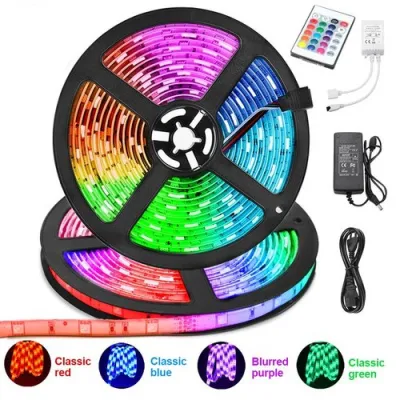
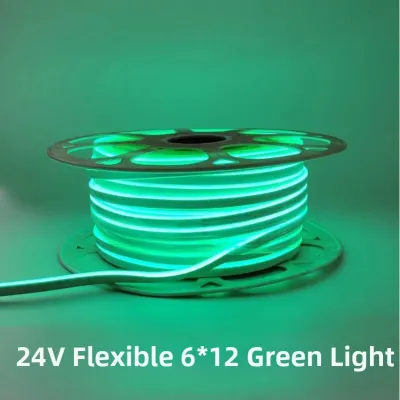
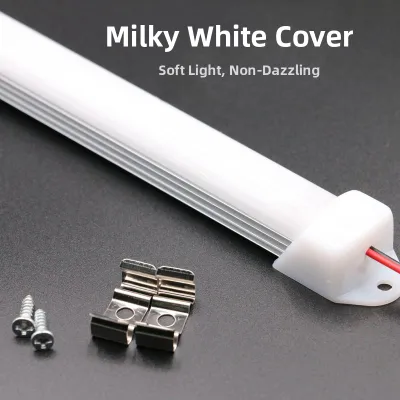
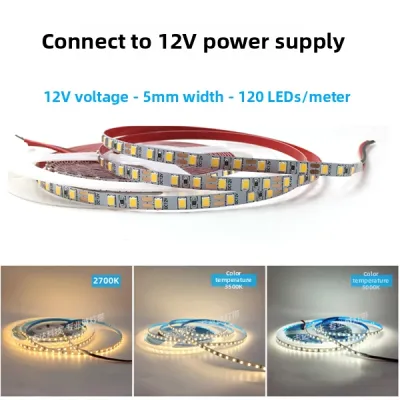
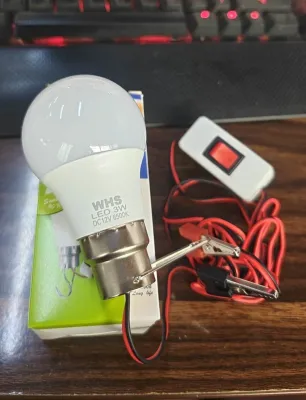
Prices are valid at publication and may change. Please refer to the product page for the latest price.
Gaming in a dark room causes eye strain due to the extreme contrast between a bright monitor and dark surroundings. Using 12V LED lights as bias lighting—projecting a soft, diffused glow onto the wall behind your monitor—balances this contrast and reduces pupillary fatigue during long sessions. Furthermore, 12V systems are highly compatible with advanced RGB and RGBIC controllers. These controllers allow you to synchronize your lighting with in-game actions, screen colors, or background music, creating an immersive, responsive atmosphere that pulls you deeper into your favorite virtual worlds.
What to Check Before Buying 12V LED Lights Online
Voltage and Power Matching: When browsing online marketplaces or local hardware stores in the Philippines, verify that the product is explicitly rated for 12V DC. Some strips run on 5V or 24V, while others plug directly into 220V AC mains. Connecting a 12V LED strip directly to a 220V AC outlet will result in immediate catastrophic failure, destroying the LEDs, melting the plastic, and creating a serious fire hazard. Always verify that the product package or online specification sheet matches the voltage of your power adapter. Look for clear markings on the copper pads of the strip itself, which should read “+12V” alongside the RGB channels.

Brightness and Density: LED density refers to the number of individual LED chips populated along a single meter of the strip. Common densities include 30, 60, or 120 LEDs per meter. Low-density strips (30 LEDs/m) are cheaper but produce highly visible, uneven “hotspots” of light, which look harsh when reflected off shiny desk surfaces. High-density strips (60 LEDs/m or more) distribute light much more evenly, creating a smooth, continuous glow. You must also check the lumen output on the product label to ensure the brightness meets your needs. For subtle ambient backlighting, a lower lumen output is sufficient, whereas task lighting or primary room illumination requires higher-lumen chips, such as SMD 5050 or addressable WS2815 LEDs.
IP Ratings for Local Climate: The ingress protection (IP) rating indicates how well the lighting fixture is sealed against dust and moisture. Standard IP20-rated LED strips have exposed copper circuitry and are designed strictly for dry indoor environments. In the Philippines, high relative humidity, coastal air, and open windows during the rainy season can introduce moisture that accelerates the oxidation of exposed copper traces, leading to premature failure. If your gaming room is well-sealed and air-conditioned, IP20 strips are perfectly adequate and run cooler. However, if your room is prone to high humidity, drafty windows, or occasional condensation, opting for IP65-rated strips—which feature a protective silicone gel coating—will safeguard the delicate electronics from moisture-induced short circuits and corrosion.
Adhesive and Mounting: Most LED strips come with a pre-applied double-sided adhesive backing. However, the high ambient temperatures and humidity in tropical climates can cause cheap, generic adhesives to dry out, lose their tackiness, and peel away from surfaces within a few weeks. When buying online, look for products that specify genuine high-quality backing adhesives, such as 3M 300LSE or VHB tape. Additionally, you should plan to use supplemental mounting solutions. Plastic mounting clips, silicone brackets, or dedicated aluminum profiles with diffuser covers not only secure the lights permanently to textured concrete condo walls or wooden desk edges but also elevate the overall aesthetic by hiding the raw circuit boards.
Best 12V LED Light Types for Different Gaming Zones
To design a balanced and visually striking gaming room, you should avoid relying on a single light source. Instead, layering different types of 12V LED fixtures across various zones of your room creates depth, reduces harsh shadows, and allows you to customize the atmosphere for gaming, streaming, or relaxing. Here are the most effective 12V LED light types categorized by their ideal placement and function.
12V RGB LED Strip Lights for Perimeter and Bias Lighting
Standard 12V RGB LED strip lights are the most versatile and common option for creating hidden and edge lighting in a gaming setup. Their flexible design allows them to be mounted along desk edges, behind monitors for bias lighting, under shelving units, and inside ceiling coves. These strips are highly customisable, allowing you to cut them to size at designated cut points to fit the exact dimensions of your furniture or room layout.
Raw LED strips can look messy and cheap if the individual light-emitting diodes are directly visible. To achieve a professional, premium look, install the strips inside aluminum channels equipped with milky or frosted polycarbonate diffuser covers. These channels scatter the light, eliminating the harsh “dotting” effect and transforming the individual light points into a single, seamless bar of glowing color. Diffusers also protect the LED chips from dust and physical damage, extending their operational lifespan.
Unlike 5V USB strips that plug directly into your PC’s ports, 12V LED strips require a dedicated external power brick (transformer) and an inline controller to function. This means you must plan your cable routing carefully to hide these bulkier components. Make sure you have adequate space behind your desk, inside a cable management tray, or behind furniture to house the power brick, and ensure it has proper ventilation to prevent heat buildup.
12V LED Light Bars for Monitor Backlighting
Long gaming sessions in a dark room can lead to severe visual fatigue. A 12V LED light bar designed specifically for monitor backlighting or mounting on top of your screen provides a highly focused, balanced light source. By illuminating the workspace directly in front of you and casting a soft glow on the wall behind, these bars bridge the contrast gap between the bright screen and the dark room, allowing your eyes to remain relaxed.
Before purchasing a light bar, check your monitor’s physical dimensions, bezel thickness, and VESA mounting configuration on the back. Some light bars utilize gravity-based counterweight clips that rest on top of the monitor bezel, which may not fit curved screens or ultra-thin monitors. Others use desk-clamped arm mounts that require a sturdy, flat desk edge with sufficient clearance. Ensuring compatibility beforehand prevents mounting issues and potential damage to your screen.
When selecting a monitor light bar, look closely at the optical specifications. High-quality light bars feature an asymmetric optical design, which projects light at a precise angle to illuminate only your desk and keyboard. This prevents any light from spilling directly onto the monitor screen, eliminating distracting glare, reflections, and washed-out contrast that can hinder your gaming performance and strain your eyes.
12V Neon Rope Lights for Custom Wall Art
If you want to add a highly personalized, thematic touch to your gaming room, 12V silicone neon rope lights are an exceptional choice. These lights are ideal for creating custom gaming logos, cyberpunk-style wall art, or outlining specific architectural features of your room. The continuous, bright glow of neon ropes adds a futuristic, high-energy vibe that raw LED strips cannot replicate.
12V silicone neon rope lights consist of a highly dense LED strip encased in a flexible, light-diffusing silicone sleeve. This design allows you to bend and shape the light into custom shapes, text, or geometric patterns on your wall. However, you must respect the manufacturer’s specified minimum bending radius—usually around 2 to 4 centimeters. Forcing the rope light into extremely sharp angles or twisting it along the wrong axis can tear the internal copper circuitry, leading to dead zones where sections of the rope fail to light up.
Unlike raw LED strips that project light in a narrow 120-degree angle with visible hotspots, neon rope lights provide a wide, perfectly uniform 180-degree glow. This makes them ideal for direct-view decorative accents where the light source itself is meant to be seen, allowing you to create eye-catching cyberpunk outlines or personalized gaming gamer-tags directly on your walls.
12V Smart LED Panels for Modular Designs
Modular smart panels are the gold standard for high-end gaming aesthetics. These panels connect together in various geometric configurations—such as hexagons, triangles, or squares—allowing you to design unique wall art that synchronizes with your PC’s audio output, matches screen colors, or displays dynamic animated scenes. They offer a highly interactive and modern look that elevates any streaming or gaming backdrop.
While many modular panels operate on a 12V DC internal system, they often rely on proprietary controllers and specialized power adapters designed specifically by the manufacturer. You must always check the input voltage and connector labels before attempting to integrate these panels with third-party 12V power supplies or controllers. Attempting to force a generic 12V power adapter into a proprietary smart panel can reverse the polarity or overload the internal microchips, permanently damaging the smart features of your expensive light panels.
Powering and Controlling Your 12V RGB Setup Safely
To run your 12V LED setup safely and ensure a long lifespan for your electronics, you must pair your lights with an adequately rated power supply. The standard formula for calculating the required wattage is:
(Watts per meter × Total length in meters) × 1.20 (safety buffer) = Minimum required power supply wattage
For example, if you purchase a high-density 12V RGB strip that consumes 14.4 Watts per meter and you plan to install a continuous 5-meter run, the calculation is:
14.4 W/m × 5 m = 72 Watts
Adding a 20% safety buffer prevents the power supply from constantly operating at 100% capacity, which causes extreme heat buildup and premature failure:
72 Watts × 1.20 = 86.4 Watts
In this scenario, you should look for a 12V DC power adapter rated for at least 90 Watts or 100 Watts. Since Amperage (A) is calculated as Wattage divided by Voltage (W / V), an 86.4W load at 12V requires at least 7.2 Amps (86.4W / 12V = 7.2A). Therefore, a standard 12V 8A or 10A power adapter would be the perfect, safe choice for this setup. Always check the official product packaging or manufacturer specification sheet for the exact wattage rating of your specific LED strip, as power draw varies significantly based on LED density and chip type.
The controller is the brain of your RGB setup, determining how you interact with and customize your lights. Basic options include infrared (IR) or radio frequency (RF) wireless remotes. IR controllers are inexpensive but require a direct, unobstructed line-of-sight between the remote and the receiver sensor. RF controllers offer better range and can operate through walls or desk panels, making them easier to hide. For a truly integrated gaming experience, smart controllers with Bluetooth or Wi-Fi connectivity are highly recommended. These smart controllers pair with mobile apps, allowing you to set schedules, create custom color gradients, and sync the lights to music via your phone’s microphone. Advanced Wi-Fi controllers can also integrate directly with PC gaming software platforms like Razer Synapse, ASUS Aura Sync, or Corsair iCUE, allowing your room’s ambient lighting to react dynamically to in-game health bars, cooldowns, or environmental changes.
Voltage drop is an electrical phenomenon where the voltage gradually decreases as it travels along a conductor, caused by the inherent electrical resistance of the thin copper traces on the LED strip’s flexible printed circuit board (FPCB). In 12V systems, voltage drop typically becomes noticeable on continuous runs longer than 5 meters. The symptoms are easy to spot: the LEDs at the beginning of the strip near the power source will be bright and accurately colored, while the LEDs at the far end will appear dim, flicker, or shift towards a dull red hue. To prevent voltage drop on longer runs, you should avoid daisy-chaining multiple strips end-to-end on a single power line. Instead, you can inject power by running a separate, thicker 12V wire from the power supply directly to the far end of the strip, or divide your setup into multiple shorter runs, each powered by its own dedicated output from a multi-channel controller or power distribution block.
Safe Installation and Cable Management for Condo Setups
Proper surface preparation is the single most important factor in ensuring your LED strips remain securely mounted over time. Dust, oil from fingers, and moisture on walls or desks create a thin barrier that prevents double-sided adhesive tape from forming a strong molecular bond. Before peeling off the adhesive backing, thoroughly clean the mounting surface. Wipe the area down with a microfiber cloth dampened with 70% isopropyl alcohol to remove all grease and dust. Do not use generic household glass cleaners or soapy water, as they often leave behind a thin chemical residue that actually degrades the adhesive. Allow the surface to dry completely for at least five minutes. When applying the strip, peel the backing paper off in small, 30-centimeter increments and press the strip firmly against the surface with your thumb, holding pressure for at least 30 seconds per section to activate the pressure-sensitive adhesive.
A messy tangle of wires not only ruins the clean, high-tech aesthetic of your gaming setup but also poses safety risks. Loose cables hanging under your desk can easily get caught in the wheels of your gaming chair, pulling down your expensive LED strips, damaging the power ports on your PC, or creating a tripping hazard. Use adhesive-backed cable tie mounts, hook-and-loop wraps, and split-loom tubing to bundle your 12V power lines and controller wires neatly. Route cables along the underside of your desk or inside plastic J-channel raceways. Ensure that all wires are kept far away from high-heat areas, such as PC exhaust vents, external power bricks, and moving mechanical parts like monitor arms or keyboard trays.
While working with 12V DC wiring is a safe, low-risk DIY activity, you must establish clear safety boundaries when it comes to high-voltage AC electricity. You should never attempt to splice, cut, or modify mains 220V AC power cords, wall outlets, or light switches. If your gaming room lighting plan involves integrating 12V step-down transformers into existing hardwired ceiling fixtures, installing new wall outlets, or drilling deep into load-bearing concrete walls of a condominium to recess heavy aluminum channels, you must stop and consult a qualified, licensed electrician. Additionally, always check your condominium’s building administration rules and guidelines, as unauthorized modifications to the structural walls or building electrical systems can violate lease agreements, void insurance policies, or lead to costly fines. Prioritize safety by ensuring all high-voltage connections are handled by professionals, and always isolate the power at the main circuit breaker before touching any hardwired electrical components.
Frequently Asked Questions (FAQ)
Can I power 12V LED strips using my PC's standard USB port?
No, you cannot power standard 12V LED strips using a standard USB port on your PC. USB-A and USB-C ports on computers are designed to output 5V DC power, which is significantly lower than the 12V required by these light strips. If you attempt to connect a 12V LED strip to a 5V USB port using a simple adapter cable, the lights will either not turn on at all, flicker weakly, or display very dim, incorrect colors because they are not receiving sufficient voltage to drive the LED chips. To power 12V LED strips safely and at their full brightness, you must use a dedicated 12V external wall adapter, or connect them to a specific 12V RGB header on your motherboard if your system manual explicitly supports it and you are using compatible software.
How do I calculate the correct power supply wattage for my setup?
To calculate the correct power supply wattage, multiply the wattage rating per meter of your specific LED strip by the total length of the strip you plan to install, and then add a 20% safety buffer. The formula is: (Watts per meter × Total length in meters) × 1.20 = Minimum required wattage. For example, a 5-meter strip rated at 12 Watts per meter requires 60 Watts of power; adding the 20% safety buffer (60 × 1.20) means you need a power supply rated for at least 72 Watts. Always check the official product packaging or manufacturer specification sheet to verify the exact wattage per meter, as this value varies widely based on LED density, chip type, and brightness levels.
Community discussion
Share your experience or ask a question. Comments are reviewed before publication.