
Finding the ideal overhead light for a child’s bedroom in a low-ceiling condominium requires balancing physical safety, visual comfort, and spatial limitations. In compact urban homes where ceiling heights often hover around 2.4 to 2.7 meters, traditional hanging fixtures or bulky semi-flush mounts pose a constant risk of being struck by toys, pillows, or raised hands.
The most effective solution is an ultra-thin, low-profile LED flush mount ceiling light. These fixtures sit almost flat against the ceiling, typically extending less than two inches downward, which maximizes vertical clearance while distributing light evenly across the entire room. By selecting a fixture that prioritizes durable materials, proper brightness, and secure installation, you can create a bright, safe, and inviting space for your child.
Measure Your Ceiling Clearance and Space Constraints
To choose the right fixture, measure the room’s vertical space from the finished floor to the ceiling. In many modern condominiums in the Philippines, dropped ceilings conceal utility pipes, air conditioning ducts, or structural concrete beams. These features can significantly reduce clearance in specific parts of the room, so measure in multiple spots rather than relying on a single reading.
Products mentioned in this guide
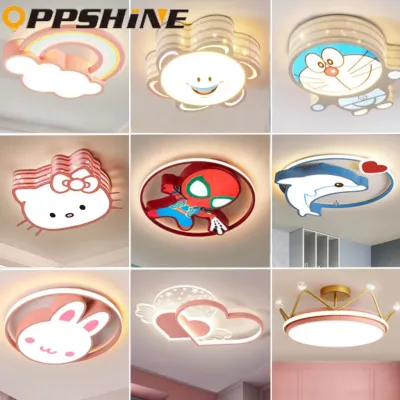
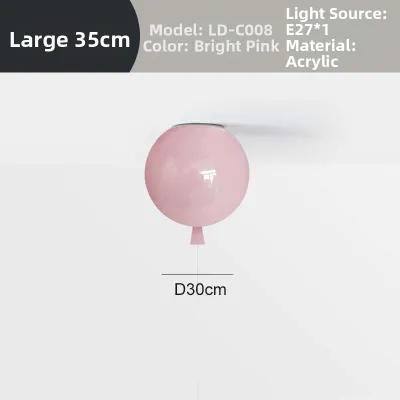
Prices are valid at publication and may change. Please refer to the product page for the latest price.
Next, establish safe clearance zones based on the room’s layout and furniture. If the room features a bunk bed, loft bed, or tall wardrobe, the clearance requirements change dramatically. A child standing on a top bunk must not be able to reach or accidentally strike the light fixture. Measure the distance from the top of the mattress to the ceiling; if this space is tight, the fixture must be as flat as possible, ideally under an inch in thickness, and positioned away from the immediate climbing path.
When browsing options on an online marketplace, always check the manufacturer’s specification sheet for the exact fixture depth and canopy height. Do not rely solely on product photos, which can be shot at angles that minimize the appearance of bulk. A true low-profile fixture should have a total depth of 1 to 1.5 inches (approximately 2.5 to 3.8 centimeters), ensuring it remains well out of reach of active children.
Calculate the Right Brightness and Color Temperature
A child’s room serves multiple purposes: it is a playroom, a study area, and a sanctuary for sleep. To determine the necessary brightness, calculate the room’s square footage and aim for a baseline of general illumination. For a standard 10-square-meter condo bedroom, a fixture emitting around 1,000 to 1,500 lumens is generally sufficient for everyday play and activities, though task lighting like desk lamps should supplement study areas.

The light’s color tone directly influences a child’s mood and circadian rhythm. Cool white or daylight tones (4,000K to 5,000K) promote alertness and are excellent for daytime study or play, but can interfere with sleep preparation. Warm white tones (2,700K to 3,000K) create a cozy, relaxing environment ideal for evening wind-down routines. Many modern low-profile LED fixtures feature a selectable color temperature switch on the back, allowing you to choose the preferred Kelvin setting during installation.
To get the best of both worlds, look for dimmable flush mount lights. Dimming capabilities allow you to transition the room from a bright play space to a soft, low-light environment perfect for bedtime stories or as a gentle nightlight. Before purchasing, verify that the fixture’s dimming method (such as triac or electronic low voltage) is fully compatible with your existing wall dimmer switch to avoid annoying flickering or buzzing sounds.
Verify Safety Features and Shatter-Resistant Materials
Children’s rooms are high-energy environments where indoor balls, flying toys, or tossed pillows are common. Traditional glass diffusers pose a severe safety hazard if struck. Instead, prioritize fixtures constructed with high-quality, shatter-resistant plastics such as acrylic or polycarbonate. These materials are lightweight, highly durable, and will not shatter into dangerous shards if an accidental impact occurs.
In tropical climates like the Philippines, high humidity and seasonal insects are constant challenges. Standard open-style light fixtures quickly accumulate dust, moisture, and dead insects inside the diffuser, reducing light output. Choosing a fully enclosed, sealed flush mount light prevents these elements from entering the fixture, keeping the light clean and reducing maintenance. Look for fixtures with an Ingress Protection (IP) rating, such as IP44 or higher, indicating resistance to dust and moisture.
Always verify that the fixture carries recognized electrical safety certifications, such as the Philippine Standard (PS) mark, the Import Commodity Clearance (ICC) sticker, or international equivalents like CE, RoHS, or UL. Because low-profile fixtures sit flush against the ceiling, proper thermal management is critical. High-quality LED flush mounts are designed with aluminum heat sinks that dissipate heat away from the ceiling surface, preventing heat buildup that could damage delicate gypsum board or concrete finishes over time.
Select a Style That Fits Condo Rules and Room Proportions
A fixture that is too small will look lost on the ceiling, while one that is too large can visually overwhelm a compact condo bedroom. As a general rule of thumb, a room measuring 3 by 3 meters benefits from a fixture with a diameter of approximately 30 to 40 centimeters. Keeping the design simple and circular helps maintain a clean, modern aesthetic that complements the limited spatial volume of a condominium.
Before undertaking any lighting upgrades, consult your condominium’s property management office. Many high-rise buildings have strict rules regarding structural modifications, including drilling into concrete ceiling slabs or altering the original electrical wiring layout. If your condo uses a solid concrete ceiling, you may be limited to using the existing junction box location, making a lightweight, easy-to-mount flush fixture the most practical choice.
While it might be tempting to install a fixture shaped like a cartoon character or featuring bright, youthful colors, children quickly outgrow these themes. Opting for a neutral, minimalist design—such as a simple white or matte black round frame—ensures the fixture remains stylish as your child transitions from toddlerhood to their teenage years. You can easily inject personality into the room through easily replaceable decor items like wall decals, bedding, and curtains.
Plan for Safe Installation and Easy Maintenance
Before mounting your new low-profile light, turn off the main power supply at the circuit breaker. Inspect the existing ceiling junction box to ensure it is securely anchored to the ceiling structure and can support the weight of the new fixture. Verify that the wiring is in good condition, with proper grounding wires present to prevent electrical shocks.
While replacing a basic light fixture is manageable for experienced DIY enthusiasts, certain situations require professional expertise. If your condo has older wiring, lacks a ground wire, or requires drilling new mounting holes into a solid concrete ceiling slab, hire a licensed electrician. Working with 220V electrical systems carries inherent risks, and a professional ensures the installation complies with the Philippine Electrical Code.
To keep your low-profile light performing at its best, establish a regular, safe cleaning routine. Dust and static electricity can cause airborne particles to cling to acrylic diffusers. Turn off the light and allow it to cool completely before cleaning. Wipe the surface gently with a soft, dry microfiber cloth. Avoid using harsh chemical cleaners, abrasive pads, or alcohol-based solvents, as these can cause micro-scratches or yellowing of the plastic diffuser, permanently degrading the light quality.
Frequently Asked Questions (FAQ)
Can I install a flush mount light on a sloped or vaulted condo ceiling?
Most standard low-profile flush mount lights are designed specifically for flat ceilings. Installing them on a sloped ceiling can cause uneven light distribution and put improper stress on the mounting hardware. If your condo has a sloped ceiling, verify that the fixture is rated for angled installation or use a compatible sloped-ceiling adapter. Additionally, ensure the ceiling junction box is rated to handle the angled load securely.
Are integrated LED flush mounts a better choice for a child's room?
Integrated LED flush mounts are highly advantageous for children’s bedrooms because they eliminate the need to climb ladders to change burnt-out bulbs, reducing accident risks. They offer a slim profile that traditional bulb-based fixtures cannot match, along with consistent light distribution. The primary trade-off is that when the integrated LED eventually fails, the entire fixture must be replaced rather than just a bulb. However, high-quality LEDs are designed to last for tens of thousands of hours, translating to years of maintenance-free use.
How do I know if my existing wall switch is compatible with a dimmable flush mount?
To determine compatibility, check the specifications of both your existing wall switch and the new flush mount light. Standard on/off toggle switches work with any fixture but do not allow dimming. If you have an older dimmer switch designed for incandescent bulbs, it may cause an LED fixture to flicker, buzz, or fail prematurely. For smooth dimming, ensure your wall switch is specifically rated as an LED-compatible dimmer (such as an ELV or trailing-edge dimmer) and matches the dimming protocol specified by the light manufacturer. If you need to upgrade your switch, consult a qualified electrician.
Community discussion
Share your experience or ask a question. Comments are reviewed before publication.