
Selecting the right led lights strip light setup can transform a standard gaming desk into an immersive, high-performance command center. The ideal choice depends on whether you prioritize screen-reactive synchronization, smart home automation, or a simple, budget-friendly ambient glow. For maximum immersion, addressable RGBIC strip lights with camera-based or software-based syncing are ideal. For seamless convenience, Wi-Fi-enabled smart strips that integrate with voice assistants offer the best control. For basic setups, standard RGB strips with physical or Bluetooth remotes provide reliable bias lighting.
In the Philippines, high humidity, warm ambient temperatures, and 220V power grids require careful selection to ensure longevity and electrical safety. Understanding the technical specifications of these lighting systems ensures you invest in a setup that matches your gaming style while remaining safe for continuous use.
Essential Features for an Immersive Gaming Atmosphere
To build a cohesive lighting scheme, you must first understand the core technologies that differentiate various products on the market. The most fundamental distinction lies in how the strip handles color distribution. Standard RGB strips use a single-channel control system where every light-emitting diode (LED) displays the exact same color at any given moment. If you set the strip to blue, the entire length turns blue. While this is suitable for basic, single-color ambient backlighting, it lacks the dynamic capability required for complex visual effects.
Products mentioned in this guide
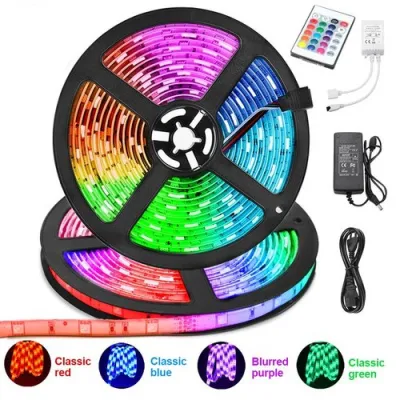
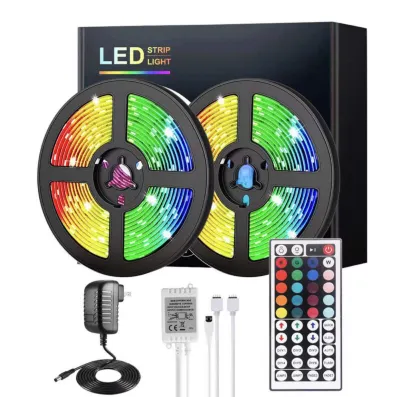
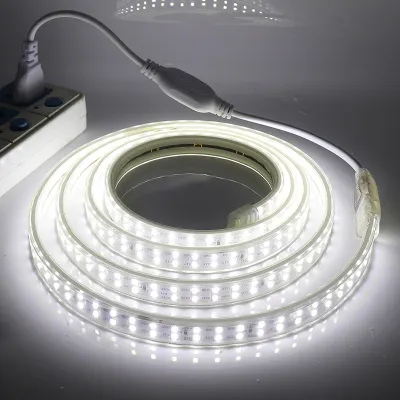

Prices are valid at publication and may change. Please refer to the product page for the latest price.
In contrast, RGBIC (RGB with an Independent Chip) strips feature addressable LEDs. These strips are equipped with microchips—such as the WS2811 or WS2812B—that divide the strip into individual, controllable segments. This architecture allows a single strip to display multiple colors simultaneously, enabling fluid gradients, chasing effects, and localized reactive lighting. If you want your lights to mimic a sunset, a flowing neon wave, or localized in-game explosions, RGBIC is the necessary standard.
LED density is another critical specification that directly impacts visual quality. Density refers to the number of diodes populated per meter of the strip. Common configurations include 30, 60, or 120 LEDs per meter. Low-density strips (30 LEDs/m) often suffer from the “dot effect,” where individual points of harsh light are visible, casting uneven hotspots on your walls or desk surfaces. High-density strips (60 LEDs/m or higher) emit a much more continuous, blended line of light. This is especially important if the strip is mounted in a position where the diodes are directly visible or reflected off glossy surfaces like tempered glass desk panels.
Control interfaces determine how seamlessly you can adjust your lighting during a gaming session. Modern systems offer several layers of control:
- App Control: Allows for precise color wheel selection, brightness adjustments, and custom DIY lighting profiles via a smartphone.
- Music Synchronization: Uses either a microphone built directly into the strip's physical controller box or your smartphone's microphone to translate audio frequencies and beats into real-time pulsing light patterns.
- Screen Color-Matching: Uses external cameras or desktop software to capture on-screen colors and project matching hues onto the wall behind your monitor, expanding your visual field.
Finally, you must evaluate the hardware interface of the control box, which typically utilizes either Bluetooth or Wi-Fi. Bluetooth controllers establish a localized, point-to-point connection with your smartphone. They are highly responsive and simple to pair, but their range is limited to approximately 10 meters, and they cannot be controlled when you leave the room. Wi-Fi controllers connect directly to your local 2.4 GHz home wireless network. This connection enables remote control from anywhere, integration with cloud-based smart home assistants, and the ability to link multiple light strips together across your home.
Choosing the Right LED Lights Strip Light Category for Your Setup
Best for Screen and Audio Syncing
For gamers seeking absolute visual immersion, reactive lighting systems represent the premium tier of ambient illumination. These setups synchronize the colors of the LED strip with the real-time action occurring on your monitor or the audio blasting through your speakers. There are two primary methods to achieve this: camera-based hardware systems and software-based desktop applications.

Camera-based systems utilize a small camera mounted on the top-center of your monitor, pointing downward at the screen. The camera continuously analyzes the color values of the screen’s edges and sends this data to a control box, which instantly projects matching colors through an RGBIC strip mounted to the back of the monitor. This hardware-driven approach works independently of your operating system, meaning it is fully compatible with gaming consoles like the PlayStation 5, Xbox Series X, or Nintendo Switch. However, the camera must have an unobstructed line of sight, and some users find the physical camera bracket on top of their thin-bezel monitor visually distracting.
Software-based syncing bypasses physical cameras entirely by using a desktop application to capture screen pixels directly from your PC’s graphics card. This method offers highly precise color matching and near-zero latency, making it excellent for fast-paced competitive gaming. The trade-off is platform limitation: these systems only work while gaming on a PC running the proprietary background software, which can consume a small amount of system resources.
Both reactive methods require a premium investment, with complete kits generally starting around ₱3,500 to ₱8,000. They also demand careful initial calibration within their respective apps to ensure that the color boundary zones on the screen align perfectly with the physical segments of the LED strip.
Best for Smart Home and Voice Control
If your goal is convenience and integration, smart Wi-Fi LED strips are the most practical choice. These strips allow you to control your gaming room’s atmosphere using voice commands or automated routines. Before purchasing, you must verify that the light strip officially supports your specific smart home ecosystem, whether that is Google Home, Amazon Alexa, or Apple HomeKit.
Wi-Fi-enabled strips excel at creating automated gaming environments. For instance, you can program a single voice command—such as “Activate Game Mode”—to simultaneously dim your main ceiling lights, power on your desktop computer, and set your LED strip lights to a deep amber or sci-fi blue. Alternatively, you can schedule the lights to automatically dim late at night to encourage better sleep hygiene after a long gaming session.
When choosing a smart strip, pay close attention to the connection architecture. Some premium smart lighting brands require a proprietary hardware hub or bridge connected directly to your internet router. While this dedicated hub reduces the load on your home Wi-Fi network and offers incredibly stable local control, it adds to the overall hardware cost and increases cable clutter. Direct-to-Wi-Fi strips do not require a hub, but they can experience latency or connection drops if your home router is overloaded with too many smart devices.
Best for Budget-Friendly Ambient Glow
For gamers who prefer a classic, static background color or simple pre-programmed lighting patterns, standard RGB strips offer an excellent, cost-effective solution. These kits typically range from ₱300 to ₱1,000 and are controlled via an infrared (IR) remote control or a basic Bluetooth smartphone app. They are ideal for “set-and-forget” installations behind desks, under shelves, or inside PC cases.
Even when shopping on a budget, you must carefully inspect the physical build quality of the strip to avoid premature failure. Look for strips that feature a double-sided copper printed circuit board (PCB). A thicker copper PCB conducts electricity more efficiently and distributes heat much better than thin, single-sided alternatives, preventing individual LED diodes from burning out over time.
Adhesive quality is another common pain point for budget-friendly options. Many generic strips use low-grade adhesive backing that quickly degrades when exposed to heat and the natural humidity of the Philippine climate. Prioritize brands that explicitly state the use of high-quality double-sided tape, such as genuine 3M backing, to ensure the strip remains firmly attached to your furniture.
Installation and Positioning Guide for Gaming Desks
Achieving a clean, professional look requires strategic placement and careful installation. The goal of gaming room lighting is to provide indirect, glare-free illumination rather than shining bright light directly into your eyes.
- Monitor Bias Lighting: Mount the LED strip to the back of your monitor, roughly 2 to 3 inches from the outer edges. This projects a soft halo of light onto the wall behind the screen. By raising the ambient light level around the monitor, you reduce the harsh contrast between a bright screen and a dark room, significantly lowering eye strain during long night sessions.
- Under-Desk Floating Effect: Mount the strip along the underside of your desk's back or front edge. This projects light downward toward the floor, creating a striking "floating" visual effect that highlights your room's flooring without causing screen glare.
- Shelving and Accent Lighting: Run strips along the undersides of floating shelves or behind display cases. This highlights your gaming collectibles, console boxes, or action figures while adding depth to the room.
During installation, maintaining electrical safety and physical care is paramount. Always read the applied product’s label and the treated item’s manufacturer instructions before starting. If instructions conflict, the item is unidentified, or the use is not covered, stop and consult the manufacturer or a qualified professional.
Always isolate the power supply by completely unplugging the power adapter from the wall outlet before physically mounting, cutting, or connecting any LED strips. If your installation involves fixed wiring, integration into home electrical mains, or mounting in damp areas (such as near windows prone to condensation), consult a qualified professional to ensure compliance with local electrical codes.
To prevent damaging the internal copper circuitry, never bend an LED strip at a sharp 90-degree angle. Doing so can sever the delicate traces that carry power and signals, causing sections of the strip to flicker or die. To turn corners behind a monitor or desk, gently loop the strip in a rounded curve that respects the manufacturer’s minimum bend radius, or use dedicated solderless corner connectors.
Proper surface preparation is crucial for long-term adhesion, particularly in warm, humid climates. Thoroughly clean the mounting surface with isopropyl alcohol to remove all dust, oils, and residues, then let it dry completely. Peel the backing tape and apply firm, even pressure along the entire length of the strip for at least 30 seconds. For the best results, let the adhesive cure for a full 24 hours before turning on the lights, as the heat generated by operating LEDs can weaken uncured glue, causing the strip to sag.
Ensure that the power adapter and control box are placed in well-ventilated areas. These components convert high-voltage household current to low-voltage DC (usually 12V or 24V) and generate heat during the process. Never tuck the power brick under carpets, cover it with clothing, or seal it inside tightly enclosed, unventilated cable management boxes.
Pre-Purchase Checklist for Buyers in the Philippines
To avoid common purchasing mistakes and ensure your new lighting setup operates safely, complete this checklist before finalizing your purchase on any online marketplace:
- Verify Voltage Compatibility: The standard electrical grid in the Philippines operates at 220V AC at 60Hz. Many cheap LED strip lights imported from overseas are designed strictly for 110V systems. Connecting a 110V-only adapter to a 220V outlet will cause immediate, irreversible burnout and poses a severe fire hazard. Always verify that the power brick label explicitly states "Input: 100-240V" or "220V."
- Check the Physical Plug Type: Standard wall outlets in the Philippines typically accept Type A (two flat parallel prongs) or Type B (two flat prongs with a round grounding pin) plugs. Many imported kits ship with Type G (UK three-prong) or Type C (European round-prong) plugs. To avoid relying on loose, bulky travel adapters that can spark or cause intermittent power connections, look for kits that include flat-prong adapters or universal power bricks.
- Assess Warranty and App Server Stability: Smart Wi-Fi LED strips rely heavily on cloud servers to process app commands and smart assistant routines. Some lesser-known brands host their servers exclusively in distant regions, which can result in frustrating control lag (latency) when you try to change colors in the Philippines. Prioritize brands with established regional server networks and local warranty support, ensuring you can easily replace components if a controller or power adapter fails.
- Look for Valid Safety Certifications: Continuous-use gaming setups place a sustained load on power adapters. Avoid unbranded, generic "no-name" LED strips sold at suspiciously low prices. These products often lack basic safety features like short-circuit protection, overcurrent protection, and flame-retardant housings. Look for recognized safety markings such as the Philippine Standard (PS) mark, Import Commodity Clearance (ICC) sticker, or international equivalents like Underwriters Laboratories (UL), CE, or RoHS certifications on the product packaging or power brick label.
Frequently Asked Questions (FAQ)
Can I cut and reconnect my LED strip lights to fit my desk?
Yes, but you can only cut the strip at designated cutting points. These points are typically spaced every few inches along the strip and are clearly marked with a printed scissor icon or a line running through exposed copper pads. Cutting anywhere else will permanently break the electrical circuit, causing the entire segment after the cut to stop functioning.
To reconnect cut segments or navigate complex angles, you can use solderless quick-connectors (such as 3-pin or 4-pin clip-on connectors, depending on whether you have RGB or RGBIC strips). Alternatively, you can solder wires directly to the copper pads. Note that physical modifications like cutting and soldering may void the manufacturer’s warranty, so always consult the product’s manual before making any alterations.
Will leaving LED strip lights on all night damage my gaming setup?
High-quality LED diodes are highly efficient and emit very little heat compared to traditional incandescent or halogen bulbs, making them safe for extended use. However, the power adapter (power brick) and the control box do generate heat as they convert and regulate electrical current.
To prevent damage or safety risks, ensure the power brick is positioned in an open, well-ventilated space rather than enclosed in a tight cable management box or buried under fabrics. To maximize the lifespan of the individual LED diodes—which slowly dim over thousands of hours of use—it is best practice to use the companion app’s built-in timer function or smart home schedules to automatically power down the lights when your gaming sessions end or when you sleep.
Community discussion
Share your experience or ask a question. Comments are reviewed before publication.