
Finding a reliable magnetic LED touch light for studying and working from home in the Philippines requires balancing desk ergonomics with a strict ₱1,000 budget. Since product availability and prices on online marketplaces fluctuate daily, this guide focuses on teaching you how to evaluate technical specifications, assess mounting stability, and navigate budget trade-offs. By understanding which features genuinely impact your productivity and eye comfort, you can build a targeted shortlist and avoid common quality traps without relying on temporary promotional rankings.
In the Philippines, where tropical humidity can affect adhesive mounts and sudden power interruptions make cordless backup lighting highly practical, a rechargeable magnetic touch light serves multiple purposes. It functions as a focused study aid, a video call fill light, and a dependable emergency lamp. Selecting the right model involves looking past flashy marketing terms to analyze the physical and electrical realities of these compact devices.
Defining Your Study and WFH Lighting Requirements
Before browsing online catalogs, you must identify the specific lighting gaps on your desk. Ambient room lighting is rarely sufficient for detailed reading or typing, as overhead fixtures often cast shadows directly over your workspace. A dedicated task light resolves this by casting direct illumination onto your physical documents or keyboard, reducing the contrast glare between your screen and a dark room.
Products mentioned in this guide
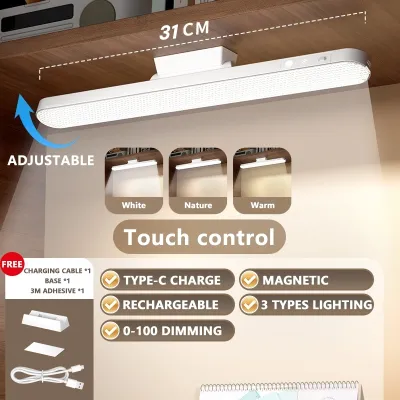
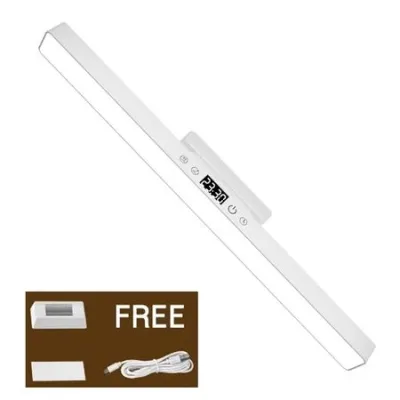
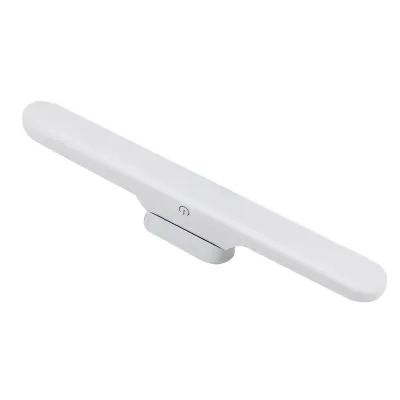
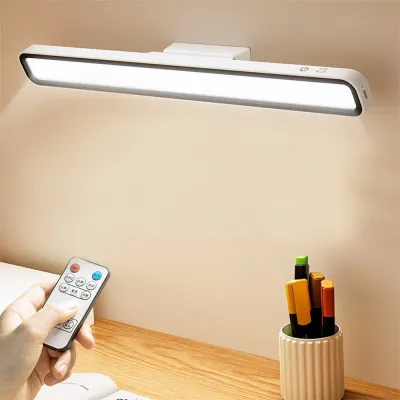
Prices are valid at publication and may change. Please refer to the product page for the latest price.
Your desk layout dictates the ideal light spread. If you work on a deep desk with a large monitor, you will require a wider beam angle to illuminate both your notepad and your keyboard. Conversely, a compact study corner or a laptop-only setup benefits from a more focused, narrow beam that concentrates light exactly where you need it without spilling over into shared bedroom spaces.
Color temperature and brightness adjustments are critical for maintaining your natural circadian rhythm. Cool white light (around 5,000K to 6,500K) promotes alertness and focus during morning study sessions or intense afternoon work hours. As evening approaches, transitioning to a warm white or yellow light (around 2,700K to 3,000K) helps your eyes relax and prepares your mind for sleep, making multi-temperature lights highly desirable.
Finally, consider how the light will interact with your video call setup. A magnetic light mounted directly behind or above your monitor can double as a front-facing fill light. This setup helps eliminate harsh under-eye shadows during virtual meetings, provided the light can be dimmed sufficiently to prevent blinding you during the call.
Essential Specifications to Evaluate Under ₱1,000
When shopping within a ₱1,000 budget, technical specifications on product listings require careful verification. Brightness is often listed in lumens, but budget manufacturers sometimes inflate these numbers. For comfortable reading, look for lights that offer a realistic output of 150 to 300 lumens, which provides ample brightness for a standard desk surface without causing excessive glare.

Battery capacity, measured in milliampere-hours (mAh), directly determines how long the light can run cordlessly. Most options under ₱1,000 feature batteries ranging from 1,200 mAh to 2,000 mAh. While listings may promise up to 24 hours of continuous use, this estimate typically applies only to the lowest brightness setting; running the light at maximum brightness will generally drain the battery in two to four hours.
Verify the charging interface before finalizing your choice. Modern USB-C ports offer more robust durability and faster power delivery than older Micro-USB ports. Choosing a USB-C compatible light allows you to share the same charging cable as your phone or laptop, reducing desk clutter. Always check the product description to confirm that a compatible charging cable is included in the package.
Touch control responsiveness is another key usability factor. Some budget lights feature a single touch button that cycles through fixed brightness levels, while others offer stepless dimming, allowing you to hold down the sensor to adjust the light level precisely. Stepless dimming provides greater flexibility for sensitive eyes, especially when working in complete darkness.
Mounting Stability and Magnetic Strength
The utility of a magnetic touch light depends entirely on its mounting system. Most budget models utilize a two-part system: a built-in magnet inside the light bar itself, and an adhesive-backed metal plate that you stick to your wall, shelf, or monitor bezel. The strength of this magnetic connection must be sufficient to hold the light’s weight when you tap the touch sensor.
In the warm, humid climate of the Philippines, standard adhesive backings can degrade rapidly, causing the metal plate to peel off painted walls or wooden shelves. To prevent your light from falling and breaking, look for packages that include high-quality double-sided acrylic tape. Alternatively, plan to reinforce the mount with a trusted local hardware adhesive if you notice any peeling.
If you plan to mount the light directly to a metal surface, such as a steel shelf or a magnetic whiteboard, check the weight-to-magnet-strength ratio. A light bar that is too heavy for its internal magnet will slowly slide downward over time. Reading user feedback regarding the physical weight of the unit can help you gauge whether the magnet is strong enough to keep it stationary.
For workspaces where adhesive mounting is not ideal, such as rented apartments or delicate wooden desks, look for versatile hybrid designs. Some magnetic lights come with secondary mounting accessories, such as a clip-on base, a small weighted desktop stand, or a hanging loop. These options allow you to reposition the light without damaging furniture finishes.
Navigating Trade-offs and Avoiding Quality Traps
Staying under a ₱1,000 price limit means accepting certain material compromises. You should expect lightweight plastic housings rather than premium aluminum alloys. While plastic is less durable, it keeps the overall weight low, which actually reduces the strain on the magnetic mount and makes the light less likely to fall.
Be wary of exaggerated marketing claims. Any budget light claiming thousands of lumens of brightness or weeks of battery life on a single charge is likely using misleading metrics. Similarly, generic “eye-care” or “flicker-free” labels should be taken with caution; true flicker-free performance requires quality internal circuitry that is not always present in entry-level electronics.
Electrical safety should remain a priority even at lower price points. Look for basic certification markings such as CE, FCC, or RoHS on the product packaging or user manual. Avoid unbranded lights with extremely cheap, lightweight internal batteries that lack overcharge protection, as these can overheat when left plugged into a wall charger for extended periods.
Finally, calculate the total cost of ownership before making a purchase. A light priced at ₱850 might seem like a bargain, but if it requires you to purchase a separate USB wall adapter, extra mounting tape, or high shipping fees, the total cost can easily exceed your ₱1,000 budget. Look for bundles that include all necessary accessories out of the box.
Building Your Shortlist on Online Marketplaces
To find the most reliable options on local e-commerce platforms, start by applying strict search filters. Set your maximum price limit to ₱900 to leave room for shipping fees. Filter for local sellers shipping from within the Philippines to ensure faster delivery times and a more straightforward return process if the unit arrives damaged.
Do not rely solely on star ratings; instead, read the written reviews and look at user-uploaded photos and videos. Pay close attention to reviews written after several weeks or months of use, as these often reveal critical long-term issues such as rapid battery degradation, loose charging ports, or failing touch sensors.
Check the seller’s warranty and return policies before adding the item to your cart. A reputable seller should offer at least a 7-day replacement window for factory defects. Since budget electronics can occasionally suffer from shipping damage or battery issues, having a clear path for returns provides essential peace of mind.
Once you have selected two or three viable candidates, compare their final checkout prices including any platform vouchers or shipping discounts. By systematically evaluating specifications, mounting options, and user feedback, you can secure a highly functional magnetic LED touch light that fits your study or WFH routine perfectly.
Frequently Asked Questions (FAQ)
Can I use a standard magnetic touch light as a dedicated monitor light bar?
While you can physically mount a standard magnetic touch light above your monitor, it will not perform the same function as a dedicated monitor light bar. Standard touch lights feature a symmetrical beam pattern that casts light in all directions, which often results in direct glare on your screen and reflections into your eyes. Purpose-built monitor light bars utilize an asymmetrical optical design that directs light downward onto your desk while completely avoiding the screen surface. Additionally, a standard light bar may block your webcam or put excess pressure on thin screen bezels.
How do I safely remove adhesive residue if I relocate the magnetic mounting plate?
To remove adhesive residue without damaging your furniture or walls, start by applying a small amount of isopropyl alcohol to a microfiber cloth and gently dabbing the residue to soften it. Avoid pouring alcohol directly onto wooden or painted surfaces, as it can strip the finish. Once softened, use a plastic scraper, an old credit card, or your fingernail to gently peel the adhesive away. Always perform a spot test on an inconspicuous area of your desk or wall first to ensure the cleaning process does not discolor or damage the material.
Community discussion
Share your experience or ask a question. Comments are reviewed before publication.