
Finding the right outdoor lighting for a lush garden in the Philippines often presents a unique challenge: how to capture enough sunlight to power your lights when thick foliage, deep eaves, or decorative structures block the sun. Outdoor solar lanterns with separate solar panels offer the ideal solution to this dilemma. By decoupling the light fixture from its power source, you can position the decorative lantern exactly where you need it—under a shaded patio, along a covered walkway, or nestled deep within garden beds—while mounting the solar panel in a high-exposure spot that receives uninterrupted tropical sunlight. This setup ensures reliable, eco-friendly illumination throughout the night without the high costs and safety hazards of running traditional high-voltage underground wiring through your yard.
Why Choose Solar Lanterns With Separate Panels?
Traditional all-in-one solar lights require the entire fixture to be placed in direct sunlight, which severely limits your landscaping and design choices. If you want to illuminate a shaded garden path or a covered veranda, an integrated solar light will struggle to charge, resulting in dim output or premature shutoffs. Separating the solar panel from the lantern body removes this limitation entirely. You gain the creative freedom to place your lanterns in deeply shaded, aesthetically pleasing, or highly functional areas while positioning the solar panel several meters away on a sunny roof, fence, or open lawn stake.
This configuration also offers significant aesthetic advantages. Instead of having a conspicuous, utilitarian solar panel sitting directly on top of a beautifully crafted vintage-style lantern or modern geometric torch, you can hide the panel out of sight. Mounting the panel discreetly on an eave or high wall preserves the visual integrity of your garden decor. However, this setup does introduce practical considerations. You must carefully manage the connecting cable, routing it safely along walls or burying it underground to prevent tripping hazards, accidental damage from lawnmowers, or chewing by local pests.
Products mentioned in this guide
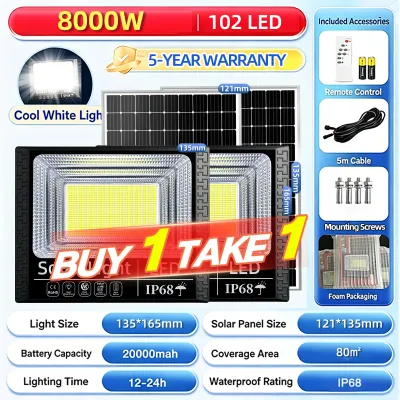
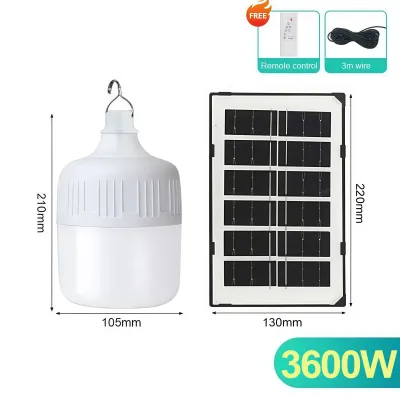
Prices are valid at publication and may change. Please refer to the product page for the latest price.
Key Selection Criteria for Reliable Garden Lighting
When browsing online marketplaces or local home improvement centers, selecting a reliable solar lantern system requires looking beyond attractive product photos. You must evaluate specific technical metrics to ensure the system can withstand the local climate and perform consistently.

Brightness and Light Distribution Start by checking the manufacturer’s lumen ratings rather than relying on vague descriptions like “super bright.” For ambient garden lighting or decorative accents, a range of 50 to 150 lumens per lantern is generally sufficient to create a warm, inviting glow. If you require functional illumination for pathways or security, look for fixtures offering 200 to 500 lumens. Pay close attention to the beam angle and lens design. A wide-angle lens or a diffused frosted glass housing is ideal for scattering light evenly across a patio, whereas a shielded, downward-facing reflector is better suited for guiding footsteps along a walkway without causing uncomfortable glare.
Battery Capacity and Runtime The performance of any solar light depends heavily on its internal battery. Look for systems utilizing Lithium Iron Phosphate (LiFePO4) or Lithium-ion (Li-ion) batteries, which offer superior thermal stability and longer lifespans compared to older Nickel-Metal Hydride (NiMH) alternatives. Check the battery capacity, measured in milliampere-hours (mAh). In the Philippines, where daytime sunlight is intense but night-time humidity and temperatures remain high, a battery capacity of at least 2,000mAh to 4,400mAh is recommended for multi-lantern setups. This capacity ensures the system can store enough energy during a standard eight-hour charge to power the lights for eight to twelve hours overnight.
Weather Resistance and IP Ratings The tropical climate presents severe environmental challenges, including intense UV exposure, high humidity, and torrential rains during the typhoon season. It is critical to verify the Ingress Protection (IP) rating of both the lantern and the separate solar panel. Look for a minimum rating of IP65, which indicates the housing is dust-tight and protected against water jets from any angle. For highly exposed areas or ground-level installations prone to temporary pooling water, an IP67 rating is highly preferred, as it ensures protection against temporary immersion.
Build Materials and Value The materials used in the construction of the lantern housing directly impact its longevity. Cheap plastics degrade rapidly under intense tropical UV rays, becoming brittle and cracking within a few months. Opt for high-quality materials such as powder-coated aluminum, stainless steel, or UV-stabilized ABS plastics. When comparing prices in Philippine Pesos (₱), balance the initial cost against the warranty terms. A slightly more expensive system costing ₱1,500 to ₱3,000 that includes a one-year warranty and replaceable batteries often represents far better long-term value than a cheap ₱300 alternative that must be entirely discarded when its non-replaceable battery fails.
Recommended Lantern Profiles for Different Garden Zones
To design an effective garden lighting scheme, you should match different lantern styles to the specific functional zones of your yard. Because a single style of light rarely suits every corner of a property, categorizing your needs helps you choose the right balance of brightness, aesthetics, and cable lengths. Ensure you measure the distance from your desired light placement to the nearest sun-exposed area to confirm the included connecting cable is long enough.
Pathway and Walkway Illumination
For pathways, safety and clear visibility are the primary goals. The ideal lantern profile for this zone features a downward-facing, shielded light source that directs illumination onto the ground rather than outward into your eyes. This design prevents night glare and clearly highlights steps, roots, or changes in elevation. Look for sturdy stake-mounted lanterns or low-profile post lights. Because these are installed close to the ground, ensure the connecting cables are routed flat along the borders of the path or buried in shallow trenches. This prevents the wires from becoming tripping hazards for family members or getting caught in grass cutters and garden shears.
Patio and Seating Area Ambiance
When lighting outdoor dining tables, verandas, or seating areas, the focus shifts from high visibility to comfort and relaxation. For these social spaces, look for hanging lanterns, wall-mounted sconces, or tabletop lanterns that emit a warm color temperature (ideally between 2700K and 3000K). Diffused light sources—such as those utilizing textured glass, woven synthetic rattan, or frosted polycarbonate shades—soften the light and eliminate harsh shadows. Since these seating areas are often covered by pergolas or roofs, you can mount the separate solar panel high on the roofline or an outer eave where it can catch maximum sunlight, running the thin cable discreetly along the structural beams to the lanterns below.
Accent and Focal Point Lighting
If you want to draw attention to specific landscape features, such as a majestic palm tree, a water fountain, or a decorative stone wall, you need accent lighting. The best profile for this application is a spotlight-style lantern or a directional torch with an adjustable head and a narrow beam angle (typically 30 to 60 degrees). These fixtures require higher lumen outputs—often 300 lumens or more—to project light effectively over a distance. Because focal points are frequently located in deep, shaded corners of the garden, look for systems that offer extra-long connecting cables (at least 5 meters) or compatible extension wires, allowing you to place the panel in a fully unshaded zone.
Installation and Panel Placement Guidelines
Proper installation is key to maximizing the efficiency and lifespan of your solar lighting system. The most critical step is positioning the separate solar panel. In the Philippines, which lies close to the equator in the northern hemisphere, solar panels should generally face south at a slight tilt angle of approximately 10 to 15 degrees. This angle is steep enough to allow heavy tropical rains to wash away accumulated dust, leaves, and debris naturally, while still capturing optimal solar radiation year-round. Ensure the panel is completely free from shadows cast by trees, power lines, or neighboring buildings, especially during the peak sunlight hours of 10:00 AM to 3:00 PM.
Cable management is another vital aspect of a successful installation. Never leave loose, dangling wires exposed across lawns or walkways. For ground installations, place the connecting cables inside flexible PVC conduits or split loom tubing before burying them 3 to 6 inches underground. This extra layer of protection prevents damage from burrowing pests, moisture, and accidental strikes from garden spades. For wall or roof-mounted panels, secure the cables tightly against the structure using UV-resistant cable clips or outdoor-rated zip ties.
Always observe safety boundaries during installation. If your setup requires mounting a heavy solar panel on a high roof, working near overhead power lines, or climbing tall ladders, it is highly recommended to hire a qualified local handyman or professional installer to prevent falls or structural damage. Furthermore, if you plan to integrate your solar lanterns with existing outdoor electrical fixtures or fixed household wiring, always isolate the main power supply before beginning work and consult a licensed electrician to ensure compliance with local electrical codes.
Maintenance and Long-Term Performance
While solar lanterns are generally low-maintenance, a small amount of regular care will dramatically extend their operational life and keep them shining brightly. In tropical environments, solar panels quickly accumulate a film of fine dust, pollen, bird droppings, and even mold due to high humidity. This buildup blocks sunlight and can reduce charging efficiency by 20% or more. Establish a cleaning schedule to wipe down the solar panel surface once every two to four weeks using a soft, damp microfiber cloth and plain water. Avoid using abrasive sponges or harsh chemical cleaners, which can scratch the tempered glass or degrade the protective coating.
Over time, all rechargeable batteries lose their capacity to hold a charge. If you notice your lanterns are only staying lit for one or two hours instead of their usual runtime, it is likely time to replace the battery. Check the manufacturer’s guidelines to identify the exact battery chemistry, voltage, and physical dimensions required. Always turn off the fixture’s power switch before opening the battery compartment, and ensure the rubber weather seals are seated perfectly when reassembling the unit to prevent moisture ingress.
Finally, perform a thorough inspection of your entire lighting system after severe weather events, such as heavy monsoon rains or typhoons. Check that the solar panel mounting brackets remain secure, inspect the cables for any signs of fraying or animal bites, and verify that the weather seals on the lantern housings have not perished or let in water. Addressing minor issues early prevents complete system failures down the road.
Frequently Asked Questions (FAQ)
Can I extend the cable between the solar panel and the lantern?
Yes, many manufacturers offer compatible extension cables designed specifically for their solar lighting systems. However, you must avoid splicing random household wires or extending the cable beyond the manufacturer’s recommended maximum length. Doing so introduces a significant voltage drop over the distance, which reduces the charging current reaching the battery and prevents the lantern from fully charging. Always check your product manual and warranty terms before modifying any factory wiring, as unauthorized cutting or splicing typically voids the warranty.
Do separate solar panels work during the rainy season?
Solar panels do continue to charge during cloudy and rainy days, but their efficiency drops significantly because they must rely on diffused ambient light rather than direct sunlight. On highly overcast days, a solar panel might only produce 10% to 25% of its typical power output, which will result in a much shorter nightly runtime for your lanterns. To mitigate this during the wet season, look for solar lantern models that feature a larger solar panel surface area, or select systems that include an auxiliary USB charging port, allowing you to charge the batteries indoors when prolonged storms occur.
Community discussion
Share your experience or ask a question. Comments are reviewed before publication.