
Choosing a solar ceiling light for a low-ceiling condo in the Philippines requires balancing physical dimensions with charging practicality. In high-density urban developments where ceiling heights often hover around 2.4 to 2.6 meters, bulky light fixtures can make a room feel cramped and visually cluttered. Solar-powered indoor lighting offers an energy-efficient, grid-independent alternative, but success depends on selecting a low-profile fixture and ensuring the solar panel receives adequate sunlight through condo windows or balcony openings. By focusing on slim-profile designs and split-panel configurations, you can illuminate your living space without sacrificing valuable headroom.
Assessing Indoor Solar Lighting Feasibility for Your Condo
Before purchasing a solar ceiling light, you must evaluate whether your condo’s layout can support this technology. Unlike outdoor installations where solar panels enjoy unobstructed sky access, indoor setups rely entirely on the light passing through your windows or balcony doors. The orientation of your condo unit plays a critical role in this assessment. East- and West-facing windows receive direct, intense sunlight for half the day, which is highly effective for charging. North- and South-facing windows, on the other hand, receive mostly indirect or ambient light, which significantly reduces the charging efficiency of standard solar panels. Additionally, modern high-rise buildings often use low-emissivity (low-E) glass or heavy window tints designed to block heat and ultraviolet rays; these coatings can also reduce the specific light wavelengths needed to charge solar batteries.
To overcome these indoor limitations, you must understand the difference between integrated and split-panel solar lights. Integrated fixtures have the solar panel mounted directly on top of the light housing. While these are convenient for outdoor pathways, they are practically useless for indoor ceilings because the ceiling receives no direct sunlight. A split-panel design is the only viable option for indoor condo applications. This system separates the light fixture from the solar panel using a thin, flexible cable that typically ranges from 3 to 5 meters in length. This setup allows you to mount the slim light fixture on your living room or kitchen ceiling while routing the cable to place the solar panel in the sunniest spot available, such as a window sill or balcony railing.
Products mentioned in this guide
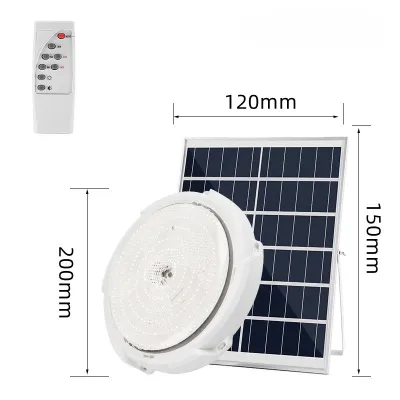
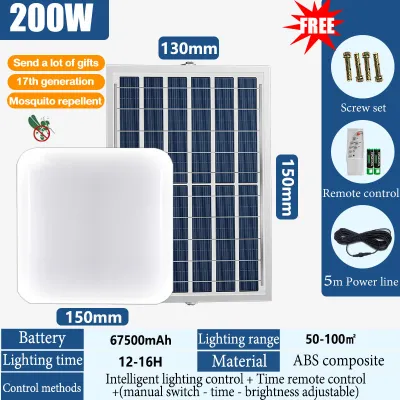
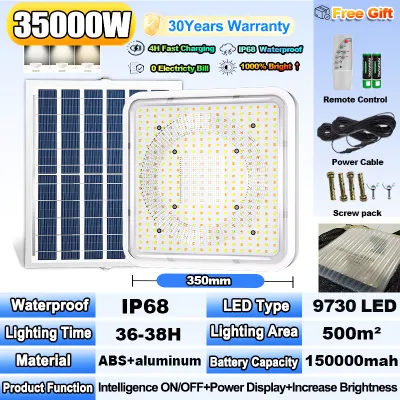
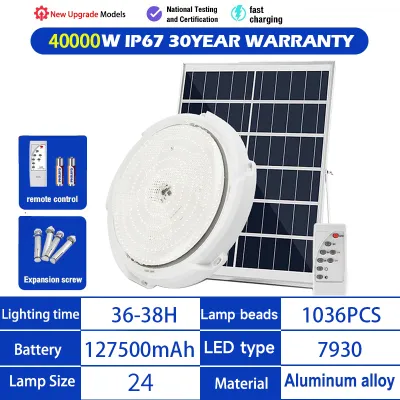
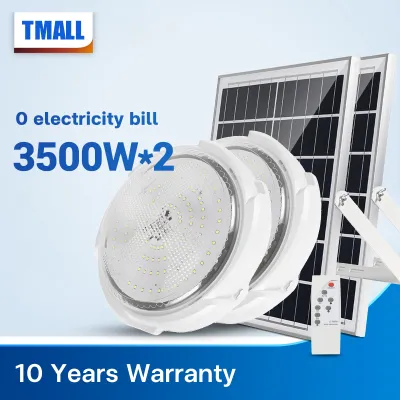
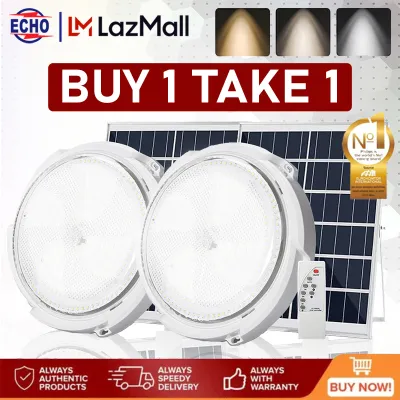
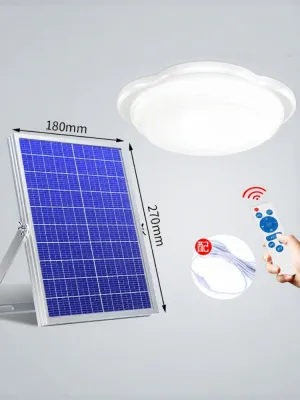
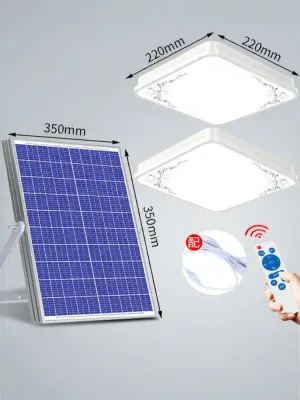
Prices are valid at publication and may change. Please refer to the product page for the latest price.
Another crucial factor to consider is the seasonal weather variation in the Philippines. During the prolonged rainy season, characterized by the southwest monsoon (habagat) and frequent tropical storms, solar exposure drops dramatically. To prevent your condo from being left in the dark during consecutive cloudy days, look for solar ceiling lights that feature hybrid charging capabilities. Some modern fixtures include auxiliary USB-C or micro-USB ports on the light housing or the battery compartment. This feature allows you to detach the unit or run a temporary cable to charge the battery using a standard power bank or wall adapter when natural sunlight is insufficient.
Defining Slim-Profile Dimensions for Low Ceilings
When dealing with low ceilings, every centimeter of vertical space matters. Standard residential condos in the Philippines often feature suspended gypsum board ceilings designed to conceal utility pipes, air conditioning ducts, and electrical conduits. This construction method frequently reduces the floor-to-ceiling clearance to less than 2.5 meters. To maintain an open, airy feel, you should target flush-mount solar fixtures with a maximum thickness of 5 centimeters (approximately 2 inches). A fixture that protrudes further down acts as a visual obstacle, drawing the eye upward and emphasizing the limited height of the room.

Beyond overall thickness, the design of the fixture’s bezel and diffuser significantly impacts how the light is perceived. Traditional dome lights often feature thick, dark plastic or metal bezels that create a harsh boundary and cast shadows near the ceiling line. In contrast, modern slim-profile solar lights utilize edge-lit LED technology combined with ultra-thin bezels. This design allows the light to emit from edge to edge, softening the transition between the fixture and the ceiling. The resulting illumination spreads wider across the ceiling plane, creating an optical illusion of a higher ceiling and a more spacious room.
Weight is another critical safety factor when installing fixtures on suspended ceilings. Gypsum board, while smooth and easy to finish, has a much lower load-bearing capacity than solid concrete. Although LEDs themselves are lightweight, solar ceiling lights contain internal rechargeable batteries that add noticeable weight to the fixture. Before installation, you must verify the weight of the light unit and ensure your ceiling can support it. Standard plastic expansion plugs are often insufficient for gypsum board; instead, use specialized hollow-wall anchors, such as toggle bolts or threaded drywall anchors, to distribute the weight safely. If possible, locate the internal metal furring channels using a stud finder and secure the mounting bracket directly to these structural supports to prevent the ceiling from sagging or cracking over time.
Verifying Light Output and Battery Specifications
Navigating the technical specifications of solar lighting requires a critical eye, as retail packaging often displays inflated wattage claims that do not reflect actual performance. Instead of relying on wattage—which often refers to the theoretical maximum capacity of the solar panel rather than the light’s output—you should focus on the lumen rating. Lumens measure the actual brightness emitted by the fixture. To determine your needs, calculate the required light output based on your room’s floor area and intended use. For ambient lighting in a typical 15-square-meter condo living room, a fixture emitting 1,500 to 2,000 lumens is generally sufficient. For task-oriented spaces like a kitchen or study corner, you may want to look for higher-output fixtures or supplement the solar light with localized task lighting.
The battery is the heart of any solar lighting system, and its chemistry determines both safety and longevity in tropical environments. When reviewing product labels, look for lithium iron phosphate (LiFePO4) batteries. Compared to standard lithium-ion (Li-ion) or lead-acid alternatives, LiFePO4 batteries offer superior thermal stability, which is crucial for safety in the hot and humid climate of the Philippines. They also boast a significantly longer cycle life, often lasting for thousands of charge-discharge cycles before experiencing noticeable capacity degradation. Check the battery capacity, which is typically measured in milliampere-hours (mAh) or watt-hours (Wh). A capacity of at least 5,000mAh is recommended for a standard living room light to ensure it can operate at a functional brightness level for 6 to 8 hours after a full day of charging.
Color temperature is another essential specification that affects the mood and functionality of your condo. Color temperature is measured in Kelvin (K) and is a matter of personal preference and spatial requirements. Warm white (2700K to 3000K) emits a soft, yellowish glow that is highly suitable for bedrooms and cozy living areas, helping you wind down in the evening. Neutral white or daylight (4000K to 4500K) mimics natural afternoon light, making it an excellent choice for general living spaces and dining areas. Cool white (6000K to 6500K) provides a bright, high-contrast blue-white light that enhances visibility in kitchens, bathrooms, and workspaces. Many modern solar ceiling lights feature adjustable color temperatures controlled via a wireless remote, giving you the flexibility to change the atmosphere of a single room throughout the day.
Navigating Condo Installation Rules and Safety Boundaries
Installing any fixture in a condominium requires strict adherence to building regulations and safety protocols. Most condo corporations in the Philippines enforce guidelines managed by the Property Management Office (PMO). These rules are designed to protect the structural integrity of the building and maintain a uniform exterior appearance. Before you drill any holes in your ceiling or mount a solar panel on your balcony, you must consult your PMO guidelines. Drilling into structural concrete slabs is often strictly prohibited due to the risk of damaging post-tensioned cables or embedded electrical conduits. Furthermore, mounting a solar panel on the outside of a balcony railing may violate aesthetic rules or pose a safety hazard during high winds and typhoons, requiring you to keep the panel within the physical boundary of your unit.
To comply with these regulations while still enjoying solar lighting, you should plan low-impact or non-destructive mounting methods. For the solar panel, if drilling into the exterior wall or window frame is not permitted, you can use heavy-duty, UV-resistant suction cups or double-sided mounting tape to secure the panel directly to the inside of a sunny window pane. When routing the connecting cable from the window to the ceiling light, avoid leaving loose wires hanging across the room, which can be a tripping hazard and look untidy. Use self-adhesive cable clips or paintable plastic conduits to route the wire neatly along the corners of walls, window frames, and ceiling cornices. This keeps the installation clean, secure, and fully reversible when you decide to move out.
Safety must always be your top priority during installation. If you are replacing an existing grid-powered ceiling light with a solar fixture, you must isolate the power at the main circuit breaker before touching any wires. Verify that the power is completely off using a voltage tester. If you encounter complex wiring, high ceilings that require working at height, or structural obstacles like concrete beams, stop immediately and consult a qualified electrician or your building’s maintenance staff. Because solar ceiling lights operate on low-voltage direct current (DC) supplied by their own batteries, they do not pose the same high-voltage shock risks as standard AC fixtures during daily use, but the physical installation process still requires careful execution and proper tools.
Building Your Conditional Shortlist
To find the right slim-profile solar ceiling light for your specific condo layout, you should build a structured comparison framework based on your physical and environmental constraints. Start by listing your non-negotiable criteria: a maximum fixture thickness of 5 centimeters, a split-panel design with a cable long enough to reach your sunniest window, and a battery capacity that matches your desired runtime. By establishing these parameters first, you can quickly filter out unsuitable options on online marketplaces and focus only on fixtures that will physically fit your space and function reliably.
When evaluating your options, weigh the trade-offs between ultra-thin integrated units and split-panel systems. While an integrated unit might look exceptionally sleek on paper, it is only practical if you have a skylight or a unique architectural feature that allows direct sunlight to hit the ceiling. For the vast majority of Philippine condos, a split-panel system is the necessary choice, even though it requires routing a cable. The minor aesthetic trade-off of a concealed wire is well worth the functional benefit of consistent, reliable solar charging from an optimally placed window panel.
Finally, establish clear purchasing criteria when shopping on ecommerce platforms. Look for reputable sellers who provide clear warranty terms—ideally a minimum of six months to one year—and responsive customer service. Prices for reliable, low-profile solar ceiling lights in the Philippines typically range from ₱1,200 for basic models to ₱3,500 for high-output units equipped with remote controls, dimming features, and hybrid charging ports. Avoid suspiciously cheap products priced under ₱500, as these often utilize low-quality batteries that degrade rapidly under tropical heat, leading to poor performance and potential safety hazards.
Frequently Asked Questions (FAQ)
How do I clean the solar panel if it is mounted indoors?
To maintain optimal charging efficiency, you should clean your indoor-mounted solar panel regularly. Dust, grease from cooking, and indoor air pollutants can accumulate on the glass surface, blocking sunlight and reducing the panel’s energy output. Use a dry, soft microfiber cloth to gently wipe away loose dust and debris. For stubborn smudges or grease, slightly dampen the cloth with water or a mild, non-abrasive glass cleaner; avoid using harsh chemical solvents, abrasive pads, or excessive water that could seep into the panel’s housing. Always check the manufacturer’s instructions to verify the water resistance limits of your specific panel before cleaning.
Can I use a standard dimmer switch with a solar ceiling light?
No, you cannot use a standard wall-mounted AC dimmer switch with a solar ceiling light. Standard dimmer switches are designed to regulate alternating current (AC) from your home’s main electrical grid, whereas solar ceiling lights operate on low-voltage direct current (DC) supplied by their internal batteries. Attempting to connect a solar fixture to an AC dimmer switch can damage the light’s internal circuitry and poses a serious electrical hazard. Instead, look for solar ceiling lights that feature built-in dimming capabilities, which are typically controlled via an included wireless remote control or a dedicated mobile application.
What should I do if the light stops holding a charge?
If your solar ceiling light stops holding a charge, begin by troubleshooting the solar panel’s exposure. Ensure the panel is clean and free of dust, and verify that its position still receives adequate sunlight, as seasonal changes can alter the angle of light entering your windows. Next, inspect the connecting cable for any visible damage, loose connections, or kinks. If the panel and cable are functioning correctly, the issue may be a degraded battery. Refer to your product’s user manual to check if the internal battery is user-replaceable; many high-quality fixtures allow you to swap out the old battery cell for a compatible new one, extending the lifespan of your fixture without requiring a complete replacement.
Community discussion
Share your experience or ask a question. Comments are reviewed before publication.