
Selecting the right Bosca solar street light for your garden pathways and driveways requires matching the physical layout of your property with the technical specifications found on the product packaging. In tropical environments like the Philippines, where intense sunny days can quickly turn into heavy monsoon downpours, choosing outdoor lighting is not just about aesthetics—it is about durability, battery efficiency, and proper light distribution. By evaluating your space and understanding how to read manufacturer labels, you can find a lighting solution that keeps your property safe and beautifully illuminated without relying on guesswork.
Assessing Your Garden and Driveway Lighting Needs
Before browsing through different solar light models, you must measure the physical dimensions of the areas you plan to illuminate. For a narrow garden pathway, a light with a wide, sweeping beam mounted too high might spill excess light into your neighbor’s yard or your bedroom window. Conversely, a long, wide driveway requires a broader light spread and a higher mounting point to ensure vehicles can navigate safely at night. Take a tape measure and note the width of your paths and the total length of your driveway.
Next, define the primary purpose of the light in each specific zone. Garden pathways generally benefit from ambient, low-intensity lighting that guides footsteps while preserving a relaxing outdoor atmosphere. Driveways and parking areas, however, demand high-visibility lighting to deter intruders and clearly reveal obstacles, steps, or parked vehicles. Identifying these distinct needs helps you determine whether you need a soft, continuous glow or a bright, high-lumen output.
Products mentioned in this guide
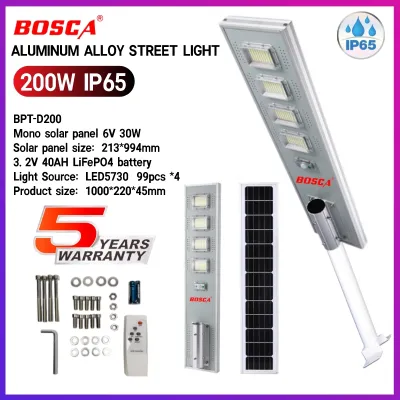
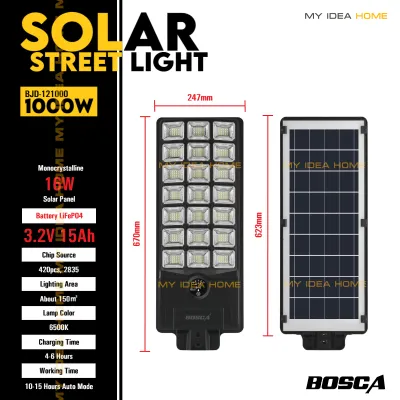
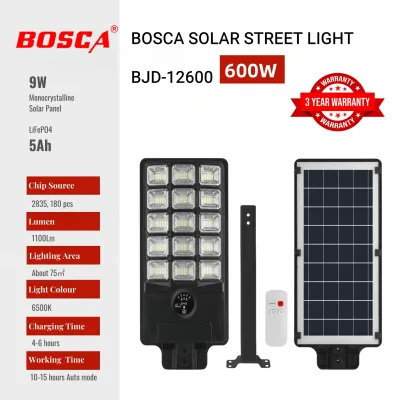
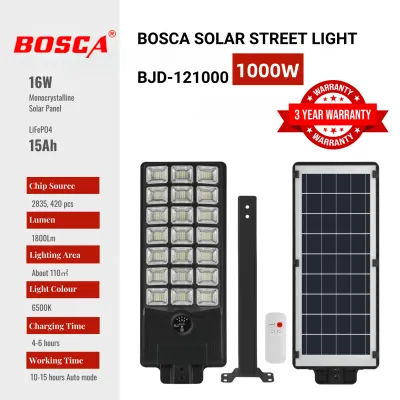
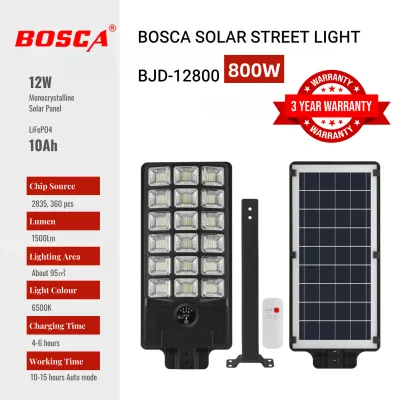
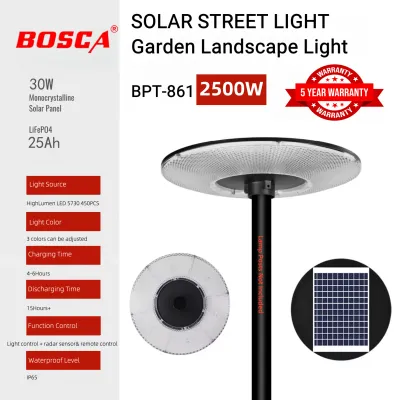
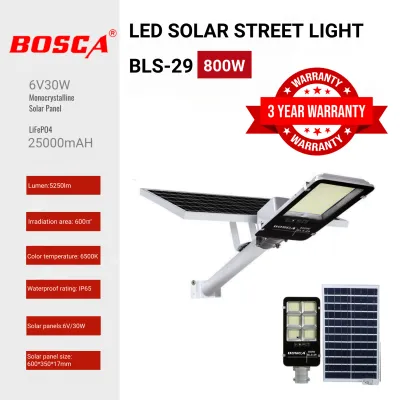
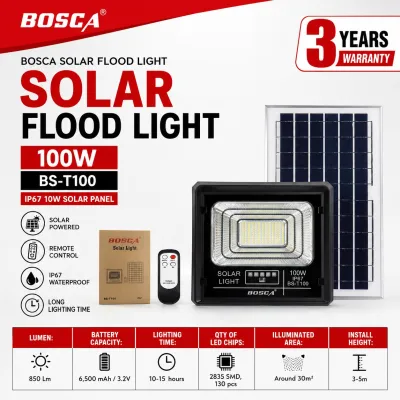
Prices are valid at publication and may change. Please refer to the product page for the latest price.
Finally, observe how sunlight moves across your property throughout the day. Tropical gardens often feature lush foliage, tall palms, or decorative overhangs that cast deep shadows. Because solar street lights rely entirely on their integrated or split solar panels to charge, you must identify installation spots that receive at least six to eight hours of direct, unobstructed sunlight daily. Mapping out these sunny spots beforehand prevents the frustration of installing a light only to find it cannot charge sufficiently to stay on through the night.
Key Specifications to Check on Bosca Solar Street Lights
When examining Bosca solar street lights, the product packaging and user manuals contain vital technical details that dictate performance. The first specification to check is the lumen rating, which measures the total amount of visible light emitted. Do not rely solely on wattage as an indicator of brightness; instead, look at the lumens to understand the light’s actual output. Pair this with the beam angle specification to understand how wide the light will spread across your ground surface.

Battery capacity and solar panel wattage are equally critical, especially during the rainy season when consecutive overcast days limit solar charging. Check the product label for the battery capacity, usually listed in milliampere-hours (mAh) or watt-hours (Wh), and the solar panel’s wattage (W). A well-balanced system features a solar panel powerful enough to fully charge the high-capacity battery during a standard sunny day, providing enough stored energy to keep the light running through long, dark nights.
Because these lights will face harsh outdoor elements, you must verify their durability markers. Look for the Ingress Protection (IP) rating on the specification sheet. For reliable outdoor performance in areas prone to heavy downpours and high humidity, prioritize lights with an IP65 or IP66 rating. These ratings certify that the housing is dust-tight and highly resistant to water jets, protecting the internal electronics and battery from moisture damage.
Additionally, pay close attention to the sensor types integrated into the light. Dusk-to-dawn sensors automatically turn the light on at nightfall and off at sunrise, which is ideal for continuous security lighting. Motion sensors, or Passive Infrared (PIR) sensors, keep the light at a dimmed energy-saving level until they detect movement, at which point they boost the brightness to 100 percent. Utilizing motion-sensor modes is an excellent way to conserve battery life during periods of extended rainy weather.
Matching Light Models to Pathway and Driveway Scenarios
With your measurements and technical knowledge ready, you can now align specific product specifications with your outdoor layouts. For narrow garden pathways, prioritize lower mounting heights of around two to three meters. Look for moderate-lumen models that offer a focused beam angle to illuminate the walking path without creating blinding glare. This setup keeps the light concentrated where your feet land while maintaining the cozy, decorative appeal of your garden landscape.
Wide driveways require a completely different approach. To cover a broad driving and parking area, select high-lumen models designed for taller pole mounts of four to six meters. These models should feature a wide beam angle to distribute light evenly across the pavement. Mounting the light higher allows the beam to spread wider, reducing the number of individual fixtures you need to install to keep the entire driveway visible and secure.
For mixed-use areas where a driveway runs parallel to a garden path, look for versatile models that offer adjustable operating modes. Some fixtures allow you to program a dim standby mode that provides gentle ambient light for the garden, which instantly switches to full, high-visibility brightness when a car or pedestrian enters the driveway. This dual-functionality ensures you do not have to compromise between security and landscape aesthetics.
To avoid dark patches or overlapping glare, follow structured spacing guidelines during installation. Check the manufacturer’s manual for the recommended distance between light poles. As a general rule of thumb, space your light poles at a distance equal to roughly three to four times the mounting height. Adhering to these spacing recommendations ensures a continuous, safe path of light along your driveway or garden walk without creating harsh, blinding hot spots.
Installation and Safety Checks for Outdoor Solar Lights
Proper installation is key to ensuring your solar street lights perform reliably over their lifespan. Because solar street lights contain integrated batteries and solar panels, they can be significantly heavier than traditional wired fixtures. Ensure that your mounting poles, wall brackets, and concrete bases are structurally sound and securely anchored. This stability is crucial for preventing the fixtures from shifting or falling during strong tropical winds and typhoons.
When positioning the solar panel, maximize its exposure to the sun. In the Philippines, angling the panel slightly toward the south generally yields the most consistent year-round solar collection. Ensure that nearby tree branches, climbing vines, or roof gutters do not cast shadows over the panel at any point during the peak sun hours of the day. Even partial shading on a single section of the solar panel can drastically reduce its charging efficiency.
Establish a simple maintenance routine to keep your lights operating at peak performance. Over time, dust, pollen, bird droppings, and salt spray can accumulate on the glass surface of the solar panel, blocking sunlight and reducing power generation. Wipe the panel clean periodically using a soft, damp cloth and plain water. While cleaning, inspect the light housing for any physical damage, loose mounting bolts, or signs of moisture accumulation inside the lens.
Finally, know when to seek professional assistance. While mounting a small solar light on a low garden fence is a straightforward DIY task, installing heavy street lights on tall poles or pouring concrete foundations requires specialized tools and physical labor. If your project involves working at significant heights, deep ground excavation, or integrating hybrid electrical wiring, stop and consult a qualified professional or structural engineer to ensure a safe and compliant installation.
Community discussion
Share your experience or ask a question. Comments are reviewed before publication.