
Finding the right task lighting is one of the most effective ways to improve your sewing accuracy and reduce eye strain, especially when working on intricate stitch patterns or dark fabrics. In the Philippines, where natural light can shift rapidly during the rainy season and tropical humidity can affect workshop conditions, a dedicated sewing lamp led setup provides the consistent, focused illumination needed for precision work. Unlike bulky desk lamps that consume valuable table space, a clip-on LED lamp attaches directly to your sewing machine, casting bright, shadow-free light exactly where the needle meets the fabric.
Selecting the ideal clip-on lamp requires more than just picking the brightest option available. You must consider how the lamp mounts to your specific machine frame, how its electrical requirements align with your workspace, and how its light quality affects your ability to match thread colors accurately. By evaluating these technical details before making a purchase, you can find a reliable lighting solution that enhances your sewing workflow without damaging your equipment.
Assessing Your Sewing Machine’s Mounting and Power Constraints
Before purchasing a clip-on LED lamp, you must carefully examine the physical structure of your sewing machine. Sewing machine casings vary significantly depending on their age and design. Modern computerized machines often feature thick, curved plastic housings with sloped edges, while vintage cast-iron models have thin, flat metal arms. Measure the thickness of the frame where you plan to attach the clamp, and compare this measurement against the maximum jaw opening of any lamp you consider. A clamp that is too narrow will fail to grip a thick plastic machine, while a clamp designed only for wide surfaces may slip off a thin metal arm.
Products mentioned in this guide
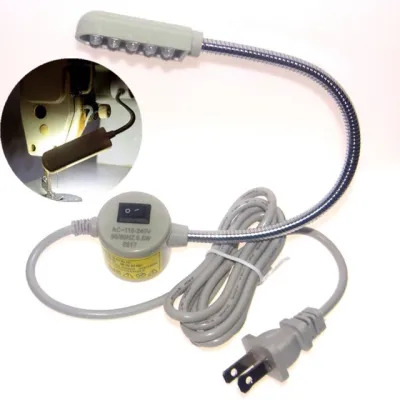
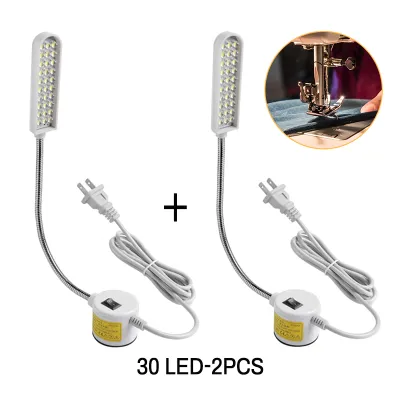
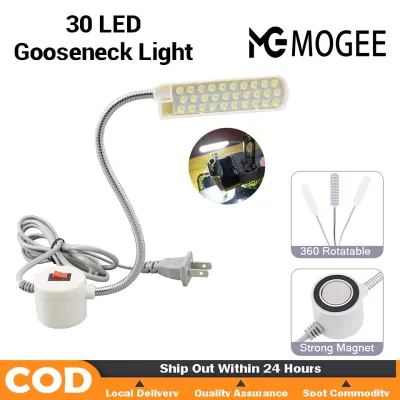
Prices are valid at publication and may change. Please refer to the product page for the latest price.
Electrical compatibility is equally critical when setting up your lighting. In the Philippines, the standard household electrical supply is 220V AC at 60Hz. If you choose a plug-in LED lamp, verify that the power adapter is rated for this voltage and frequency. Look for local safety certifications, such as the Philippine Standard (PS) mark or the Import Commodity Clearance (ICC) sticker, which indicate the device has undergone safety testing. Alternatively, many modern task lights use a 5V USB interface. USB-powered lamps are highly versatile because they can run off standard phone chargers, computer ports, or even portable power banks—a practical feature that allows you to keep working during localized power interruptions.
Finally, check for physical obstructions along the upper arm and faceplate of your machine. The mounting area must be completely clear of moving parts and essential accessories. Ensure the clamp will not block the thread path, spool pins, tension discs, or the carrying handle. On computerized models, make sure the clamp does not cover or press against LCD screens, touch panels, or button interfaces. Identifying these physical boundaries beforehand prevents you from buying a lamp that interferes with your machine’s daily operation.
Selecting the Right Light Quality for Fabric Work
Working with textiles requires high-quality light that reveals the true texture and color of your materials. When evaluating a sewing lamp led product, pay close attention to the Color Rendering Index (CRI). CRI measures how accurately a light source reveals colors compared to natural daylight, rated on a scale up to 100. For sewing, a CRI of 80 or higher is recommended, while a CRI of 90 or above is ideal. A high CRI prevents color distortion, ensuring that the navy blue, dark purple, or black threads you match under the lamp look exactly the same when your finished garment is viewed in natural sunlight.

Color temperature, measured in Kelvin (K), also plays a major role in visual comfort. Cool white light (5000K to 6500K) closely mimics natural daylight and provides high contrast, making it excellent for detailed tasks like threading needles, aligning seams, or working on dark denim. However, intense cool light can cause eye fatigue during long sewing sessions. Neutral white light (4000K) offers a softer, more balanced alternative that reduces glare while maintaining excellent clarity. Avoid warm yellow light (3000K or lower) for precision work, as it can cause eye strain and distort your perception of fabric colors.
To accommodate different fabrics and working conditions, choose a lamp with adjustable brightness levels. Highly reflective materials like satin, silk, or metallic threads can create blinding glare under intense light, requiring you to dim the illumination. Conversely, highly absorbent, dark fabrics like black wool or velvet require maximum brightness to make the stitch line visible. Ensure the lamp features a high-quality diffuser—such as a frosted or milky lens—to spread the light evenly across the needle plate and presser foot, eliminating harsh hot spots and distracting shadows.
Evaluating Clip Design and Neck Flexibility
The mechanical design of the lamp determines how well it performs under the physical stress of sewing. Sewing machines generate constant micro-vibrations, especially when running at high stitching speeds. A poorly designed clip will slowly slide out of place or rattle loose during operation. Compare spring-loaded clips against screw-tightened clamps to find the best fit for your machine. Spring clips are highly portable and easy to reposition, but they rely entirely on spring tension to stay secure. Screw-tightened C-clamps offer a much stronger, mechanical lock, making them highly resistant to vibration, though they require a flat, parallel surface to grip properly.
To protect your machine’s finish, look for clips equipped with non-slip padding. High-quality clamps feature thick silicone grips, textured rubber inserts, or dense foam lining. This padding serves two purposes: it increases friction to prevent the lamp from slipping, and it cushions the machine’s casing against scratches, scuffs, and pressure marks. In the humid tropical climate of the Philippines, cheap adhesive rubber pads can degrade or become sticky over time; choosing a lamp with integrated, molded silicone padding ensures long-term durability and keeps your machine clean.
Gooseneck flexibility and stiffness are equally important. The flexible arm must be long enough to reach over the top of your machine and position the light head directly above the needle area without blocking your line of sight. However, the neck must also possess sufficient stiffness to hold its shape. If the gooseneck is too weak or thin, the vibrations from your machine’s motor will cause the light head to droop or sway while you sew. Look for goosenecks constructed from robust metal coils encased in a protective silicone sleeve, which offers both smooth adjustability and excellent stability.
Finding the Right LED Sewing Lamp on E-Commerce Platforms
When searching for a suitable task light on online marketplaces, using precise search terms will help you filter out generic desk lamps that are too bulky for a sewing machine. Combine specific keywords such as “sewing lamp led”, “USB clip-on gooseneck light”, “flexible clamp lamp”, or “magnetic sewing light” to narrow down your options. While magnetic lights are popular for heavy cast-iron vintage machines, clip-on models remain the most versatile choice for modern plastic-bodied computerized machines that lack magnetic mounting surfaces.
Before adding a lamp to your cart, carefully analyze the customer reviews and seller ratings. Look specifically for feedback from verified buyers who mention using the lamp for sewing, quilting, or crafting. Pay attention to comments regarding vibration stability, clamp grip strength, and how warm the lamp head gets during extended use. If multiple reviews complain that the gooseneck droops when the sewing machine runs at high speeds, it is best to look for a sturdier model. Additionally, check the seller’s return policy to ensure you can exchange or return the lamp if the clamp design proves incompatible with your machine’s casing profile.
Establish a realistic budget based on the materials and features you need. Basic USB-powered clip lamps with plastic clamps and simple on/off switches typically range from ₱250 to ₱500 on local e-commerce platforms. If you require advanced features—such as adjustable color temperatures, stepless touch dimming, high CRI ratings, and robust metal screw-clamps—expect to spend between ₱600 and ₱1,500. Investing slightly more in a model with durable materials and a certified power adapter ensures a safer, more reliable lighting setup that will last for years.
Safe Installation and Cable Management
Once you have selected your clip-on LED lamp, proper installation is key to ensuring a safe and productive sewing environment. Begin by identifying a flat, stable mounting point on the upper arm of your sewing machine. Avoid clipping the lamp onto curved surfaces, thin plastic decorative trim, or near the motor’s ventilation slots. Blocking these vents can restrict airflow, causing your sewing machine motor to overheat during long projects. Ensure the clamp is tightened securely but gently, applying just enough pressure to prevent movement without cracking the plastic housing.
Cable management is a critical safety step that is often overlooked. A loose, dangling power cord poses a serious hazard, as it can easily catch on your fabric, get tangled in the handwheel, or pull the lamp into the path of the moving needle bar. Route the power cable along the back of the machine frame, following the path of the machine’s existing power cord. Secure the cable tightly using reusable hook-and-loop straps, zip ties, or adhesive cable clips. Leave a small amount of slack near the gooseneck so you can adjust the light angle freely without pulling the cord taut or straining the power connection.
After securing the lamp and routing the cable, perform a quick safety and stability test. Turn on the lamp, thread your machine, and run it at a low speed on a scrap piece of fabric. Gradually increase the speed to your normal sewing pace while watching the lamp head and clamp. Check for any signs of sliding, vibrating, or drooping. If you notice any movement, turn off the machine, isolate the power supply by unplugging both the machine and the lamp, and adjust the mounting position. Taking a few minutes to verify the stability of your setup ensures a safe, distraction-free sewing experience.
Frequently Asked Questions (FAQ)
Can I power a USB sewing lamp directly from my machine's built-in USB port?
Many modern computerized sewing and embroidery machines feature built-in USB ports, but you should exercise caution before using them to power external accessories. In most cases, these integrated ports are designed strictly for data transfer, such as importing embroidery designs or updating the machine’s firmware. Consequently, they may only output a very low electrical current, often limited to 100mA or 500mA. Attempting to power a high-draw LED task lamp from a low-output data port can overload your sewing machine’s internal circuitry, potentially causing electrical damage. Always consult your sewing machine’s user manual to verify the exact power output specifications of the USB port before plugging in any lighting accessory.
Will the clip damage the finish of my vintage or computerized sewing machine?
Whether a clip damages your machine depends entirely on the clamp design and how you install it. Vintage sewing machines feature beautiful, painted cast-iron bodies with delicate decals that can easily chip or scratch under the hard plastic or metal jaws of a clamp. Computerized machines have molded plastic shells that can warp or crack if a screw-tightened clamp is overtightened. To protect your machine’s finish, always choose a lamp with integrated silicone or rubber padding. If your preferred lamp lacks adequate padding, you can easily create a protective barrier by placing a small piece of felt, a thick microfiber cloth, or a thin sheet of silicone between the clamp jaws and your machine’s casing before tightening.
Community discussion
Share your experience or ask a question. Comments are reviewed before publication.