
Condos in the Philippines often present a unique architectural challenge: maximizing vertical space in units with low ceilings. When floor-to-ceiling heights hover around 2.4 to 2.6 meters, choosing the right lights for ceiling spaces becomes a delicate balancing act between functional illumination and physical clearance. Selecting the wrong fixture can make a room feel claustrophobic or create a safety hazard for taller occupants. To select the ideal flush mount light size and profile, you must evaluate the room’s square footage, determine the maximum allowable fixture drop, and choose a profile that distributes light widely without causing glare.
Defining Low Ceilings and the Role of Flush Mount Profiles
In residential real estate, a standard ceiling height typically ranges from 2.7 to 3 meters. However, many modern high-rise developments in metropolitan areas like Manila feature low ceilings, often measuring between 2.4 and 2.5 meters. This restriction is frequently due to concrete slab construction, structural beams, or dropped gypsum ceilings designed to conceal utility lines and electrical conduits. Hanging fixtures like heavy chandeliers or long pendants in these environments visually dissect the room, making the living space feel significantly smaller than its actual footprint.
To preserve an open, airy atmosphere, look to flush mount profiles. A true flush mount sits directly against the ceiling surface with zero gap, hiding the junction box. In contrast, a semi-flush mount features a small stem that creates a gap of roughly 5 to 15 centimeters. While semi-flush mounts offer a decorative shadow-line, even a minor drop can compromise headroom in a low-ceiling condo. Understanding the exact height profile of a fixture is just as critical as measuring its diameter, as every centimeter of vertical clearance directly impacts spatial perception.
Products mentioned in this guide
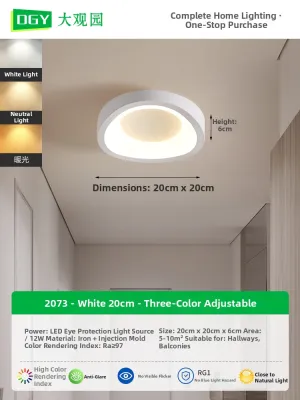
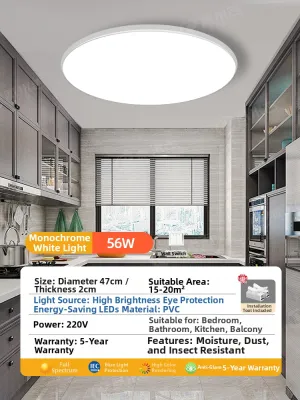
Prices are valid at publication and may change. Please refer to the product page for the latest price.
Matching Flush Mount Lights for Ceiling Spaces to Room Dimensions
Selecting the correct diameter for your ceiling lights prevents the fixture from looking like a tiny, lost point of light or, conversely, an overwhelming obstacle. Interior designers rely on a straightforward formula to estimate the appropriate fixture diameter: add the room’s width and length in feet, and convert that sum directly into inches. For example, if a study room measures 10 feet by 12 feet (approximately 3 meters by 3.6 meters), the sum is 22, indicating that a fixture with a 22-inch (56 cm) diameter is visually balanced.

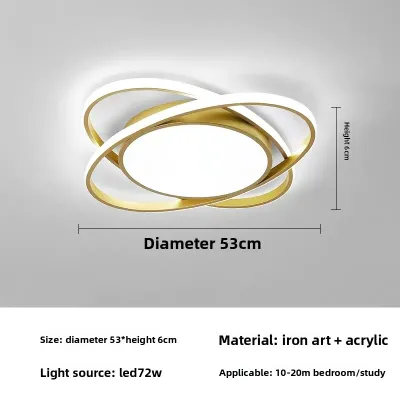
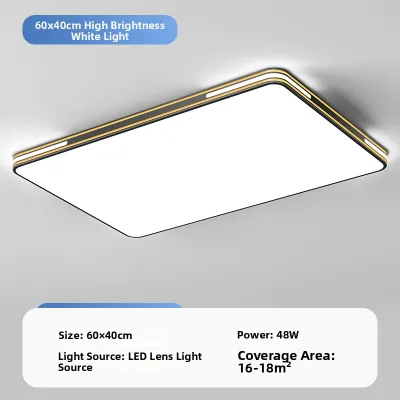
When dealing with low ceilings, this formula must be applied with caution. A wide, thick fixture can feel visually heavy when positioned close to eye level. For rectangular rooms, L-shaped layouts, or multi-functional spaces, relying on a single massive fixture is rarely the best approach. Instead, dividing the space into distinct functional zones and installing multiple smaller, coordinated fixtures creates a more balanced light distribution and maintains a clean ceiling plane.
Sizing for Compact Spaces (Bedrooms, Hallways, and Bathrooms)
In smaller, enclosed areas of a condo, such as narrow hallways, walk-in closets, and compact bathrooms, space is at a premium. For hallways that are typically 90 to 120 centimeters wide, a large fixture will block the path visually and physically. Opt for compact flush mounts with a diameter of 8 to 10 inches (20 to 25 cm). In a small bedroom measuring under 10 square meters, a fixture diameter of 10 to 12 inches (25 to 30 cm) provides sufficient ambient light without dominating the ceiling. Balancing the scale of the light with the physical boundary of the room ensures that the fixture complements the furniture layout.
Sizing for Open-Plan Living and Dining Areas
Philippine condos frequently combine the living, dining, and kitchen areas into a single open-plan layout. Attempting to illuminate this entire multi-purpose zone with one large central light often results in harsh shadows in the corners and an awkward visual focal point. A more effective strategy involves zoning. You can install a 14 to 16-inch (35 to 40 cm) low-profile flush mount over the main seating area, and coordinate it with a separate, slim fixture over the dining table. This approach defines each functional area clearly, maintains consistent headroom across the entire ceiling plane, and avoids visual clutter.
Selecting the Ideal Profile and Thickness
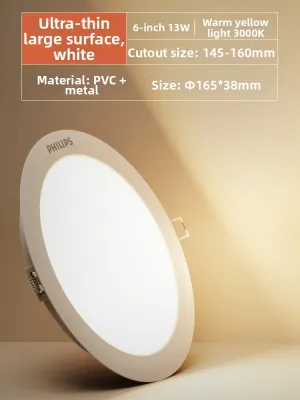
The thickness of a flush mount fixture dictates how far it protrudes into your living space. Traditional flush mounts, such as classic glass domes or fabric drums, typically feature a profile thickness of 10 to 18 centimeters. While these designs offer classic aesthetic appeal, they can feel intrusive in a room with a 2.4-meter ceiling. Modern manufacturing has introduced ultra-thin LED panels that measure less than 2.5 centimeters in thickness, presenting a streamlined alternative that sits almost flush with the drywall or concrete.
Beyond physical clearance, the shape and material of the fixture’s diffuser play a significant role in how light is dispersed. A deep dome or drum fixture distributes light both downward and laterally, which can help soften shadows on the ceiling. Conversely, flat, ultra-thin panels project light primarily downward in a direct beam. If the diffuser material is of poor quality, this direct projection can create a harsh glare or cast stark shadows, highlighting minor ceiling imperfections.
Ultra-Thin and Low-Profile LED Options
Ultra-thin LED ceiling lights are highly effective for maximizing headroom in low-ceiling condos. Because these fixtures utilize integrated light-emitting diodes rather than traditional screw-in bulbs, manufacturers can design housings that are incredibly slim, often ranging from 1.3 to 3.8 centimeters in thickness. When installed, these fixtures visually blend into the ceiling, mimicking the clean look of recessed downlights without requiring deep ceiling cavities. When shopping for these slim options, look for fixtures with high-quality polycarbonate or frosted acrylic diffusers. A well-engineered diffuser ensures that individual LED chips are not visible as bright, piercing dots, instead scattering the light evenly to prevent eye strain when looking upward from a bed or sofa.
Standard Flush Mounts vs. Semi-Flush Alternatives
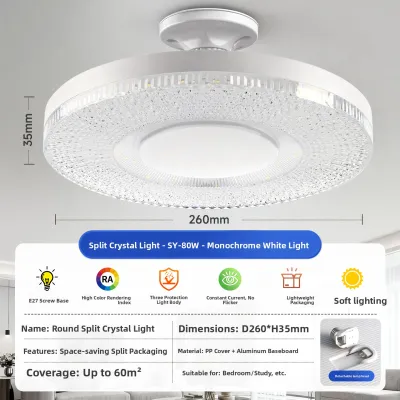
While ultra-thin designs are practical, there are scenarios where a standard flush mount with a deeper housing is preferable. For instance, if you prefer using replaceable E27 LED bulbs rather than integrated LED modules, the fixture must have a deeper body—typically 10 to 15 centimeters—to accommodate the physical dimensions of the bulbs. Standard flush mounts also offer a wider variety of decorative materials, such as metal trim, textured glass, or fabric shades, which can add warmth to a minimalist condo interior.
Semi-flush mounts, which hang slightly below the ceiling, should generally be avoided in rooms with ceilings below 2.5 meters. If you choose a semi-flush option, ensure that the bottom of the fixture sits at least 2.1 meters (7 feet) above the finished floor. This clearance is necessary to prevent tall family members or guests from accidentally bumping into the light, and to ensure that inward-swinging bedroom doors or tall wardrobe doors can open freely.
Brightness, Beam Angle, and Heat Management
Illuminating a room from a flat, high plane requires careful technical planning. Because low-profile lights for ceiling spaces sit close to the ceiling, they lack the benefit of a vertical drop to spread light naturally. To compensate, choose fixtures with a wide beam angle, ideally between 110 and 120 degrees. This ensures light spreads outward to meet the walls, preventing the “cave effect” where only the center of the room is illuminated.
In the warm, humid climate of the Philippines, heat management is critical for fixture longevity. Integrated LED drivers are highly sensitive to heat build-up. In an enclosed, ultra-thin flush mount, heat can quickly accumulate during hot summer months. Without proper thermal design, this heat degrades the internal electronics, leading to premature flickering or failure.
Verify the manufacturer’s specifications for thermal design, looking for aluminum backplates or dedicated heat sinks that dissipate heat effectively. Additionally, check wattage limits and IP (Ingress Protection) ratings. For moisture-prone areas like kitchens or bathrooms, select fixtures with at least an IP44 rating to protect against water splashes and steam.
Measuring, Installation, and Condo Clearances
Before purchasing, precise measurements of your existing infrastructure are essential. Begin by turning off the electrical power at your condo unit’s main circuit breaker panel. Use a reliable ladder to reach the existing fixture, remove it carefully, and measure the diameter of the junction box. You must also measure the canopy diameter of the new fixture to ensure it covers the existing ceiling opening and any unpainted rings left behind by the old light.
Condo construction in the Philippines typically presents two ceiling types, each requiring a different installation approach:
- Solid Concrete Slabs: Many high-rise units feature exposed structural concrete ceilings. Drilling into solid concrete requires a rotary hammer drill, masonry drill bits, and specialized concrete anchors (such as tox plugs). Exercise extreme caution to avoid drilling into embedded electrical conduits.
- Suspended Gypsum or Drop Ceilings: Often installed to hide piping, these ceilings require lightweight fixtures or specialized toggle bolts that distribute weight across the gypsum board. Never mount a heavy fixture directly to gypsum without securing it to the underlying metal furring channels.
Working with fixed electrical wiring carries inherent risks of electrical shock. Always check the manufacturer’s installation instructions and verify that the fixture carries local safety certifications, such as the Philippine Standard (PS) mark or the Import Commodity Clearance (ICC) sticker. If your installation involves running new wiring, upgrading an outdated junction box, or navigating condo permit rules, stop immediately and hire a licensed electrician.
Common Sizing and Placement Mistakes to Avoid
Avoiding common pitfalls during the selection process can save you time, money, and frustration. One of the most frequent errors is choosing a fixture based solely on its aesthetic appeal in a spacious showroom, only to find it is completely out of proportion in a compact condo room. A fixture that is too small will look like an afterthought and fail to provide adequate ambient light, leaving the room feeling dim and uninviting.
Another overlooked detail is the canopy diameter. When replacing an old, wide fixture with a modern, ultra-thin LED panel, the new canopy may be smaller than the footprint of the old one. This leaves unsightly paint lines, plaster patches, or gaps exposed on your ceiling. Measure both the old fixture’s footprint and the new fixture’s canopy before making a purchase to avoid unexpected ceiling repair work.
Finally, pay close attention to the glare factor of exposed bulbs or clear glass shades. In a low-ceiling environment, the ceiling light sits much closer to eye level than it would in a house with high ceilings. If you install a low-profile fixture with clear glass and high-wattage bulbs directly above a bed or a sofa, the direct glare can be highly uncomfortable. Opt for frosted, opal, or fabric diffusers that soften the light and shield your eyes.
Frequently Asked Questions (FAQ)
Can I install a flush mount light on a sloped condo ceiling?
Yes, you can install a flush mount light on a sloped ceiling, provided the junction box is securely mounted and rated for the angle. However, because a true flush mount sits flat against the ceiling surface, the light will project perpendicular to the slope rather than straight down. This can result in uneven light distribution. If your condo has a sloped ceiling, look for flush mounts with directional or adjustable heads, or ensure the fixture’s diffuser is designed to scatter light widely to minimize dark spots.
How do I clean and maintain ultra-thin flush mount lights?
Maintaining ultra-thin flush mount lights is simple but requires care to avoid damaging the delicate acrylic or polycarbonate diffusers. Always turn off the power at the wall switch and allow the fixture to cool completely before cleaning. Wipe the exterior surface gently with a dry, soft microfiber cloth to remove dust. Avoid using harsh chemical cleaners, alcohol, or abrasive pads, as these can scratch or yellow the plastic diffuser over time. If insects have crawled inside the fixture housing, consult the manufacturer’s instructions on how to safely unclip the diffuser cover to clear out debris.
Are smart flush mount lights available in low-profile designs?
Yes, many modern low-profile and ultra-thin flush mount lights are equipped with integrated smart technology. Because smart LED drivers have become incredibly compact, manufacturers can fit Wi-Fi or Bluetooth modules directly inside slim housings without adding physical bulk. These smart fixtures allow you to adjust the brightness, schedule lighting times, and change color temperatures—from warm white (3000K) to cool daylight (6500K)—directly from your smartphone or via voice commands, offering versatile lighting control tailored to the time of day.
Community discussion
Share your experience or ask a question. Comments are reviewed before publication.