
When designing a modern condominium bedroom, space optimization is key—especially when dealing with the lower ceiling heights typical of urban high-rises. If you are wondering how low a flush mount ceiling light should hang, the bottom of the fixture must remain at least 7 feet (approximately 2.13 meters) above the finished floor. For a standard condo ceiling height of 2.4 meters (around 7.8 feet), this leaves you with a maximum allowable fixture depth of 3 to 5 inches (7.6 to 12.7 centimeters). Adhering to this clearance prevents physical obstruction, maintains safety, and keeps your bedroom from feeling visually cramped.
Standard Clearance Rules for Low-Ceiling Condos
In many high-rise developments across metropolitan areas like Manila, Cebu, and Davao, developers often design residential units with structural concrete slabs that limit ceiling heights to between 2.4 and 2.6 meters. When you factor in dropped ceilings or bulkheads designed to hide utility pipes and air conditioning ducts, the vertical clearance in a bedroom can shrink even further. This makes the standard safety guideline of maintaining a 7-foot clearance between the floor and the lowest point of any light fixture an absolute necessity. This clearance ensures that residents and guests can walk freely beneath the light source without any risk of accidental contact, even when changing bed sheets or stretching.
Furthermore, the layout of a bedroom demands a more nuanced approach than a standard hallway or living room. You must account for the height of your bed frame and mattress thickness. If the light fixture is positioned directly above or near the foot of the bed, a person kneeling, sitting up suddenly, or stepping onto a high mattress could easily collide with a low-hanging fixture. The physical safety of the tallest occupant in your household is the ultimate benchmark, but visual comfort is equally critical. A ceiling light that protrudes too far down casts harsh shadows and creates a heavy, oppressive atmosphere, making an already compact condo bedroom feel significantly smaller.
Products mentioned in this guide

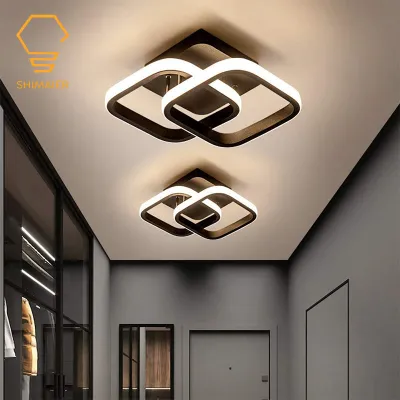
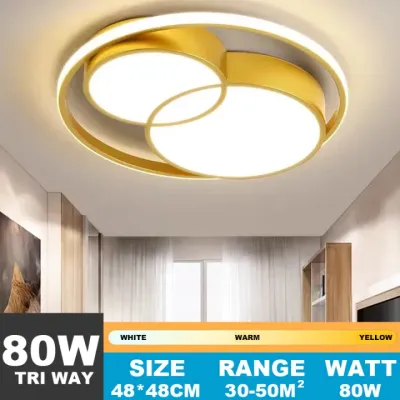
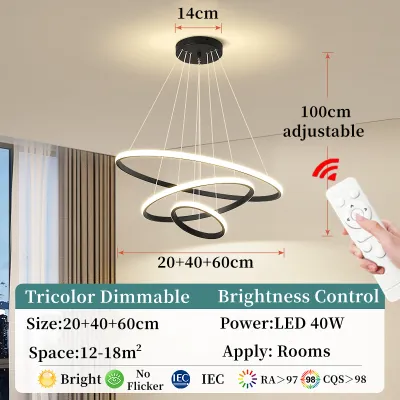
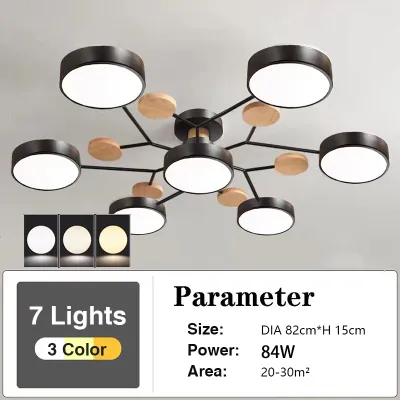
Prices are valid at publication and may change. Please refer to the product page for the latest price.
Selecting the Right Flush Mount Profile and Depth
When shopping for the perfect fixture, it is easy to confuse the visible shade depth with the overall height or “drop” of the unit. The overall height is the total distance from the ceiling surface to the absolute lowest point of the fixture, which includes the mounting bracket, canopy, and any decorative finials or diffusers. Always scrutinize the product specification sheet for the exact overall height rather than relying solely on product photos, which are often shot from angles that minimize the fixture’s profile.

The relationship between a fixture’s diameter and its depth also plays a major role in how it is perceived in a low-ceiling space. A wide, low-profile fixture (for example, one with a 40-centimeter diameter and a 3-inch depth) distributes its visual weight horizontally, making the ceiling appear broader and more expansive. Conversely, a narrow but deep fixture (such as a cylinder style that is 15 centimeters wide but projects 6 inches downward) concentrates its volume vertically. This creates a visual “pendant” effect that draws the eye down, making the ceiling feel lower and turning the fixture into a potential spatial hazard.
Ultra-Low Profile vs. Standard Flush Mounts
Choosing between an ultra-low profile flush mount and a standard flush mount depends on your exact vertical measurements and aesthetic goals. Standard flush mounts generally have a depth of 4 to 6 inches (10 to 15 centimeters). These fixtures are excellent for ceilings that are 8.5 feet (2.6 meters) or higher, as their slightly deeper bodies allow for larger, more traditional light bulbs (such as standard E27 LED bulbs) and offer better lateral light diffusion across the room.
On the other hand, ultra-low profile flush mounts—often referred to as “hugger” lights or flat-panel LEDs—typically feature a depth of under 3 inches (7.5 centimeters). These are highly recommended, and often strictly necessary, for ceilings under 8 feet (2.4 meters) or when the fixture is positioned directly over a high bed. While ultra-low profiles offer a sleek, minimalist look that blends seamlessly into the ceiling, they often rely on integrated LED arrays rather than replaceable bulbs. This is a design trade-off to consider, as it means the entire fixture may eventually need replacement once the LEDs reach the end of their lifespan, though high-quality integrated systems are built to last for tens of thousands of hours.
Why Dimmable Ceiling Lights Matter in the Bedroom
To create a restful sanctuary, selecting a dimmable fixture is vital, particularly when the light source is physically closer to your bed. If you search for ceiling lights bedroom dim options, you will find that control over light intensity directly mitigates the visual drawbacks of a low-profile fixture. When a flush mount is installed on a low ceiling, the light source sits closer to your line of sight when you are lying down. A non-dimmable, full-brightness light can cause intense, uncomfortable glare, disrupting your sleep-wake cycle and making late-night reading or early-morning waking unpleasant.
Integrating dimming functionality allows you to transition your bedroom from a bright, functional space for dressing and cleaning to a soft, relaxing environment conducive to sleep. For integrated LED fixtures, many modern designs offer “warm dimming” technology, which mimics traditional incandescent bulbs by shifting the color temperature from a crisp cool or neutral white (such as 4000K) down to a cozy, amber-toned warm white (such as 2200K) as the brightness decreases. This shift in color temperature is a subjective preference that can enhance the perceived coziness of the space.
Before purchasing, you must verify the dimming method of the fixture. Some low-profile fixtures feature built-in stepless dimming controlled via an included remote control or a dedicated mobile app, which bypasses the need for complex wall wiring. Others are designed to work with traditional wall-mounted dimmer switches. If you opt for a wall dimmer, ensure the fixture is explicitly labeled as dimmable and check its electrical compatibility. In the Philippines, residential electrical systems operate at 220V-230V at 60Hz. Ensure that any LED driver or dimmable bulb is rated for this voltage and that you pair it with a compatible leading-edge (Triac) or trailing-edge dimmer switch to prevent flickering, buzzing, or premature component failure.
How to Measure Your Space and Check Condo Constraints
To avoid costly purchasing mistakes, follow a systematic approach to measuring your bedroom and understanding your building’s structural limits:
- Measure the Floor-to-Ceiling Height: Use a reliable steel tape measure to find the exact distance from the finished floor (including any thick rugs or laminate flooring) to the bare ceiling.
- Account for Obstructions: Measure the distance from the ceiling to the top of your mattress, and check if any wardrobe doors, ceiling fan blades, or decorative crown moldings will swing near the light fixture's intended radius.
- Examine the Junction Box: Turn off the power at the main circuit breaker and safely remove any existing light fixture to inspect the electrical junction box. Note its depth; many concrete slab ceilings in Philippine condos use shallow utility boxes that limit the space available for tucking in excess wiring or bulky LED drivers.
Because condo units are typically constructed using post-tensioned concrete slabs or solid concrete ceilings, you face unique structural constraints. You cannot easily cut into or hollow out a concrete ceiling to recess a deep junction box or run new concealed conduits without violating building safety codes. Any mounting anchors used must be rated for solid concrete, and heavy fixtures (such as those with heavy glass or metal frames) require heavy-duty concrete expansion shields.
Before making any structural changes, changing your wall switches to dimmer units, or drilling into the ceiling, consult your condo’s Property Management Office (PMO). Many developments have strict guidelines regarding electrical modifications, load limits, and drilling depths to protect the structural integrity of the concrete slabs and embedded utility lines. Always isolate the electrical power at your unit’s main breaker panel before attempting any installation, and hire a registered master electrician to handle the fixed wiring to ensure full compliance with the Philippine Electrical Code. Additionally, verify that the fixture carries local safety certifications, such as the Product Safety (PS) Mark or Import Commodity Clearance (ICC) sticker.
Common Sizing and Placement Mistakes to Avoid
One of the most frequent design missteps in low-ceiling condo bedrooms is choosing a fixture with a deep, downward-facing dome or dangling crystal elements. Even if the base of the fixture is marketed as a flush mount, these decorative extensions can easily breach the 7-foot clearance rule, presenting a constant hazard for taller individuals and creating a cluttered visual line.
Another critical mistake is installing an un-diffused or highly directional light source directly over the sleeping area. If the fixture lacks a high-quality frosted or fabric diffuser, it will cast harsh, direct beams straight into your eyes when you are resting in bed. Instead, prioritize flush mounts with wide, opaque diffusers that scatter light evenly across the ceiling and walls, softening the overall illumination.
Finally, avoid ignoring the visual scale of the room. A massive, bulky flush mount installed in a compact 10-square-meter condo bedroom can overwhelm the space, making the ceiling feel as if it is pressing down on you. As a general rule of thumb for proportion, a bedroom under 12 square meters is best served by a flush mount with a diameter of 30 to 40 centimeters, while keeping the overall depth under 4 inches.
Frequently Asked Questions (FAQ)
Can I use a semi-flush mount instead of a flush mount in a low-ceiling condo?
Semi-flush mounts typically feature a small stem or gap that suspends the main light body 6 to 12 inches (15 to 30 centimeters) below the ceiling. While this gap allows light to bounce off the ceiling for a pleasant indirect glow, semi-flush mounts are generally not recommended for ceilings under 8.5 feet (2.6 meters). In a low-ceiling condo bedroom, a semi-flush mount will likely violate the 7-foot head clearance rule and make the room feel cramped. Stick to true flush mounts or ultra-low profile fixtures to maximize both physical safety and visual space.
Do I need a specific dimmer switch for LED bedroom ceiling lights?
Yes, upgrading to a dimmable LED flush mount usually requires a compatible LED-rated dimmer switch. Older analog dimmers designed for traditional incandescent bulbs operate on different electrical principles and often cause modern LED fixtures to flicker, buzz, or fail to dim smoothly. When selecting your fixture, review the manufacturer’s specifications for a list of tested, compatible dimmer models. Always ensure the switch and the fixture are rated for the local 220V-230V 60Hz power supply, and consult a licensed electrician to safely perform the switch replacement.
Community discussion
Share your experience or ask a question. Comments are reviewed before publication.