
Arranging a jinx photocard collection into a cohesive gallery wall is an exceptional way to transition your favorite collectibles from binders into a striking home decor statement. Whether your collection features rare holographic prints, limited-edition promotional cards, or classic character artwork from Arcane and League of Legends, a thoughtful arrangement ensures every individual card receives the visual focus it deserves. By balancing spatial layouts, selecting protective framing, and incorporating subtle thematic design cues, you can create a dynamic display that protects your collection while elevating your living space.
Creating a successful gallery wall requires a deliberate approach that balances the small scale of standard photocards with the larger canvas of your wall. Because photocards are compact—typically measuring around 55mm by 85mm—they can easily get lost on a large wall if they are not framed and spaced correctly. The key is to design a layout that draws the eye inward, using color contrast, precise spacing, and dedicated lighting to guide the viewer’s gaze across each piece of your collection.
Planning Your Layout and Jinx-Themed Visual Style
Before making physical changes to your space, measure your available wall space and choose a layout pattern that suits your collection size. A structured grid layout works beautifully for uniform, standard-sized cards, creating a clean, modern, and symmetrical appearance. If your collection includes a mix of standard photocards and larger promotional art, a centered focal layout is more appropriate, placing the largest piece in the center and arranging smaller cards around it. For an expanding collection, an eclectic salon style offers the flexibility to add new frames organically over time without disrupting the overall balance.
Products mentioned in this guide
![[500gsm] Jinx Manhwa BL Photocards Joo Jaekyung - Matte](https://img.lazcdn.com/g/p/6e3665f319b9ca6fe09ee3b76d643121.png_400x400q80.png_.webp)

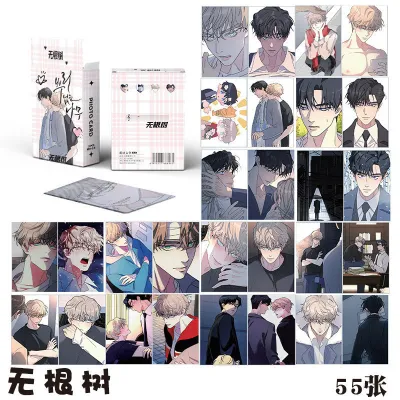


Prices are valid at publication and may change. Please refer to the product page for the latest price.
Integrating the iconic visual identity of Jinx into your gallery wall adds a personalized, high-energy touch without overpowering the delicate photocards. Her signature aesthetic relies on a vibrant contrast of neon blue, electric pink, deep black, and raw, graffiti-inspired textures. Instead of painting an entire wall in a loud neon shade—which can distract from the details of the cards—consider using these colors strategically. A neutral dark charcoal or clean off-white wall serves as an excellent backdrop, allowing neon-colored frame matting or subtle background accents to pop. Using double-matting with a thin sliver of electric pink or bright blue surrounding each card provides a sophisticated nod to the character’s style while keeping the presentation clean.
To achieve a balanced distribution of visual weight across your gallery wall, sort your photocards by their color palette, brightness, and rarity. Grouping too many dark cards on one side can make the arrangement feel lopsided, while clustering all the bright, holographic foils in one corner can distract from the rest of the display. Aim to scatter highly reflective holographic cards and rare special-edition variants evenly throughout the layout. Placing these prized items at key visual intersections ensures that the eye naturally travels across the entire wall, appreciating every card in the collection.
Selecting Frames and Wall-Safe Mounting Hardware
Preserving the physical integrity of your jinx photocard collection is just as important as the visual arrangement. Standard printed inks and delicate holographic foils are highly susceptible to fading, discoloration, and physical degradation when exposed to environmental elements. When selecting frames, prioritize those equipped with UV-protective acrylic or glass fronts. This specialized glazing filters out harmful ultraviolet rays from both natural sunlight and indoor light fixtures, preventing the vibrant blues and pinks of your cards from dulling over time.

In addition to UV protection, always use acid-free matting or cardstock borders inside your frames. Placing a photocard directly against the glass or acrylic front can lead to disaster, especially in warm climates. Over time, the glossy surface of the photocard can stick to the glass, causing the print to tear or transfer when you attempt to unframe it. Acid-free matting creates a physical gap between the card and the glass, providing essential breathing room while giving each card a professional, gallery-quality border.
Frame selection also dictates the overall mood of your gallery wall. Using identical, minimalist black aluminum frames establishes a sleek, contemporary look that emphasizes the artwork of the cards themselves. Alternatively, if you want to capture the chaotic, rebellious energy of Jinx, you can mix frame styles. Try pairing clean black metal frames with custom neon acrylic borders or slightly distressed frames. This contrast mirrors the character’s fragmented aesthetic while maintaining a structured layout that keeps the collection looking intentional.
Choosing the correct mounting hardware is crucial to protect both your frames and your walls, particularly depending on the construction materials of your home. In many residential spaces in the Philippines, walls are constructed from solid concrete or hollow blocks covered in plaster, rather than hollow drywall. For concrete surfaces, traditional nails can easily bend, crack the plaster, or fail to hold securely. If you are using heavier, multi-card wooden frames, you must drill pilot holes and insert plastic wall anchors to secure the screws properly.
For renters or those using lightweight acrylic frames, heavy-duty adhesive strips offer an excellent, drill-free alternative. However, it is vital to check the weight limits specified on the adhesive packaging and ensure the wall surface is clean, dry, and free of dust before application. Failing to match the hardware to the frame weight and wall type can lead to falling frames, which can damage both your walls and your irreplaceable photocards.
Step-by-Step Guide to Hanging Your Gallery Wall
Transitioning from the planning phase to physical installation requires patience, precision, and the right preparation. Rushing this stage often results in crooked frames, uneven spacing, or unnecessary holes in your wall. Before you begin, gather all the essential tools: a reliable tape measure, a pencil for light marking, a spirit level, painter’s tape, and your chosen mounting hardware. Taking the time to execute each step systematically ensures a professional result that you can enjoy for years.
Step 1: Create a Floor Mockup and Wall Templates
The safest way to visualize your gallery wall without making permanent commitments is to create a physical mockup on the floor. Clear a space in front of your target wall and arrange your framed photocards in the exact configuration you planned. This step allows you to step back and evaluate the spatial relationships, color balance, and overall flow of the cards. You can easily swap frames around or adjust the gaps until the arrangement feels completely balanced.
Once you are satisfied with the floor layout, trace the outline of each frame onto sheets of kraft paper or scrap cardboard. Cut out these paper templates and label each one with the name of the corresponding photocard. Using low-tack painter’s tape, stick these templates onto your wall in the exact positions of your layout. This technique lets you see the scale of the arrangement on the actual wall. Aim for a consistent spacing of 2 to 3 inches (5 to 7.5 cm) between each frame. Step back to view the templates from different entry points in the room, making any necessary adjustments to the height or spacing before any hardware is installed.
Step 2: Anchor the Focal Point
Every successful gallery wall needs a strong visual anchor to ground the arrangement. Identify the most prominent piece in your collection—this could be a rare signed jinx photocard, a larger framed promotional art piece, or your absolute favorite card. This anchor piece should be positioned in the center of your layout to serve as the starting point for the rest of the installation.
In professional gallery design, the center of the focal piece is typically positioned at eye level, which is approximately 57 to 60 inches (145 to 152 cm) from the floor. Measure this height on your wall and align the center of your paper template accordingly. Once you have marked the exact mounting spot, secure this central frame first. Use a spirit level to ensure it is perfectly horizontal. Because all subsequent frames will be spaced relative to this anchor, taking extra care to level this piece perfectly prevents a crooked layout.
Step 3: Hang, Space, and Level the Arrangement
With your central anchor piece securely in place, begin hanging the remaining frames, working systematically outward. Hang one frame at a time, checking the alignment of each new addition against the central piece. Do not rely on visual estimation alone; use your spirit level for every single frame to prevent a cascading slant that can ruin the entire layout.
To maintain perfectly consistent gaps between your frames, create a physical spacing tool. Cut a strip of thick cardboard or wood to your desired spacing width (such as 2.5 inches). Hold this spacer flat against the edge of the already hung frame while positioning the next frame template. This simple trick ensures uniform gaps across the entire wall without the need for constant, repetitive measuring with a tape measure.
Always prioritize safety during the installation process. If you encounter a section of the wall where the plaster crumbles, if a frame feels loose on its anchor, or if an adhesive strip fails to bond properly, stop the installation immediately. Do not attempt to force a weak connection. Remove the affected frame, clean the wall surface thoroughly to remove any dust or adhesive residue, and assess the issue. You may need to switch to a more robust mounting method, such as a plastic wall anchor or a different grade of adhesive, to ensure your frames remain securely on the wall.
Elevating the Display with Lighting and Thematic Accents
Proper lighting is the secret to transforming a standard wall display into a dramatic, museum-quality gallery. Incorporating dedicated lighting not only highlights the intricate details of your jinx photocard collection but also enhances the overall ambiance of your room. One effective option is to mount battery-operated LED picture lights directly above your central focal pieces. Alternatively, you can install thin, low-profile LED light strips behind the outer edges of your frames to create a floating, neon-backlit effect that perfectly mirrors the high-contrast aesthetic of the character.
When selecting and installing lighting fixtures, safety and preservation must remain your primary concerns. For any wired lighting setups, always verify the voltage compatibility, base/interface types, wattage limits, and electrical certifications (such as the PS mark or ICC certification in the Philippines) to prevent electrical hazards. If your installation involves fixed wiring, working at height, or mounting heavy fixtures, ensure you isolate the power at the main breaker, follow the manufacturer’s instructions precisely, or consult a qualified professional.
Furthermore, you must protect your paper collectibles from thermal and UV damage. Never use high-heat halogen or incandescent bulbs, and avoid placing your gallery wall in areas that receive direct, unfiltered sunlight. Excessive heat and UV exposure will cause the paper backing of the cards to warp, the plastic protective sleeves to degrade, and the vibrant printed inks or holographic layers to fade permanently. Instead, use cool-white or adjustable-color LEDs, which emit virtually no heat or UV radiation, keeping your collection safe while offering customizable color temperatures to match your mood.
To complete the visual theme, you can integrate lightweight decorative accents around the periphery of your gallery wall. Consider adding subtle, clean graffiti-style wall decals, a small custom neon sign, or floating display shelves for related collectible figurines. When adding these elements, ensure they remain secondary to the photocards themselves. The surrounding decor should frame and complement your collection, keeping the focus squarely on the individual cards.
Protecting and Maintaining Your Collection in Tropical Climates
Displaying delicate paper collectibles in tropical climates, such as the Philippines, presents unique environmental challenges that require active management. High relative humidity and ambient warmth can cause paper to absorb moisture, leading to warping, curling, or the development of mold and mildew inside sealed frames. To protect your investment, keep the display room well-ventilated. Running a dehumidifier or utilizing air conditioning during the highly humid rainy season helps maintain stable indoor humidity levels, preventing moisture from accumulating behind the glass.
Ensure your frames are properly sealed at the back to minimize air exchange and moisture ingress. Using acid-free backing boards and sealing the rear edges of the frame with archival tape can provide an extra layer of defense against humid air. Additionally, avoid hanging your gallery wall on damp exterior walls or directly in the path of air conditioning vents, as rapid temperature fluctuations can cause condensation to form inside the frames.
Maintaining your display requires a gentle, dry cleaning routine. Use a clean, dry microfiber cloth to gently dust the frames and glass surfaces on a regular basis. Never spray liquid glass cleaners, water, or chemical solvents directly onto the frames. Liquid can easily seep through the edges of the frame glass, tracking moisture directly onto the matting and permanently staining or ruining the paper photocards. If a frame requires deep cleaning, remove it from the wall, take the photocard out of the frame entirely, clean and dry the frame completely, and then reassemble it.
As your jinx photocard collection grows, you will eventually want to integrate new acquisitions into your display. Resist the temptation to squeeze new frames into existing gaps, as this can disrupt the carefully planned visual balance and spacing. Instead, treat any major addition as an opportunity to refresh the layout. Take down the frames, recreate your floor mockup with the new cards, and adjust the spacing systematically using your templates before rehanging. This methodical approach ensures your gallery wall remains a balanced, striking, and protective showcase for your collection.
Community discussion
Share your experience or ask a question. Comments are reviewed before publication.