
Displaying your K-pop collection turns a personal hobby into a curated interior design statement. For Bunnies, showcasing a cherished photocard newjeans collection requires a thoughtful balance between visual harmony and archival preservation. Transforming standard 55x85mm paper collectibles into a striking gallery wall demands more than simply taping them to a flat surface; it requires a systematic approach to planning, layout design, and material selection. By understanding how to mount these delicate items safely, you can celebrate your favorite album eras—from the retro, Y2K-inspired aesthetics of their debut to the vibrant, modern concepts of their latest releases—while ensuring they remain pristine for years to come.
Planning Your NewJeans Photocard Gallery Wall Layout
Before making any marks on your wall or purchasing frames, you must assess the scope of your collection and the physical characteristics of your room. Start by counting your NewJeans photocards and measuring their physical dimensions. While a standard K-pop photocard measures 55x85mm, some special editions, broadcast cards, or concert merchandise might deviate slightly. Knowing the exact count and dimensions allows you to calculate the total square footage required for your display. This step prevents the common frustration of running out of space mid-installation or ending up with an unbalanced layout that feels cramped.
Once you have a clear picture of your collection size, select a layout style that matches your aesthetic preferences and the variety of your items. A structured grid layout is highly recommended if you are displaying uniform collections, such as a complete set from a single album version like Get Up or How Sweet. Grids offer a clean, minimalist, and symmetrical appearance that highlights the cohesive color palettes of specific eras. Conversely, an organic or salon-style layout is ideal if your collection is more eclectic. This approach allows you to mix standard photocards with larger items, such as inclusion postcards, official polaroids, concert tickets, or mini-posters, creating a dynamic visual narrative that can grow over time.
Products mentioned in this guide
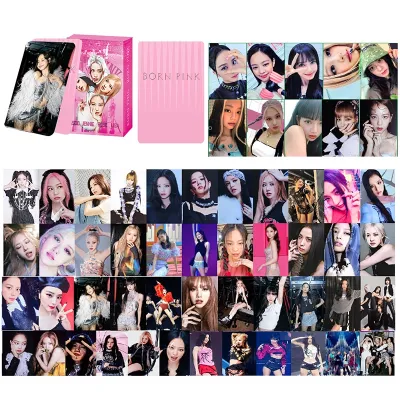
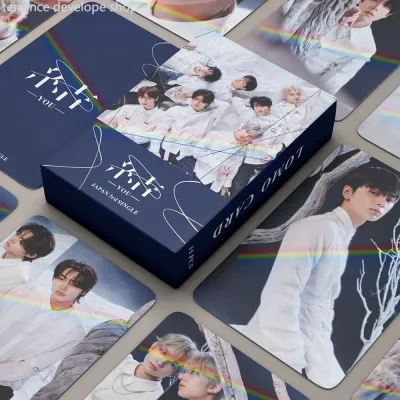
Prices are valid at publication and may change. Please refer to the product page for the latest price.
The physical environment of your chosen wall is the final planning consideration, particularly in tropical climates like the Philippines. High humidity and direct sunlight are the primary enemies of paper-based collectibles, causing paper fibers to warp, colors to fade, and glossy coatings to degrade. Select an interior wall that receives indirect, ambient light rather than harsh, direct afternoon sun. Avoid walls that share a boundary with high-moisture zones, such as bathrooms or kitchens, where humidity fluctuations are extreme. If you are mounting your display on a painted concrete wall—which is standard in many local homes—ensure the surface is completely dry and free of paint bubbling, as moisture trapped in concrete can ruin paper items from behind.
Essential Tools and Materials for Safe Display
Preserving the condition of your collection requires investing in the right protective and mounting materials. Never let a bare photocard touch an adhesive or a rough surface. The foundation of photocard safety lies in high-quality, acid-free, and PVC-free (polyvinyl chloride) penny sleeves. For added rigidity and protection against physical bending, these sleeved cards should be placed into rigid plastic top loaders or premium UV-protective acrylic card bricks. Acrylic bricks are particularly popular for gallery walls because their crystal-clear edges provide a sleek, modern look while filtering out harmful ultraviolet rays that cause signature inks and printed colors to fade.

Your choice of framing determines how the cards sit against the wall. Standard multi-aperture photo frames with custom mat boards are an excellent, budget-friendly option, allowing you to group multiple cards under a single sheet of glass. For a more premium, floating effect, look for magnetic acrylic wall mounts designed specifically for standard card sizes. These mounts allow you to change cards easily when a new comeback drops without dismantling an entire frame. Depending on your design, budget options can range from simple plastic frames under ₱150 to high-end custom acrylic displays that cost upwards of ₱600 per unit.
Securing these frames to your wall requires damage-free mounting supplies that respect both your collectibles and your home’s paint. Double-sided foam tapes or heavy-duty mounting tapes should be avoided, as they can tear plaster or leave permanent, sticky residues. Instead, opt for reputable damage-free adhesive strips or adhesive hooks designed for clean removal. If you are hanging heavier glass frames, or if your walls are made of textured concrete where adhesives struggle to bond, you may need to use small picture-hanging nails or wall anchors. For any installation involving drilling, working at heights, or mounting suspended loads, always prioritize safety by isolating nearby electrical paths, using a sturdy step ladder, and consulting a qualified professional if you are unsure of your wall’s structural integrity.
Finally, gather your layout and alignment tools to ensure a flawless installation. You will need a roll of low-adhesion painter’s tape, a few sheets of kraft paper or recycled newspaper, scissors, a pencil, a measuring tape, and a spirit level. The spirit level is crucial; even a tiny fraction of a degree of tilt can ruin the clean lines of a grid layout, making the entire gallery wall look unprofessional.
Step-by-Step Guide to Arranging and Mounting
Step 1: Prep and Protect Your Photocards
The first step is entirely focused on preservation. Before handling your NewJeans photocards, wash and dry your hands thoroughly to remove natural skin oils, or wear clean cotton gloves. Carefully slide each card into an acid-free, PVC-free polypropylene sleeve. Standard PVC sleeves contain plasticizers that degrade over time, releasing acidic gases that can bond with the photocard’s glossy laminate, eventually tearing the image off when removed. This chemical degradation is accelerated by the warm, humid climate of the Philippines, making PVC-free materials non-negotiable. Once sleeved, insert each card into a rigid top loader or a UV-blocking acrylic card brick to provide a structural shield against bending and dust.
Step 2: Map Out the Layout on the Floor
Never start mounting directly onto the wall without a visual test run. Clear a flat floor space that matches the rough dimensions of your target wall area. Lay down your sleeved and framed photocards on the floor, experimenting with different arrangements. If you are designing an organic layout, place a central focal point first—such as a rare group card, a limited-edition broadcast card, or your favorite member’s solo shot—and build the rest of the layout outward. For a balanced look, maintain a consistent gap of 2 to 3 inches (approximately 5 to 8 centimeters) between each frame. Step back, view the layout from different angles, and adjust the spacing until the composition feels visually balanced and cohesive.
Step 3: Create Wall Templates and Mark Positions
To translate your floor layout to the wall without making accidental marks or drilling unnecessary holes, create paper templates. Place each frame or acrylic brick onto a sheet of kraft paper or newspaper, trace its outline with a pencil, and cut it out. Mark the exact spot where the hanging bracket or adhesive strip will sit on each paper template. Using low-adhesion painter’s tape, stick these paper templates onto your wall in the exact arrangement you mapped out on the floor. Use your measuring tape to verify the gaps between the templates and place your spirit level along the top edges to ensure every piece is perfectly horizontal. This step allows you to make easy adjustments without damaging your wall paint.
Step 4: Mount the Frames or Card Holders
Once your paper templates are perfectly aligned, you are ready for the final installation. If you are using damage-free adhesive strips, clean the wall surface with isopropyl rubbing alcohol and let it dry completely to ensure a strong bond. Apply the adhesive strips to the back of your frames according to the manufacturer’s specific instructions, paying close attention to the designated weight limits. Press the frame firmly against the wall over the corresponding paper template, or remove the template just before pressing, using your pencil marks as a guide. Hold the frame in place for the duration recommended by the manufacturer—typically 30 seconds—to activate the adhesive. If you are using traditional wall hooks, drive the nails directly through the marked spots on your paper templates, then tear the paper away. Hang your framed photocards and use your spirit level one last time to confirm a perfectly straight finish.
Common Mistakes to Avoid When Displaying K-Pop Merch
Creating a gallery wall is an exciting project, but several common pitfalls can ruin your rare NewJeans photocards or damage your living space. The most devastating mistake is ignoring environmental factors. Hanging your display in direct sunlight will cause the vibrant inks of your cards to fade within months, turning a colorful layout dull and yellowed. Similarly, placing your display near an air conditioning unit that drips, or on a damp wall during the rainy season, introduces excess moisture. This localized humidity can cause paper fibers to swell, leading to permanent warping, wavy edges, and even mold growth inside the frames.
Another frequent error is using improper adhesives directly on your collectibles or walls. Never use double-sided tape, hot glue, sticky putty, or standard clear household tape on a bare photocard or even on its protective sleeve if you plan to mount it without a frame. These adhesives contain acidic chemicals that eat through paper fibers and leave stubborn, oily residues that ruin the card’s resale and aesthetic value. On the wall side, using low-quality adhesives can result in your frames falling unexpectedly, which can shatter glass components and damage the cards inside.
Additionally, avoid overcrowding your display. While it is tempting to pack as many photocards as possible into a small area, leaving no breathing room makes the wall look cluttered and chaotic rather than curated. Tight spacing also makes it incredibly difficult to dust or clean around the frames without accidentally bumping them out of alignment. Finally, always respect weight limits. If a package of adhesive strips states a limit of 1 kilogram, do not attempt to hang a heavy wooden or glass frame that approaches or exceeds that weight, especially on painted concrete walls where adhesive grip can vary.
Frequently Asked Questions (FAQ)
How do I protect my NewJeans photocards from fading in a sunny room?
To shield your photocards from UV damage in a room with natural light, always use frames or card bricks made with certified UV-filtering acrylic or glass. Standard glass and cheap plastics allow ultraviolet rays to pass through, which breaks down the chemical pigments in printed ink over time. Additionally, consider applying a professional UV-protective film to your windows, or hang sheer curtains to diffuse the harsh, direct sunlight entering the room. For highly valuable, rare, or autographed NewJeans photocards, the safest approach is to display high-quality color copies on the wall while keeping the original cards safely preserved in an archival binder stored in a dark, cool closet.
Can I use washi tape directly on the photocards?
You should never apply washi tape directly to a bare photocard. Although washi tape is celebrated for its low-tack adhesive and easy removal, the adhesive formulas can vary wildly between brands. Over time, even gentle adhesives can bond permanently with the glossy laminate of a K-pop photocard, leaving a sticky residue or peeling away the outer paper layer when you try to remove it. If you love the decorative look of colorful washi tape, slide your NewJeans photocard into a protective plastic sleeve or a top loader first, then apply the tape to the outside of the protective barrier. If you must apply tape directly for a specific DIY project, always test a small piece on a common, low-value duplicate card first to observe how the adhesive behaves over several days.
Community discussion
Share your experience or ask a question. Comments are reviewed before publication.