
Arranging a collection of BL (Boys’ Love) lomo cards into a gallery wall layout is an exceptional way to transform small, highly cherished paper collectibles into a striking piece of home decor. Because these cards typically feature detailed character illustrations, official promotional art, or fan-made designs, displaying them collectively requires a thoughtful balance of visual storytelling, precise spatial planning, and protective framing. A well-executed gallery wall not only showcases your favorite series and character pairings but also protects the delicate paper prints from environmental wear, turning a personal hobby into a sophisticated interior design feature.
Planning Your Gallery Wall Layout
Before making any permanent marks on your wall, it is essential to plan the visual arrangement and spatial balance of your collection. Because standard lomo cards are relatively small—often measuring around 5.4 by 8.6 centimeters—they can easily look lost or cluttered on a large wall if they are not grouped with intention. Begin by measuring the exact dimensions of the wall space you wish to dedicate to the display, as well as the outer dimensions of the frames or sleeves you plan to use. This allows you to calculate the precise spacing and margins required to keep the arrangement looking balanced and cohesive.
When deciding on an arrangement, consider how different layout styles align with the size of your collection and the overall theme of your room:
Products mentioned in this guide





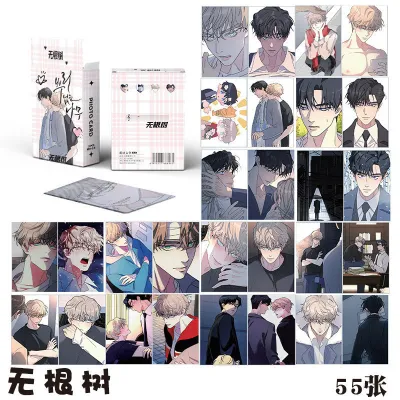
Prices are valid at publication and may change. Please refer to the product page for the latest price.
- Structured Grids: A clean, geometric grid (such as a 3×3 or 4×4 layout) is ideal for a minimalist or modern aesthetic. This style works exceptionally well for displaying complete card sets, chronological series releases, or cards with a highly consistent color palette.
- Symmetrical Alignments: Aligning frames along a central horizontal or vertical axis creates a formal, balanced look. This approach is perfect for highlighting specific character pairings or contrasting themes on either side of a central focal point.
- Organic Salon-Style Clusters: If you have a growing collection of varying card sizes, fan art, and small decorative accents, an organic cluster offers the ultimate flexibility. This style allows you to arrange items in a more relaxed, cloud-like formation, making it easy to add new cards over time without dismantling the entire display.
To visualize your layout without risking damage to your walls, create paper templates of your frames or card holders. Trace the outline of each display piece onto plain paper, cut them out, and label them according to which card will go where. Using low-tack painter’s tape, arrange these paper templates on the wall, experimenting with different configurations and gap sizes—typically keeping a consistent 2 to 5 centimeters of space between each piece. Step back to assess the layout from a distance, adjusting the templates until you achieve a visually balanced composition that fits your space perfectly.
Gathering the Right Tools and Display Materials
Protecting your BL lomo cards from physical degradation is just as important as the layout itself. Because these cards are printed on paper or thin cardstock, direct exposure to air, moisture, and light can cause irreversible fading, yellowing, or warping. When selecting display materials, whether you are using budget-friendly acrylic sleeves costing under ₱100 or investing in premium custom frames, prioritize acid-free and UV-protective materials to prevent degradation:

- Acrylic Card Sleeves and Top-Loaders: These lightweight, budget-friendly options provide a clear, protective barrier against dust and fingerprints. Ensure they are made of archival-safe polypropylene rather than PVC, which can release harmful chemicals over time.
- Floating Frames: Sandwiching your cards between two panes of glass or acrylic creates a beautiful, suspended effect that highlights the borders of each card. This modern look adds a premium feel to the gallery wall.
- Standard Photo Frames with Mats: Placing your cards inside standard frames with custom-cut paper mats elevates the presentation, giving the collection a professional, gallery-grade appearance while keeping the paper from touching the glass directly.
Next, select the appropriate mounting hardware based on your wall type and the weight of your display pieces. For smooth, painted walls, heavy-duty adhesive strips designed for picture hanging are an excellent, damage-free option for renters. If you are using heavier wooden or metal frames, or if your walls have a textured plaster finish, traditional picture hooks, concrete nails, or wall anchors may be necessary. Always check the manufacturer’s stated weight limits on the hardware packaging to ensure it can safely support your frames.
Finally, gather the essential installation tools before you begin. You will need a reliable measuring tape to verify distances, a spirit level (or a leveling app on your smartphone) to keep your lines perfectly straight, a soft pencil for marking light guide points, and a hammer or application tool depending on your chosen hardware. Having these tools ready ensures a smooth, efficient, and accurate installation process.
Step-by-Step Installation Guide
With your layout planned and tools gathered, you can begin the physical installation process. To ensure the final display is straight and visually balanced, start by establishing a central anchor point or a baseline. Find the center of your designated wall space—typically at eye level, which is approximately 140 to 150 centimeters from the floor. Use your spirit level and a soft pencil to draw a faint, horizontal reference line on the wall. This baseline will serve as your guide, ensuring that even if your floor or ceiling is slightly uneven, your gallery wall remains perfectly level.
Next, prepare the wall surface and install your chosen hardware strictly according to the manufacturer’s instructions. If you are using adhesive strips, wipe the wall area with rubbing alcohol to remove any dust, grease, or moisture, and let it dry completely. Apply the adhesive strips to the back of your frames, press them firmly against the wall for at least 30 seconds, and—if specified by the manufacturer—temporarily remove the frame to let the adhesive cure on the wall for an hour before hanging the full weight. Following these curing times is essential to prevent the frames from falling later.
Once the hardware is secure, begin mounting your framed or sleeved lomo cards, working outward from your central anchor point. Replace your paper templates one by one with the actual framed cards. As you hang each piece, place your spirit level on top of the frame to verify that it is perfectly horizontal before moving on to the next one. Maintain consistent spacing between the frames by using a small wooden block or a cut piece of cardboard as a spacer template.
During the installation, always prioritize safety and structural integrity. Define clear stop conditions: halt the installation immediately and consult a qualified professional if you encounter unexpected wall structures, suspect hidden electrical wiring or plumbing behind the wall, or if the mounting hardware fails to hold securely. If you are drilling into concrete or plaster and feel sudden, unusual resistance, do not force the tool. Taking a moment to verify the safety of your wall prevents costly damage and ensures your beautiful display is mounted securely.
Protecting and Maintaining Your Collection
Once your gallery wall is complete, establishing a proper maintenance routine will preserve both the physical condition of your BL lomo cards and the stability of the mounting hardware over time. Environmental factors are the primary threat to paper collectibles, so positioning is key. Avoid hanging your gallery wall in areas that receive direct sunlight, as ultraviolet rays will rapidly fade the vibrant inks and yellow the paper. Keep the display away from direct heat sources, such as air conditioning vents, radiators, or electronic appliances that generate localized warmth, which can dry out paper fibers and cause them to curl.
Managing humidity is particularly crucial in tropical climates, such as in the Philippines, where high moisture levels can lead to paper rippling, adhesive failure, or the growth of mold and mildew inside frames. To protect your collection, consider the following environmental controls:
- Dehumidifiers: Running a portable dehumidifier in the room during the rainy season helps maintain a stable, dry environment for your paper collectibles.
- Silica Gel Packets: Placing small, thin silica gel packets behind the backing boards of your frames can help absorb any trapped moisture.
- Air Circulation: Ensure there is adequate airflow in the room, and avoid mounting your display on damp, exterior-facing walls where condensation is more likely to form.
Finally, implement a gentle cleaning routine to keep your gallery wall looking pristine. Dust the tops and fronts of the frames weekly using a clean, dry microfiber cloth to prevent buildup. Avoid spraying liquid glass cleaners or water directly onto the frames, as liquid can easily seep behind the glass and ruin the paper cards; instead, spray a small amount of cleaner onto a cloth first, wipe the glass, and dry it immediately. Periodically inspect the mounting hardware, gently pressing on adhesive-mounted frames to ensure the bond remains strong and checking for any signs of wall damage or loosening hooks.
Frequently Asked Questions (FAQ)
Can I use double-sided tape directly on my lomo cards?
No, you should never apply double-sided tape, sticky tack, or hot glue directly to your lomo cards. Standard household adhesives contain acidic compounds and oils that will seep into the paper fibers over time, causing permanent yellow staining, discoloration, and warping. Additionally, attempting to peel off direct adhesives will almost certainly tear the paper, permanently damaging your collectible cards. Instead, protect your cards by placing them inside acid-free polypropylene sleeves or rigid top-loaders first, and then apply your mounting tape to the outside of the plastic barrier. You can also use acid-free photo corners or magnetic acrylic frames to hold the cards securely without any adhesive contact.
How do I arrange a mix of standard and oversized lomo cards?
To arrange a mix of standard and oversized lomo cards without creating a cluttered look, focus on creating intentional visual zones or standardizing your frames. You can place your larger cards or prints in the center of your layout to serve as primary focal points, surrounding them with smaller, standard-sized cards in a symmetrical pattern. Alternatively, you can group cards by color palette, character pairings, or specific series to create a cohesive narrative flow across the wall. Another highly effective method is to use uniform, larger frames for all your cards, using custom-cut paper mats with different aperture sizes to accommodate the varying card dimensions. This standardizes the outer grid of your gallery wall while beautifully showcasing the different card sizes inside.

Community discussion
Share your experience or ask a question. Comments are reviewed before publication.