
Transforming a collection of ENHYPEN lomocards into a cohesive gallery wall requires careful spatial planning, protective framing, and secure mounting. By organizing your cards by album era or color scheme and using damage-free hanging methods, you can showcase your favorite concepts while preserving the physical condition of your collectibles. Whether you are displaying a complete set from a specific comeback or a curated mix of your favorite member concepts, a systematic approach ensures a balanced, visually striking display that remains secure over time.
Planning the Layout for Your Lomocard Collection
Before making any marks on your wall, you must assess the available space and choose a layout pattern that complements both your room and your collection size. A structured grid layout works exceptionally well for lomocards because of their uniform dimensions. A three-by-three or four-by-four grid offers a clean, symmetrical aesthetic that mimics professional gallery displays. If your collection is constantly growing, an organic cluster or a salon-style layout provides more flexibility, allowing you to add new frames over time without disrupting the overall balance.
Grouping your cards strategically prevents the wall from looking cluttered. Consider organizing your ENHYPEN lomocards by album era, such as grouping the dark, gothic aesthetics of the Dark Blood era separately from the vibrant, retro tones of Orange Flower or the sleek, modern visuals of Romance: Untold. Alternatively, you can group cards by color palette, matching the dominant background hues of the cards to create a smooth visual transition across the wall. Keeping member cards balanced across the layout also helps distribute visual weight evenly.
Products mentioned in this guide
![[55pcs/box] EN- Lomo Cards / Photo Cards KPOP](https://img.lazcdn.com/g/p/ca42d3a34a9dca10f9344f0b12a4e1fa.jpg_400x400q80.jpg_.webp)
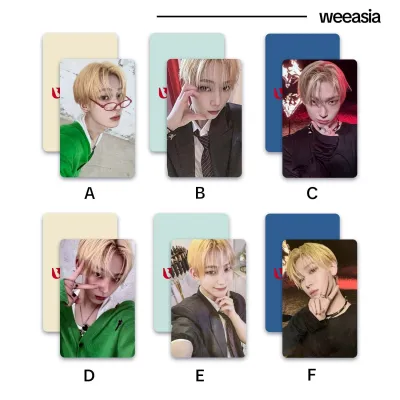

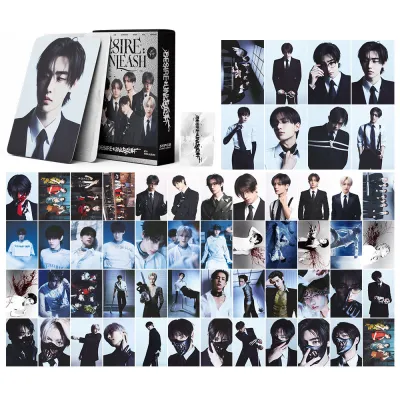
Prices are valid at publication and may change. Please refer to the product page for the latest price.
To visualize the final look without damaging your paint, create paper templates of your frames. Trace the outline of each frame onto plain kraft paper or newspaper, cut the shapes out, and label them. Use low-tack painter’s tape to stick these templates to the wall. This method allows you to experiment with different spacing—typically 5 to 8 centimeters apart—and adjust the entire arrangement until you achieve a balanced composition. Leave the templates on the wall until you are ready to install the actual hardware.
Choosing Frames and Wall Mounting Methods
Standard ENHYPEN lomocards typically measure around 5.4 by 8.6 centimeters, which is much smaller than standard photo frames. To display them elegantly, look for frames with custom matting or multi-aperture mats designed specifically for trading cards or mini-photos. Floating acrylic frames are another excellent option, as they sandwich the card between two clear panels, creating a modern, borderless look that highlights the card edges. Ensure the frame depth is sufficient to accommodate both the card and any protective sleeves you use.

Protecting your cards from environmental damage is crucial for preserving their color and value. Standard glass offers minimal protection against ultraviolet (UV) rays, which can cause the vibrant inks on your lomocards to fade over time. Opt for frames equipped with UV-protective acrylic or museum-grade glazing. Acrylic is highly recommended because it is lightweight, shatterproof, and less likely to break if a frame accidentally falls from the wall.
Your choice of mounting hardware depends on your wall material and living situation. For concrete or masonry walls, which are common in many homes, small concrete nails or picture hooks are reliable options. If you are renting or want to avoid drilling, high-quality damage-free adhesive strips are an excellent alternative. However, in tropical climates with high humidity, standard adhesives can lose their grip over time. Look for moisture-resistant adhesive strips rated for the specific weight of your frames, and always clean the wall surface with rubbing alcohol before application to ensure a strong bond.
Hanging Your Gallery Wall Step-by-Step
To begin the physical installation, establish a central anchor point or baseline. For most gallery walls, the center of the arrangement should sit at eye level, which is approximately 145 to 150 centimeters from the floor. If you are hanging the display above a desk, bed, or shelf, position the bottom row of frames about 15 to 25 centimeters above the furniture piece to keep the arrangement visually connected to the room’s layout.
Using your paper templates as a guide, mark the exact placement for your mounting hardware. Do not simply mark the top of the frame; instead, measure the distance from the top of the frame to the hanging bracket or wire on the back. Transfer this measurement to your paper template on the wall, marking the spot with a pencil. If you are using adhesive strips, mark the outer corners of the frame lightly with a pencil to ensure precise alignment during application.
Mount the hardware carefully, working from the center outward. If you are using nails or screws, tap or drill them into your marked spots at a slight downward angle for maximum stability. For adhesive strips, press the strip firmly against the wall for at least 30 seconds, and allow the adhesive to cure according to the manufacturer’s instructions—often up to an hour—before hanging the weight of the frame.
Once the frames are on the wall, place a spirit level on top of each frame to verify that it is perfectly horizontal. Step back periodically to check the alignment from a distance. If you notice minor spacing discrepancies, you can make small adjustments by slightly shifting the brackets or using small pieces of removable mounting putty on the bottom corners of the frames to keep them from shifting out of place.
Protecting and Maintaining Your Lomocard Display
To keep your ENHYPEN gallery wall in pristine condition, avoid placing it in areas exposed to direct sunlight or extreme temperature fluctuations. Intense sunlight accelerates UV damage, even if you use protective glazing. Additionally, high humidity can trap moisture inside the frames, leading to paper warping, mold growth, or the card sticking to the glass. Avoid hanging your display directly opposite large windows, near air conditioning vents, or on damp exterior walls.
Regular maintenance will extend the life of both your frames and your cards. Dust the frames weekly using a dry, clean microfiber cloth or a static duster. Avoid spraying liquid glass cleaners directly onto the frames, as the liquid can seep through the edges and saturate the paper backing, permanently damaging your lomocards. Instead, spray a small amount of cleaner onto a cloth first, wipe the glass, and dry it immediately. Periodically press down on adhesive-mounted frames to ensure the strips maintain a secure bond with the wall.
If you decide to swap out your cards to feature a new comeback or update your bias display, handle the collectibles with care. Wash and dry your hands thoroughly to remove natural oils, or wear lint-free cotton gloves. Gently open the frame backing on a clean, flat surface. If you need to remove tape or photo corners, peel them away slowly and parallel to the surface to avoid tearing the card fibers. Store your inactive cards in acid-free, PVC-free storage boxes to keep them safe until their next rotation.
Frequently Asked Questions (FAQ)
Displaying Lomocards Without Traditional Frames
If you prefer a casual or minimalist aesthetic, you can display your ENHYPEN lomocards without traditional wooden or plastic frames. Using clear, acid-free plastic card sleeves attached to a metal grid panel with small wooden pegs or decorative clips is a popular alternative. Magnetic poster hangers or acrylic photo blocks also offer a modern look. However, displaying cards without protective glazing increases their exposure to dust, physical bending, and ambient UV light, which can cause rapid fading and physical wear over time.
Preventing Lomocards From Slipping Inside Frames
To keep small lomocards centered inside larger frames without damaging them, use archival-quality mounting supplies. Place the card inside a clear, PVC-free sleeve, and secure the sleeve to the mat board using acid-free photo corners or double-sided archival tape applied only to the back of the sleeve. This method ensures the adhesive never touches the card itself. Avoid using standard household sticky tapes, masking tape, or hot glue, as these adhesives contain acids that cause yellowing, staining, and permanent tearing when removed.

Community discussion
Share your experience or ask a question. Comments are reviewed before publication.