
A refrigerator door is often the central hub of a busy household, acting as a canvas for family schedules, reminders, and cherished memories. Arranging multiple fridge magnet photo frames into a cohesive gallery requires a thoughtful approach to visual balance, geometric alignment, and surface safety. By coordinating your layout style, preparing the appliance door correctly, and using paper templates, you can transform a cluttered appliance into a beautifully structured display of your favorite moments.
Check Your Refrigerator Door and Magnet Compatibility
Before purchasing or arranging your frames, evaluate the physical characteristics of your refrigerator door. Standard painted steel doors are highly magnetic and provide an excellent foundation for these frames. However, modern glass-panel doors do not support magnetic accessories at all. Some stainless steel models, particularly those featuring anti-fingerprint or brushed protective coatings, exhibit weak magnetic properties or can scratch easily.
Next, verify the weight capacity of your selected fridge magnet photo frame. The built-in magnetic backing must be strong enough to support both the frame itself and the weight of the printed photograph. If you are using thick cardstock, laminated prints, or double-layered photo paper, standard flexible rubber magnets may fail. Overloading the door can cause the frames to slide down or fall off entirely when the door is swung open or shut. If your frame design allows, consider upgrading weak backings to small, heavy-duty neodymium magnets to ensure a secure grip, provided they are safely recessed to prevent direct friction against the appliance paint.
Products mentioned in this guide
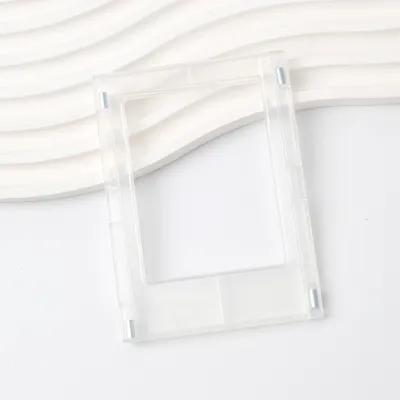
![[5pcs Set] Magnetic Photo Frame for Instax Mini 12/11/9/8/40 Film – DIY Fridge Magnet Album Decoration for Home & Office⚡PH deliveryIn stock⚡](https://img.lazcdn.com/g/p/9714769be9d2b70e75506d41419edcc0.jpg_400x400q80.jpg_.webp)
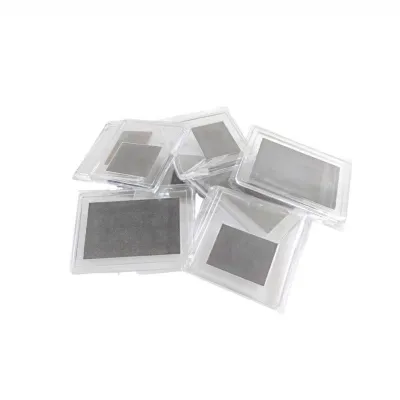
![[ELA] Acrylic Magnet Frame 6MM Thick](https://img.lazcdn.com/g/p/b05ec613d7e310de89e1790b3327284a.png_400x400q80.png_.webp)
Prices are valid at publication and may change. Please refer to the product page for the latest price.
Gather Your Layout and Installation Tools
To execute a clean, balanced gallery display without repeatedly moving magnets and risking scratches, gather all necessary tools beforehand. This preparation prevents unnecessary adjustments on the delicate surface of your refrigerator.

Collect your selected fridge magnet photo frames and the printed photos you plan to display. For the planning phase, you will need a roll of kraft paper, butcher paper, or recycled newspaper, along with a pair of scissors, a pencil, and low-adhesion painter’s tape (often called masking tape). This specific tape allows you to mount paper templates temporarily without leaving sticky residue on the door. Finally, keep a clean microfiber cloth and a mild, non-abrasive appliance cleaner or glass cleaner on hand for surface preparation.
Plan Your Layout Before Sticking
Designing your layout on a vertical canvas like a refrigerator door requires careful planning. A haphazard arrangement can quickly make a kitchen look chaotic, whereas a structured design feels deliberate and artistic.
Choose a Layout Style
Your choice of layout should match the shapes and sizes of your frames. If you have a collection of identical, uniform frames, a Grid Alignment is highly effective. Aligning the edges perfectly and maintaining equal spacing (such as 1 to 2 centimeters between each frame) creates a clean, modern, and symmetrical appearance.
For a collection of mixed frame sizes, shapes, or orientations, a Salon or Cluster Grouping works best. To execute this, select one large or visually striking frame to act as your central anchor. Arrange the smaller frames around this center point, building outward. Keep the outer boundaries of the overall cluster relatively aligned to maintain a sense of order amid the variety.
If you have limited space, such as a narrow side panel or a single-door refrigerator, a Linear or Row Arrangement is ideal. Aligning your frames in a single, straight horizontal or vertical line creates a minimalist, streamlined effect that coordinates well with the vertical lines of the refrigerator handle.
Create Paper Templates
To avoid scratching the door during the design process, use paper templates to test your layout. Place each fridge magnet photo frame onto your sheet of kraft paper or newspaper, trace the outline with a pencil, and cut out the shape. Label each paper template with the specific photo or frame it represents.
Use small pieces of low-adhesion painter’s tape to stick these paper cutouts onto the refrigerator door. Step back several feet to evaluate the visual weight, spacing, and height of the arrangement. This step is crucial for ensuring the display does not interfere with high-traffic areas, such as the space immediately surrounding the door handle where hands frequently grasp the appliance. Adjust the paper templates as many times as necessary until you achieve a balanced composition.
Prepare the Refrigerator Surface
A clean surface is essential for both magnetic adhesion and appliance preservation. Over time, kitchen grease, dust, and humidity can build up on the refrigerator door, creating a microscopic layer of debris.
Spray a small amount of mild, non-abrasive appliance cleaner onto a soft microfiber cloth. Avoid spraying liquid directly onto the refrigerator door to prevent moisture from seeping into electronic panels or door seals. Gently wipe down the entire area where you plan to mount your frames. Never use abrasive sponges, steel wool, or harsh chemical solvents, as these can permanently strip the protective clear coat or dull the finish of your appliance.
Allow the door to dry completely before proceeding. In humid tropical environments, trapping moisture beneath a magnetic backing can lead to localized rust spots or mold growth over time. Ensuring the surface is thoroughly dry prevents these issues and minimizes the risk of micro-scratches caused by trapped dust particles.
Arrange and Secure the Photo Frames
Once your surface is clean and your paper templates are perfectly positioned, you can begin replacing the paper with your actual loaded photo frames.
If you are executing a cluster layout, start by placing the largest anchor frame in the center and work your way outward. For a grid layout, begin at the top-left corner or the center point to maintain consistent spacing. Carefully peel away each paper template just before placing the corresponding magnetic frame in its spot.
Crucial Safety Step: Never drag, slide, or glide a magnet across the refrigerator door to adjust its position. Even on a freshly cleaned door, microscopic dust particles can settle quickly. Sliding a magnet traps these particles and drags them across the paint, acting like fine sandpaper and leaving permanent micro-scratches. Always lift the frame completely off the surface, reposition your hand, and place it straight back down.
Fine-Tune for Visual Balance and Stability
With all the physical frames mounted on the door, take a moment to evaluate the final display and verify its physical security.
Visual Verification
Step back at least three to four feet (about one meter) from the refrigerator. Look at the display as a whole rather than focusing on individual photos. Check that the negative space—the empty areas surrounding and between the frames—is relatively uniform. Ensure the visual weight is balanced across the door; an arrangement that is too heavy on one side can make the entire appliance look lopsided.
Physical Verification and Troubleshooting
Gently tap the corners or lightly tug the edges of each frame to test the strength of the magnetic hold. Open and close the refrigerator door with normal force to ensure none of the frames slide, shift, or rattle.
If a frame begins to slide down the door, the weight of the assembly is too heavy for the built-in magnet. You can resolve this by replacing heavy glass inserts with lightweight, clear acrylic sheets, or by printing your images on thinner photo paper instead of heavy cardstock. Alternatively, if the frame design permits, you can attach small, flat, heavy-duty neodymium magnets to the back of the frame to boost its magnetic pull.
Tips for Mixing Frames with Other Fridge Decor
A refrigerator door is a multi-functional space often shared with shopping lists, delivery menus, and travel souvenirs. Integrating your photo gallery with these everyday items requires a deliberate strategy to prevent visual clutter.
Establish a clear visual hierarchy by treating your photo frames as the primary focal points of the door. Keep secondary items, such as loose paper notes, utility magnetic clips, or small colorful souvenirs, physically separate from the photo gallery. Designate “clear zones” on your refrigerator—such as keeping the photo gallery on the upper half of the main door while placing utility items on the side panel or near the bottom.
To maintain a cohesive look, choose frames that share a common design element. Using frames of a uniform color—such as all matte black, clean white, or natural wood tones—ties the display together, even if the photos inside feature diverse colors and subjects. This consistency prevents the refrigerator from looking disorganized and ensures your cherished photos remain the highlight of your kitchen decor.
Frequently Asked Questions (FAQ)
Can I use fridge magnet photo frames on a stainless steel or glass refrigerator?
Glass-panel refrigerators do not contain magnetic materials behind the glass surface, meaning standard magnetic frames will not stick to them. For stainless steel appliances, compatibility varies. Some stainless steel alloys contain high amounts of nickel, which reduces magnetic pull, while others are highly magnetic. Additionally, many modern stainless steel doors feature specialized anti-fingerprint coatings that can be easily scratched by hard magnets. Always test a single, lightweight magnet in an inconspicuous area, such as the lower side of the door, to check the magnetic strength and surface sensitivity before committing to a full display.
How do I prevent heavy photo frames from sliding down the fridge?
Sliding occurs when the downward gravitational pull on the frame exceeds the horizontal magnetic force holding it to the steel door. To prevent this, reduce the weight of the frame by using lightweight plastic or acrylic covers instead of heavy glass inserts, and print your photos on standard, lightweight photo paper rather than heavy cardstock. If the frame construction allows, you can also attach supplementary high-strength neodymium magnets to the back. Ensure these magnets are flush with the frame backing so they do not scratch the door surface.
Will moving the magnet frames scratch my refrigerator door?
Yes, moving magnetic frames can scratch your refrigerator door if they are dragged or slid across the surface. The scratches are typically caused by tiny dust particles, kitchen grease, or grit that becomes trapped between the magnet and the appliance’s painted or metal finish. To prevent damage, always lift the frames completely off the door when repositioning them. For added protection, you can apply a small piece of clear adhesive tape or a very thin felt pad over the back of the magnet, provided it does not weaken the magnetic hold too much.
Community discussion
Share your experience or ask a question. Comments are reviewed before publication.