
Creating a gallery wall with polaroid photo prints is an excellent way to transform personal memories into a dynamic piece of home decor. The iconic square format, characterized by its distinct white border, offers a nostalgic yet modern aesthetic that fits beautifully into various interior styles. To achieve a balanced and visually appealing display, you must carefully plan your layout, select the appropriate mounting hardware for your specific wall type, and follow a systematic hanging process.
By taking the time to measure your space, mock up your design, and protect your prints from environmental factors like humidity and direct sunlight, you can create a professional-looking gallery wall that remains secure and vibrant for years. Whether you prefer a clean, symmetrical grid or a relaxed, organic arrangement, this guide provides the practical steps and technical considerations needed to bring your vision to life.
Planning Your Polaroid Gallery Wall Layout
Before making any marks on your wall or peeling the backing off adhesive strips, you must thoroughly assess your available wall space. Start by measuring the width and height of the wall area you intend to use. Define the visual boundaries of your display by considering surrounding elements, such as door frames, window casings, and furniture pieces. For instance, if you are hanging the prints above a sofa or a console table, the arrangement should ideally span approximately two-thirds to three-quarters of the furniture’s width to maintain a balanced proportion.
Products mentioned in this guide


![[28pcs] Instax Mini Inspired Photo Print Personalized](https://img.lazcdn.com/g/p/22cb08d56cb111cf5df6ea761b8bf896.png_400x400q80.png_.webp)



Prices are valid at publication and may change. Please refer to the product page for the latest price.
Once you have your measurements, choose a layout style that complements both your personal aesthetic and the number of polaroid photo prints you plan to display. A uniform grid layout is highly structured and works exceptionally well for a clean, minimalist look. This style requires precise spacing and alignment, making it ideal for a set number of prints, such as a 3×3 or 4×4 arrangement.
Alternatively, an organic salon-style layout offers a more relaxed and eclectic feel. This approach allows you to mix polaroids of different orientations, combine them with other art pieces, and easily add new prints over time without disrupting the overall harmony. For narrow spaces like hallways or columns, a linear horizontal or vertical row provides a sleek, streamlined effect that guides the eye naturally through the space.
Every successful gallery wall relies on a clear focal point or anchor piece to ground the arrangement. This is the central element that the eye is naturally drawn to first. In a symmetrical grid, the center print or the intersection of the central grid lines serves as the anchor. In an organic or salon-style layout, select your favorite, most visually striking, or slightly larger print to act as the focal point. Position this anchor piece at eye level—typically around 140 to 150 centimeters from the floor—and build the rest of your arrangement outward from this central point to ensure the display feels balanced and intentional.
Choosing the Right Hanging Hardware
Selecting the correct mounting hardware is critical to ensuring your polaroid photo prints stay securely on the wall without causing unnecessary damage. The choice of hardware depends heavily on your wall type, the weight of your display, and whether you are renting your home. In many residential structures, particularly in tropical regions like the Philippines, walls are often constructed from solid concrete or masonry covered in plaster, rather than standard drywall. Concrete walls require different mounting strategies than drywall, as traditional nails can easily bend or crack the plaster.

For damage-free installation, especially in rental properties, adhesive strips, double-sided mounting tape, or reusable adhesive putty are excellent options for lightweight polaroid prints. However, before applying any adhesive, you must evaluate the surface texture. Adhesives perform best on smooth, painted surfaces and may struggle to bond securely to heavily textured plaster, brick, or matte paint finishes. Always check the manufacturer’s specified weight limits and surface preparation instructions. In warm, humid climates, moisture in the air can weaken adhesive bonds over time, so choosing moisture-resistant adhesive products is highly recommended.
If you prefer a more permanent or framed display, traditional picture hooks, small finish nails, or specialized concrete wall hangers are suitable alternatives. Framed polaroid arrangements add weight, requiring sturdier support. When dealing with complex installations, such as hanging heavy multi-frame displays, working on crumbling or unstable plaster surfaces, or drilling into structural concrete walls where you suspect hidden electrical wiring or plumbing, it is best to halt the installation. In these scenarios, consulting a qualified professional or a professional handyman ensures the structural integrity of your wall and the safety of your home.
Step-by-Step Guide to Positioning and Hanging
To translate your planned layout onto the wall with precision, follow a systematic, step-by-step approach that minimizes errors and avoids accidental damage.
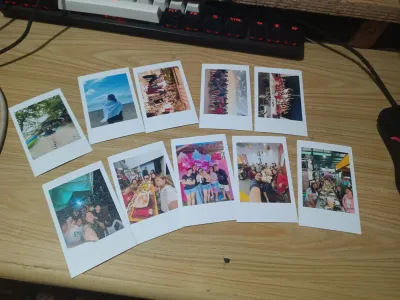
Step 1: Create a Floor Mockup Begin by clearing a flat floor space or a large table that matches the dimensions of your target wall area. Arrange your polaroid photo prints on this surface, experimenting with different placements, color balances, and spacing. This physical mockup allows you to visualize how the prints interact with one another and make adjustments easily. Once you are satisfied with the arrangement, take a quick photograph of the layout with your phone to serve as a reference guide during the installation process.
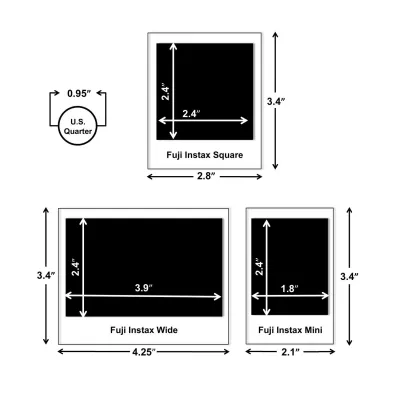
Step 2: Prepare Paper Templates To bridge the gap between the floor mockup and the wall, create individual paper templates for each print or for the entire layout block. Trace the outline of your polaroid prints onto lightweight paper, such as butcher paper or newspaper, and cut them out. Using low-tack painter’s tape, stick these paper templates onto the wall in your desired arrangement. This step allows you to step back and evaluate the scale, height, and overall balance of the layout in the actual room environment before committing to any permanent placement.
Step 3: Establish a Central Anchor Point Instead of measuring down from the ceiling or up from the floor—which are rarely perfectly level—establish a central anchor point on the wall. Use a measuring tape to mark a point approximately 145 centimeters from the floor, which represents the standard human eye level. Use a spirit level or a projected laser level to draw a light, erasable pencil line horizontally and vertically through this anchor point. This crosshair will serve as your primary reference line, ensuring that your entire arrangement remains perfectly straight and level.
Step 4: Prepare the Wall Surface For adhesive-based hardware, proper surface preparation is essential to prevent peeling. Clean the wall area where the adhesives will be applied using a clean microfiber cloth dampened with isopropyl alcohol or a mild soapy water solution, depending on your paint manufacturer’s guidelines. Allow the surface to dry completely. This step removes dust, oils, and ambient humidity residue, ensuring a strong, long-lasting bond between the adhesive and the wall.
Step 5: Apply Hardware and Mount the Prints If you are using adhesive strips, apply them to the back of the polaroid prints or their lightweight backing boards according to the package instructions. Press the prints firmly against the wall at the marked template positions, holding pressure for at least 30 seconds to activate the adhesive. If you are using traditional hooks or nails for framed prints, align the hardware with your pencil marks, install the fasteners carefully, and hang the frames. Work outward from your central anchor piece to maintain consistent spacing.
Step 6: Verify Alignment and Spacing Once all the prints are mounted, step back several paces to inspect the entire gallery wall. Use your spirit level to verify that each print is perfectly horizontal. If you notice minor alignment errors, make gentle adjustments. For adhesive putty or adjustable hanging strips, you can easily reposition the prints slightly. Ensure that the negative space between each print remains consistent across the entire display, creating a cohesive and polished final look.
Styling and Lighting Your Polaroid Display
Once your polaroid photo prints are securely hung, you can enhance the visual impact of your gallery wall through thoughtful styling and lighting. Consider how the display interacts with the surrounding room decor. To prevent the wall from feeling cluttered, maintain a healthy balance of negative space around the perimeter of your arrangement. If your polaroid gallery is positioned near furniture, ensure there is a clear visual gap of at least 15 to 25 centimeters between the top of the furniture and the bottom row of prints.
Lighting plays a crucial role in both showcasing your photos and preserving their quality. Direct sunlight contains harmful ultraviolet (UV) rays that can cause polaroid photo prints to fade, discolor, or yellow over time. To protect your memories, avoid placing your gallery wall on surfaces that receive direct, intense sunlight during the day. Instead, opt for indirect natural light or controlled artificial lighting.
To highlight your display in the evening, consider incorporating subtle accent lighting. Low-wattage LED picture lights, track lighting, or delicate fairy lights can add a warm, inviting glow to your gallery wall. When selecting artificial lighting, choose LED bulbs, as they emit minimal heat and do not produce harmful UV radiation. If you are installing plug-in or hardwired lighting fixtures, always isolate the power source before beginning, verify that the voltage matches your home’s electrical system, check for proper electrical safety certifications, and consult a qualified electrician for any fixed wiring installations.
Frequently Asked Questions (FAQ)
How much space should I leave between each polaroid print?
For a uniform grid layout, a spacing of 2 to 5 centimeters between each polaroid print is generally recommended. This distance is wide enough to let each individual photo stand out, yet close enough to maintain a cohesive, unified look. If you are planning a more relaxed, organic salon-style layout, you can increase the spacing to 5 to 10 centimeters to allow the arrangement to breathe. The key is to keep the spacing consistent throughout the entire display, regardless of the layout style you choose.
Can I hang polaroid prints in high-humidity areas?
Hanging unprotected polaroid prints in high-humidity areas, such as bathrooms or kitchens, is not recommended. Excess moisture and humidity can cause the photo paper to warp, curl, or delaminate, and can also weaken mounting adhesives, causing the prints to fall. If you wish to display polaroids in these environments, ensure the room has adequate ventilation, such as an active exhaust fan. For maximum protection, place the prints inside sealed, moisture-resistant frames with protective matting to shield them from direct steam and water splashes.
Community discussion
Share your experience or ask a question. Comments are reviewed before publication.