
Displaying your SB19 lomo cards on a gallery wall is an excellent way to celebrate your favorite P-pop group while turning your room into a personalized fan space. However, paper collectibles are highly vulnerable to creasing, fading, and adhesive damage if mounted incorrectly. To showcase your collection safely, you must use archival-grade protective barriers and damage-free mounting techniques that keep adhesives entirely away from the raw paper. By planning your layout in advance and using the right materials, you can create a stunning visual display that preserves the pristine condition and resale value of your cards.
Preparing Your SB19 Lomo Cards for Display
Before you begin arranging your gallery wall, you must prepare each card to withstand environmental exposure. The raw paper and glossy coatings of lomo cards are highly sensitive to moisture, dust, and natural skin oils. Handling the cards with bare hands can transfer oils that eventually cause yellowing or permanent smudging. To prevent this, wash and dry your hands thoroughly, or wear lightweight cotton gloves, and handle each card strictly by its outer edges.
Before placing any card into a display setup, inspect the surface for dust particles, lint, or static cling. Use a dry, clean microfiber cloth to gently wipe the front and back of each card using light, circular motions. Avoid using any liquid cleaners, wet wipes, or household detergents, as moisture will seep into the paper fibers and cause irreversible warping or ink bleeding.
Products mentioned in this guide
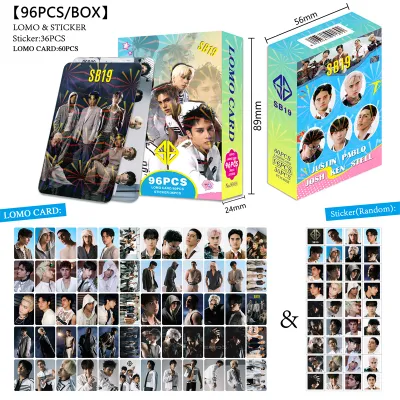
Prices are valid at publication and may change. Please refer to the product page for the latest price.
Once clean, slide each card into an acid-free, PVC-free plastic sleeve, often referred to as a penny sleeve or archival card protector. Standard plastic sleeves containing polyvinyl chloride (PVC) release harmful acidic gases over time, which degrade paper fibers and cause the printed images to stick to the plastic. Verifying that your sleeves are labeled as acid-free and PVC-free ensures a safe chemical environment for long-term display. These archival sleeves are highly accessible, often costing under ₱150 per pack in local online marketplaces, making them a budget-friendly protective step.
Choosing Damage-Free Mounting Methods
Selecting the right mounting method is the most critical step in protecting your collection from physical damage. Traditional hanging methods like push pins, staples, or standard double-sided tape will permanently puncture or tear the paper fibers, instantly ruining the value of your cards. Glue sticks and household adhesive tapes also leave behind sticky residues that are nearly impossible to remove without tearing the card surface.

To mount your sleeved cards directly to the wall, use safe, reversible alternatives such as archival photo corners, acid-free mounting tape, or high-quality reusable adhesive putty. Photo corners are small, triangular pockets that stick to a backing board or the wall, allowing you to slide the corners of the sleeved card in and out without any adhesive touching the sleeve itself. If you prefer mounting tape or putty, apply it exclusively to the back of the protective plastic sleeve, never directly to the raw card.
For a more polished and premium aesthetic, consider using lightweight acrylic floating frames or magnetic poster hangers. Acrylic frames protect the cards from dust and physical contact while giving the gallery wall a modern, clean look. Magnetic hangers use gentle magnetic strips to clamp the top and bottom of a backing sheet, allowing you to display multiple cards together without any adhesive contact. Alternatively, small wooden clipboards or wire grid panels with mini wooden pegs offer a rustic, highly customizable setup that lets you swap cards easily whenever a new comeback or concept photo drops.
Designing Your Gallery Wall Layout
A successful gallery wall requires careful planning to ensure the final arrangement looks balanced and intentional rather than cluttered. Because lomo cards are relatively small, grouping them together in a structured format prevents them from getting lost on a large wall. Before mounting anything, map out your entire layout on the floor or a large table to experiment with different configurations.
To visualize how the display will look on your wall, cut out paper templates matching the dimensions of your frames or card groupings. Use low-tack painter’s tape to stick these templates to the wall, allowing you to adjust the spacing and alignment without damaging your paint. Aim for consistent margins—typically two to three centimeters—between each card or frame to create a cohesive, professional grid.
When organizing your SB19 cards, consider grouping them by specific eras, album concepts, or color palettes to tell a visual story. For instance, you can dedicate one section to the vibrant, energetic tones of the “GENTO” era, and another to the sleek, monochromatic styling of “WYAT.” Mixing portrait and landscape orientations within a structured grid adds visual interest, while keeping the overall shape of the gallery wall symmetrical maintains a sense of order.
Step-by-Step Installation Guide
Once you are satisfied with your paper template layout, you can begin the physical installation. Start by gathering a spirit level, a pencil, and low-tack painter’s tape to mark your alignment lines. A spirit level is essential to ensure your rows are perfectly horizontal, as even a slight tilt can ruin the clean look of a grid layout.
Mark the top corners of your planned frames or card sleeves lightly on the painter’s tape rather than directly on the wall paint. If you are using acrylic frames or backing boards, follow the manufacturer’s instructions for wall mounting. For lightweight, direct-sleeve mounting, apply your chosen damage-free adhesive—such as mounting putty or acid-free tape—to the back of the plastic sleeve. Ensure the adhesive is spread evenly near the corners to prevent the sleeves from curling away from the wall over time.
Press the mounted sleeve or frame firmly against the wall, holding it in place for at least thirty seconds to allow the adhesive bond to set. If you are using adhesive putty, knead it briefly in your hands to warm it up before application, as this improves its grip. Always verify that the wall surface is clean, dry, and free of dust or oil before applying any adhesive, as surface debris will weaken the bond and cause your display to fall.
Maintaining and Protecting Your Display
Preserving your gallery wall requires ongoing care, especially when dealing with environmental factors. Direct sunlight is the greatest enemy of paper collectibles, as ultraviolet (UV) rays will rapidly fade the vibrant colors of your SB19 cards. Position your gallery wall on a surface that does not receive direct sunlight, or use UV-filtering acrylic frames if the room has large windows. Avoid placing the display directly beneath harsh, heat-emitting spotlights, as localized heat can warp both the plastic sleeves and the cards inside.
Regular cleaning keeps your display looking pristine without risking damage to the cards. Use a dry, soft microfiber cloth or a static duster to gently remove dust from the frames, clipboards, or outer sleeves. Never spray liquid glass cleaners, water, or aerosol dusters directly onto the display, as moisture can seep into the edges of the sleeves and ruin the paper.
In the tropical climate of the Philippines, high humidity and temperature fluctuations pose a significant risk of mold growth and paper warping. Ensure your display room has adequate ventilation, and consider using a dehumidifier or placing silica gel packets behind larger frames to absorb excess moisture. If you notice any signs of humidity damage, such as curling edges or musty odors, temporarily move your collection to a cool, dry, climate-controlled storage box until room conditions improve.
Frequently Asked Questions (FAQ)
Can I use washi tape directly on my SB19 lomo cards?
No, you should never apply washi tape directly to your raw SB19 lomo cards. While washi tape is generally marketed as low-tack and easy to remove, the adhesive can still leave a sticky residue or pull away the delicate paper fibers and glossy coating of the card when peeled off. Instead, place your lomo card inside a protective, acid-free plastic sleeve first. You can then safely use decorative washi tape on the outside of the sleeve or use it to secure the sleeve to a backing board or the wall, keeping your collectible completely safe from adhesive contact.
How do I remove adhesive putty without tearing the card sleeve?
To remove reusable adhesive putty safely, avoid pulling or yanking the sleeve directly off the wall, as this sudden tension can crease the plastic and bend the card inside. Instead, slowly and gently twist the sleeve clockwise and counterclockwise while pulling it away from the wall with minimal force. Once the sleeve is free, remove any remaining putty residue from the plastic by taking a small, clean ball of the same putty and dabbing or rolling it repeatedly over the leftover bits. This technique lifts the residue cleanly without stretching or tearing the protective sleeve.
Community discussion
Share your experience or ask a question. Comments are reviewed before publication.