
To arrange your SEVENTEEN Lomo cards in a balanced and visually appealing photo wall layout, you must carefully plan your spacing, select a cohesive design theme, and use protective, humidity-resistant mounting materials. By mapping out your layout on the floor first and using safe, removable adhesives on protective card sleeves rather than the cards themselves, you can create a stunning gallery that showcases your favorite K-pop collectibles without risking wall or card damage.
Whether you want to display the entire thirteen-member lineup or highlight specific album eras, a thoughtful arrangement elevates your room’s decor. In tropical environments, balancing aesthetics with material preservation is key to keeping your collection pristine.
Choose a Balanced Layout for Your Collection
Before mounting anything to your wall, assess the available surface area and count the exact number of cards you plan to display. The total count will dictate the structural possibilities of your layout. A small collection of ten cards requires a different spatial strategy than a massive collection spanning multiple album eras. Measuring your wall space helps prevent the display from looking cramped or awkwardly lost on a large, blank wall.
Products mentioned in this guide
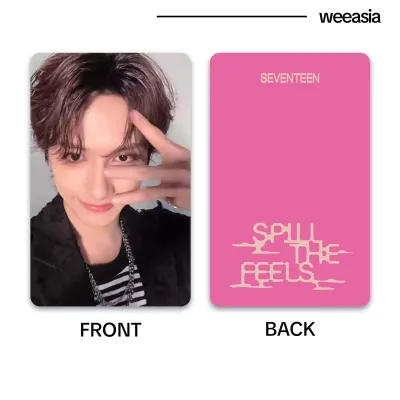
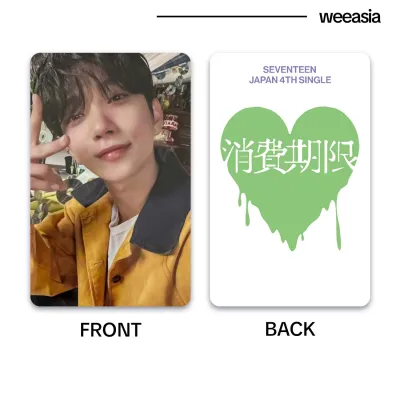
Prices are valid at publication and may change. Please refer to the product page for the latest price.
For a clean, modern, and highly organized aesthetic, a structured grid layout is an excellent choice. This style works exceptionally well for complete sets, such as displaying all thirteen members of SEVENTEEN in uniform rows. You can create a balanced 3×4 grid with a central anchor card, or a wider 2×7 grid to give each member equal visual weight. Grid layouts rely on precise, equal spacing between each card to maintain a sense of order and symmetry.
If you prefer a more dynamic and casual vibe, an asymmetrical or scattered layout offers creative freedom. This approach allows you to mix different card sizes, orientations, and even coordinate them with other memorabilia like concert tickets or mini-posters. Instead of aligning everything to a strict grid, you balance the visual weight across an imaginary center line, placing larger or darker elements near the center and lighter pieces toward the outer edges.
Another highly popular method is organizing your collection into thematic groupings. You can group your cards by specific SEVENTEEN sub-units—such as the Vocal, Hip-Hop, and Performance teams—or arrange them chronologically by album eras, tracking their visual evolution from their debut days to their latest comebacks. Alternatively, sorting your cards by color palette creates a satisfying gradient effect that transitions smoothly across your wall, turning your collection into a cohesive piece of color-coordinated art.
To ensure your layout looks balanced before making any marks on your wall, always create a physical mock-up. Lay your cards out on a flat table or on the floor over a sheet of wrapping paper cut to the exact dimensions of your wall space. Rearrange the cards until you are completely satisfied with the composition. Once finalized, take a quick photo with your phone to use as a reference, or trace the outlines of the card holders onto the paper to create a custom template for the wall.
Select Safe Materials for Humid Climates
Displaying paper collectibles in a tropical climate like the Philippines presents unique environmental challenges. High ambient humidity can cause thin photo paper to absorb moisture from the air, leading to unsightly warping, bubbling, or curling. To protect your valued collectibles, you must establish a barrier between the raw card and the surrounding environment.

Never apply adhesives directly to the bare surface of your Lomo cards. Instead, slide each card into an acid-free, PVC-free penny sleeve as a baseline layer of defense. For enhanced structural support and a more premium look, place the sleeved cards inside rigid plastic toploaders or thick, magnetic acrylic blocks. These protective holders shield the glossy surfaces from skin oils, dust, and moisture while keeping the paper perfectly flat.
Selecting the right adhesive is crucial for both preserving your wall paint and keeping your display secure. Avoid permanent double-sided tapes or heavy-duty liquid glues, which will ruin both the wall and your card holders. Instead, opt for high-quality, removable mounting putty, damage-free double-sided hanging strips, or decorative washi tape. Washi tape, made from traditional Japanese paper, features a mild adhesive that peels away cleanly without leaving sticky residue.
When choosing adhesives in humid regions, look for products specifically formulated to withstand moisture and temperature fluctuations. Standard low-cost adhesive putties can soften, lose their grip, or melt under high humidity, causing your display to sag or fall. Using moisture-resistant mounting options ensures that your protective sleeves and acrylic frames remain firmly anchored to the wall through every season.
Step-by-Step Installation for a Flawless Display
Mounting your display requires patience and precision to achieve a professional, gallery-like finish. Gathering your tools beforehand—including a pencil, a measuring tape, a spirit level, and your prepared cards—will make the installation process smooth and stress-free.
Step 1: Establish Your Focal Point
Determine the center point of your display on the wall, which should ideally sit at eye level—typically around 140 to 150 centimeters from the floor. Use a measuring tape to find the exact center of your wall space, and mark it lightly with a pencil. Place a spirit level against the wall to draw a faint, perfectly horizontal reference line. This line acts as your visual anchor, ensuring your entire arrangement remains level as you build outward.
Step 2: Prepare the Card Holders
Ensure your hands are clean and dry before handling your collection. Carefully insert each SEVENTEEN Lomo card into its designated protective sleeve or rigid toploader. Double-check that the cards are centered within their holders and that no dust particles are trapped inside, as these can scratch the glossy photo finish over time.
Step 3: Apply the Wall-Safe Adhesive
Take your chosen adhesive and apply it directly to the back of the protective plastic holder—never allow the adhesive to make contact with the paper card itself. If you are using mounting putty, roll four small, pea-sized balls and press one firmly into each corner of the holder’s back. If you are using damage-free hanging strips, follow the manufacturer’s instructions to apply them evenly to the back of the frame.
Step 4: Mount from the Center Outward
Begin mounting your cards by placing the central card or the middle row first, aligning it carefully with your penciled reference line. Press firmly on the corners of the holder for at least ten seconds to ensure a secure bond with the wall. Work your way outward in concentric patterns, using a spacer—such as a small piece of cardboard cut to your desired gap width—to keep the distance between each card uniform. Step back from the wall every few cards to verify the alignment from a distance.
If you are using heavier materials like magnetic acrylic blocks, pay close attention to the weight limits of your adhesive. If you notice any sliding, peeling, or lifting, stop the installation immediately. Do not risk your collection falling; instead, switch to a stronger, load-rated, wall-safe mounting solution designed specifically for heavier frames.
Protect and Rotate Your Lomo Cards Safely
Once your photo wall is complete, routine maintenance will keep it looking vibrant and fresh. Dust naturally accumulates on horizontal surfaces and plastic edges over time. To clean your display without scratching the plastic holders or shifting their alignment, use a clean, dry, ultra-soft makeup brush or a high-quality microfiber cloth. Gently sweep the brush over the tops and sides of the holders to remove dust particles without applying heavy pressure.
Environmental exposure is the greatest threat to paper collectibles. Direct sunlight contains harsh ultraviolet (UV) rays that degrade paper fibers and cause the colorful inks on your Lomo cards to fade rapidly. To prevent this irreversible sun damage, position your photo wall on a surface that receives only indirect, ambient indoor light. If your room gets a lot of sun, consider installing UV-blocking window films or choosing display holders with built-in UV protection.
One of the best parts of displaying K-pop collections is updating the visuals to celebrate new comebacks, concert tours, or member birthdays. When swapping out your cards, prioritize safety to avoid bending the delicate paper. Gently peel the protective holder off the wall, slide the card out of its sleeve with care, and insert the new photo. This rotational system keeps your room decor dynamic and allows you to enjoy your entire collection over time without cluttering your walls.
Frequently Asked Questions (FAQ)
Is it safe to use washi tape directly on Lomo cards?
No, it is not recommended to apply washi tape directly to the surface of your Lomo cards. Although washi tape is known for its gentle, low-tack adhesive, the chemicals can still degrade the paper fibers or leave a greasy residue over time. Additionally, peeling the tape off can strip away the glossy protective coating of the card. Always place the card inside a plastic penny sleeve first, and apply the tape to the sleeve rather than the collectible itself.
How do I prevent my Lomo cards from curling in humid weather?
To prevent your cards from curling due to high humidity, you must seal them away from excess moisture and provide physical structural support. Placing your cards inside rigid plastic toploaders or sealing them within thick, magnetic acrylic bricks keeps them perfectly flat. The rigid plastic physically resists the paper’s tendency to warp, while a snug sleeve limits the amount of moisture the paper fibers can absorb from the tropical air.
Community discussion
Share your experience or ask a question. Comments are reviewed before publication.