
Transforming a cherished BL (Boys’ Love) photocard collection from a tucked-away binder into a stunning gallery wall is an incredibly rewarding project. Whether your collection features official merchandise from popular dramas, limited-edition manhwa prints, or anime character cards, displaying them allows you to appreciate the artwork daily. To achieve a cohesive, professional-looking gallery wall, you must balance visual aesthetics with long-term preservation. This guide walks you through planning your layout, selecting protective framing materials, executing a clean installation, and maintaining your display against environmental factors like tropical humidity.
Plan Your Wall Space and Layout Strategy
Before driving any nails or applying adhesives, you must carefully evaluate the physical space you intend to use. Start by measuring the height and width of your target wall area. Defining these boundaries early prevents the display from looking cramped or awkwardly lost on a massive wall. Consider the surrounding furniture; a gallery wall usually looks most balanced when centered above a desk, bed, or console table, keeping the center of the display at eye level—typically around 140 to 150 centimeters from the floor.
Once you have your dimensions, select a layout style that matches both your collection size and your personal aesthetic.
Products mentioned in this guide
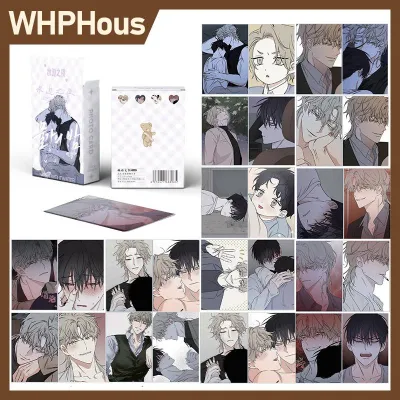
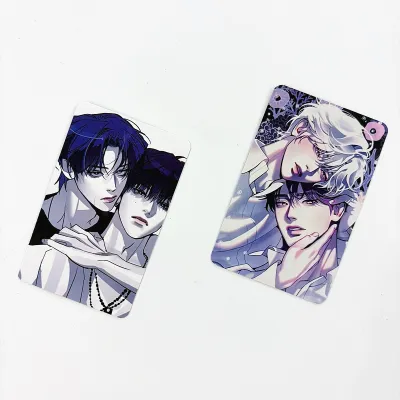
![[500gsm] Jinx Manhwa BL Photocards Joo Jaekyung - Matte](https://img.lazcdn.com/g/p/6e3665f319b9ca6fe09ee3b76d643121.png_400x400q80.png_.webp)
Prices are valid at publication and may change. Please refer to the product page for the latest price.
- Structured Grid: This layout uses identical frames arranged in neat, even rows and columns. It is highly suitable for uniform collections, such as a complete set of photocards from a single series. A grid layout offers a clean, modern, and highly organized look, but it requires precise measurements during installation.
- Salon-Style: If you have a diverse collection of photocards, postcards, and larger art prints, a salon-style layout is ideal. This approach groups frames of different sizes and orientations together in a clustered, organic arrangement. It allows your collection to grow over time, as you can easily add new frames to the outer edges.
- Linear Row: For smaller collections, a single horizontal or vertical row of frames provides a minimalist, elegant statement. This works exceptionally well in narrow spaces, such as hallways or columns between doors.
To visualize these layouts without damaging your walls, create paper templates. Trace each of your frames onto lightweight paper, cut them out, and label them. Use low-tack painter’s tape to stick these templates to the wall. This allows you to experiment with different spacings, swap frame positions, and step back to view the overall balance from a distance before committing to any permanent mounting.
Select Frames and Protective Mounts
Photocards are delicate paper collectibles that are highly susceptible to environmental damage. Selecting the right frames and mounting materials is crucial to keeping them pristine while showcasing their vibrant colors.

- Acrylic Floating Frames: These frames sandwich the photocard between two clear acrylic panels, creating a modern, borderless look where the card appears to float on the wall. They are excellent for highlighting the clean edges of the cards, but you must ensure the acrylic is rated for UV protection to prevent light damage.
- Standard Wooden or Metal Frames with Mats: Traditional frames with a cardboard mat board provide a classic, museum-like appearance. The mat board creates a physical separation between the photocard and the glass, which is highly beneficial for preventing moisture buildup.
When purchasing frames, always check the inner dimensions rather than the outer frame size. Standard BL photocards typically measure around 55 millimeters by 85 millimeters. If you choose a larger frame, you will need a mat board with a custom-cut window or a secure backing to keep the card centered.
In tropical climates like the Philippines, high humidity and intense sunlight pose significant risks to paper collectibles. Standard glass and cheap plastics allow ultraviolet (UV) rays to pass through, which will fade the ink on your photocards over time. Look for frames equipped with UV-filtering acrylic or glass. Additionally, never place a bare photocard directly against glass; changes in temperature and humidity can cause the glossy photo emulsion to stick to the glass, permanently ruining the card when you try to remove it. Always use acid-free, archival-grade plastic sleeves or backing boards to shield your collection.
Execute the Arrangement and Installation
With your layout planned and your frames prepared, you are ready to begin the physical installation. Having the right tools on hand makes the process smooth and precise. Gather a measuring tape, a pencil, a spirit level, and your chosen mounting hardware. If you are drilling into walls or installing heavy shelving to support your frames, always check for hidden electrical wiring or plumbing behind the wall surface. For complex installations or concrete walls that require heavy-duty anchors, consulting a qualified local professional is a safe and reliable option.
To ensure perfect alignment, follow this step-by-step assembly process:
- Prepare the Wall: Wipe down the wall surface with a dry microfiber cloth to remove dust and oils. This is especially important if you plan to use adhesive mounting strips, as dust prevents the adhesive from bonding securely.
- Lay Out the Frames: Place your framed photocards on the floor directly in front of the wall. Arrange them to match your paper template. This physical mockup allows you to double-check that the colors, frame styles, and card orientations complement each other when placed side by side.
- Mark the Mounting Points: Refer back to your paper templates on the wall. Use a pencil to mark the exact spot where the frame's hanging hardware or adhesive strip will sit. Use your spirit level to draw a faint, level reference line across the wall to keep your rows perfectly straight.
- Mount the Frames: Install your hanging hardware or apply your adhesive strips according to the manufacturer's instructions. If using adhesive strips, press them firmly against the wall for the recommended amount of time to ensure a strong bond.
- Insert and Secure the Photocards: Carefully place your sleeved photocards into the frames, ensuring they are centered and secure. Hang the frames on the wall, using your level one final time to make any minor adjustments.
Protect and Maintain Your Display Over Time
A gallery wall is not a set-and-forget project; ongoing maintenance is key to preserving both the wall and your valuable BL photocard collection.
- Manage Sunlight and Humidity: Never hang your gallery wall directly opposite a window that receives intense, direct sunlight. Even with UV-protective glass, prolonged exposure to direct sun will eventually cause colors to fade. In humid environments, keep the room well-ventilated. Using a dehumidifier or running an air conditioner periodically helps maintain a stable indoor climate, preventing the paper cards from warping or developing mold.
- Regular Cleaning: Dust your frames weekly using a dry, soft microfiber cloth or a static duster. Avoid spraying liquid glass cleaners directly onto the frames, as moisture can seep through the edges and damage the paper inside. Instead, spray a small amount of cleaner onto a cloth, wipe the glass surface, and dry it immediately.
- Inspect Hardware and Adhesives: Periodically check that your frames are still hanging securely. High humidity can weaken some adhesive strips over time. If you notice a frame sagging or pulling away from the wall, replace the adhesive immediately to prevent a fall that could damage both the frame and the photocard.
- Rotate Your Collection: If you own rare, highly valuable, or signed photocards, consider rotating them out of the display every few months. Replacing them with color photocopies or alternative cards allows you to preserve the originals in protective binders while keeping your gallery wall looking fresh and dynamic.
Frequently Asked Questions (FAQ)
Can I use double-sided tape to hang photocard frames?
Using standard double-sided tape is not recommended for hanging photocard frames. Standard tape lacks the shear strength required to support the weight of frames over time, which can lead to frames falling and breaking. Furthermore, permanent double-sided tape can severely damage your wall paint or plaster when removed, and the adhesive residue can ruin the back of your frames. Instead, use high-quality, removable adhesive hanging strips designed specifically for pictures. Always check the weight capacity on the product packaging and ensure your wall surface is clean and dry before application.
How do I prevent my photocards from slipping inside the frames?
Because photocards are much smaller than standard photo frames, they will easily slide out of place without proper support. To prevent this, use an acid-free backing board or a custom-cut mat board that fits snugly inside the frame. You can secure the photocard to the backing board using photo-safe, archival mounting corners. These clear corners hold the card gently by its edges without any adhesive touching the card itself. Alternatively, place the photocard inside a tight-fitting archival sleeve, and use a small piece of acid-free artist’s tape on the back of the sleeve to secure it to the mat board.
Community discussion
Share your experience or ask a question. Comments are reviewed before publication.