
Transforming your cherished SEVENTEEN photocard collection into an aesthetic gallery wall is a beautiful way to celebrate your favorite eras while elevating your room’s interior design. To achieve a balanced, professional look, you must carefully plan a cohesive visual theme, select protective display materials that shield your cards from environmental wear, and execute a precise layout. Because these collectible cards are highly susceptible to fading and moisture damage—especially in warm, humid tropical climates—the ideal arrangement must prioritize both structural stability and long-term preservation. By treating your photocards as miniature pieces of fine art, you can design a dynamic wall display that feels like a curated gallery rather than a temporary setup.
Plan Your Gallery Wall Layout and Theme
Before hammering any nails or sticking adhesive strips to your wall, you need a clear design concept that unifies your collection. SEVENTEEN’s diverse discography offers a rich spectrum of visual aesthetics, from the warm, sun-drenched tones of Face the Sun to the cool, minimalist, or vibrant pastel palettes of other eras. You might choose to organize your gallery wall around a specific album’s color scheme, dedicate sections to your favorite members, or opt for a sleek, monochrome look that blends seamlessly with modern home decor. Deciding on this overarching theme first ensures that your frames, mats, and background colors work in harmony rather than competing for attention.
Once you have established your visual theme, select a layout pattern that matches your available wall space and the size of your collection. A structured grid layout offers a clean, symmetrical, and modern appearance, which works exceptionally well if you have matching frames of the exact same size. If your collection is still growing or features cards of varying dimensions, a relaxed salon-style cluster allows you to arrange frames of different sizes organically around a central focal point. Alternatively, a staggered or offset arrangement can introduce a sense of movement and energy, making it ideal for narrow walls or spaces above desks and beds.
Products mentioned in this guide


![[5-13pcs/set] SEVENTEEN Seventeenth Heaven UNOFFICIAL Photocards Matte w/ backprint](https://img.lazcdn.com/g/p/3ef800831764ef3f155c5c0873970615.jpg_400x400q80.jpg_.webp)
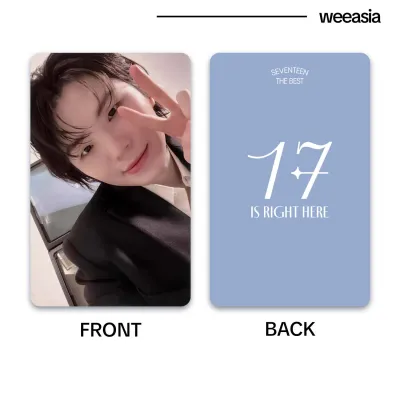
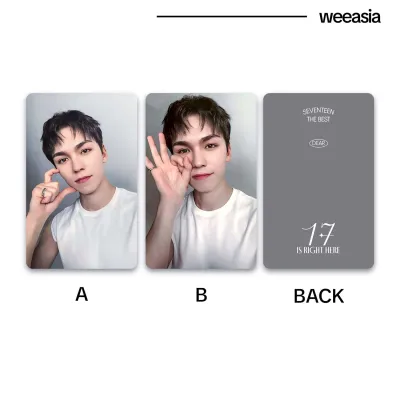
![[ON-HAND] Seventeen the Best 17 is Right Here Dear Version photocard Tingi](https://img.lazcdn.com/g/p/894e9a5e649a840385c114e2365c61ad.jpg_400x400q80.jpg_.webp)
![[13pcs/set] SEVENTEEN 17 IS RIGHT HERE UNOFFICIAL Photocards w/ backprint](https://img.lazcdn.com/g/p/3d05d6cba4672cef7742af00991c90de.jpg_400x400q80.jpg_.webp)
Prices are valid at publication and may change. Please refer to the product page for the latest price.
To visualize how these patterns will look in your room, always create a physical mock-up before making any permanent changes. Lay your frames out on the floor first, adjusting the spacing until the composition feels balanced and visually grounded. Once you are satisfied with the floor arrangement, trace each frame onto paper, cut out the templates, and tape them to your wall using low-tack painter’s tape. This step allows you to step back, evaluate the height, check how the light hits the display at different times of the day, and make easy adjustments without damaging your walls.
Choose the Right Frames and Display Materials
Selecting the right frames is a critical step that bridges the gap between protecting your valuable SEVENTEEN photocards and matching your room’s aesthetic. Sleek metal frames in matte black, gold, or silver offer a contemporary, polished look that highlights the clean lines of a grid layout. Natural wood frames bring warmth and a cozy, organic feel to the space, making them well-suited for softer, pastel-themed collections. If you prefer a minimalist, floating effect where the focus remains entirely on the cards themselves, clear acrylic frames are an excellent modern alternative that lets the wall color show through.

Because photocards are printed on paper and cardstock, they are highly vulnerable to environmental degradation, particularly from light exposure. Standard glass or basic plastic covers offer little to no protection against ultraviolet (UV) rays, which can cause the vibrant inks on your cards to fade, yellow, or discolor over time. When shopping for frames, look for options equipped with UV-protective glass or museum-grade acrylic covers. This specialized glazing filters out harmful light rays, ensuring that the signature colors of your favorite cards remain bright and true for years to come.
Equally important is the material that comes into direct contact with your photocards inside the frame. Never use standard cardboard backing, acidic papers, or household adhesives, as these can leach chemicals over time, causing irreversible staining, warping, or tearing. Instead, opt for acid-free matboards to create a professional border around each card, keeping the paper from touching the glass directly. To secure the photocards safely within the mat, use archival-quality, acid-free mounting corners or slide the cards into PVC-free, acid-free plastic sleeves before mounting them to the backing board. This ensures that no sticky residue or chemical reactions compromise the integrity of your collection.
Prepare Your Wall and Tools
A successful gallery wall installation relies on proper preparation and having the right tools on hand before you begin. Gather a reliable measuring tape, a pencil for marking placement, a spirit level to ensure every frame is properly aligned, and your chosen hanging hardware. If you are mounting heavier frames or adding decorative accent lighting above your gallery wall, ensure you follow all safety guidelines for working at heights and handling electrical components. For any complex electrical installations, such as hardwired picture lights, always consult a qualified professional to prevent safety hazards.
The type of wall in your home dictates the best hanging method to use. Many homes in the Philippines feature solid concrete or masonry walls, which require a masonry drill bit, wall plugs, and screws for a secure, permanent hold if you are hanging heavy glass frames. If you are living in a rental space or working with drywall, high-quality, damage-free adhesive hanging strips are an excellent alternative. However, these adhesives require a completely clean, dry, and smooth surface to bond correctly.
Before applying any adhesives or marking your wall, take the time to prep the surface thoroughly. Wipe down the wall with a clean, dry microfiber cloth to remove dust, oils, and loose particles that could compromise the adhesive’s grip. If the wall has accumulated grime, clean it with a mild soap solution or rubbing alcohol, allowing it to dry completely for several hours before proceeding. Taking these preparatory steps prevents the frustrating and potentially damaging experience of frames falling off the wall later.
Step-by-Step Installation Guide
With your design finalized, materials selected, and wall prepared, you are ready to begin the physical installation. Start by establishing a central anchor point or a solid horizontal baseline to ground your entire gallery wall. If you are hanging your display above a piece of furniture, such as a study desk or a console table, the bottom edge of your lowest frames should sit roughly 15 to 20 centimeters above the furniture piece to create a cohesive visual connection. If the wall is completely open, aim to position the center of the gallery wall at eye level, which is generally around 145 to 150 centimeters from the floor.
Next, transfer your planned layout from your floor mock-up to the wall using your paper templates. Tape the paper cutouts onto the wall using painter’s tape, measuring the gaps between each template carefully to ensure consistent spacing—typically 5 to 10 centimeters apart works best for a balanced look. Use your spirit level along the top edges of the paper templates to verify that everything is level and horizontal. Once the templates are aligned, use a pencil to mark the exact spot where the nail, screw, or adhesive strip needs to be positioned on each template.
Now, begin hanging your frames systematically, starting from the center of your layout and working your way outward. If you are using traditional nails or screws, drive them directly through the marked spots on your paper templates, then gently tear the paper away before hanging the frame. If you are using adhesive strips, apply them to the back of the frame and press the frame firmly against the wall according to the manufacturer’s instructions, ensuring you hold it in place for the recommended time to establish a strong bond.
As you hang each frame, place your spirit level on top of it to double-check that it remains level and straight. Step back frequently to assess the overall balance of the arrangement from a distance, making minor adjustments to the spacing or alignment as you go. Working slowly and methodically from the inside out prevents cumulative measuring errors, ensuring that your final gallery wall looks polished, symmetrical, and neatly installed.
Protect and Maintain Your Photocard Display
Once your SEVENTEEN photocard gallery wall is complete, ongoing maintenance is essential to preserve both the aesthetic appeal of the display and the physical condition of your cards. Environmental control is your primary line of defense against damage. Avoid hanging your gallery wall in areas that receive direct, intense sunlight for extended periods, such as directly opposite large windows. Additionally, keep the display away from sources of high humidity and temperature fluctuations, such as directly adjacent to air conditioning units, humidifiers, or bathroom doors, as excess moisture can cause the paper cards to warp or develop mold.
Establish a gentle, regular cleaning routine to keep your gallery wall looking pristine without risking damage to the frames or the photocards inside. Use a dry, clean microfiber cloth to gently dust the tops and faces of the frames once a week. Avoid spraying liquid glass cleaners or harsh chemical sprays directly onto the frames, as moisture can seep through the edges of the glass and ruin the paper cards. If the glass or acrylic covers require a deeper clean, spray a small amount of specialized cleaner onto a microfiber cloth first, then gently wipe the surface.
Finally, design your display with flexibility in mind so you can easily rotate or swap out your photocards as your collection grows or your favorite eras change. Using frames with easy-opening backing clips and utilizing photo-safe, non-permanent mounting corners makes swapping cards a simple, damage-free process. Regularly rotating your display not only keeps your gallery wall feeling fresh and exciting but also limits the continuous light exposure on any single photocard, helping to preserve your collection for the long term.
Frequently Asked Questions (FAQ)
Can I use double-sided tape directly on my photocards?
No, you should never apply double-sided tape, sticky tack, or any household adhesives directly to your SEVENTEEN photocards. These adhesives contain harsh chemicals and strong glues that will leave a permanent sticky residue, discolor the paper, or tear the delicate backing of the card when you try to remove them. Instead, always place your photocards inside acid-free, archival-safe plastic sleeves first, or use acid-free photo mounting corners. This keeps the cards completely untouched by adhesives while holding them securely in place within your frames.
How do I arrange a gallery wall if I have an odd number of photocards?
Arranging an odd number of photocards is a great opportunity to create a dynamic, asymmetrical gallery wall that feels organic and artistic. You can place your favorite card or a larger group photo frame in the center as a focal point, then arrange the remaining frames symmetrically around it to balance the visual weight. Another effective strategy is to fill the empty space in your layout with complementary, non-card decor items, such as a framed SEVENTEEN concert ticket stub, a small piece of fan art, or a minimalist botanical print that matches your color palette.

Community discussion
Share your experience or ask a question. Comments are reviewed before publication.