
Creating a realistic fake window effect in a compact Philippine condo requires balancing optical specifications with tight physical space. A fake window projector can transform a windowless bedroom or a dark studio unit into a bright, open space by projecting high-definition scenes of nature, rainy streets, or sunny landscapes. However, achieving a convincing illusion depends on selecting a device that matches your room’s dimensions, wall surface, and ambient light levels. By focusing on throw distance, brightness, and local electrical compatibility, you can find a projector that fits your layout without cluttering your living area.
Identifying the Right Projector Features for Compact Rooms
To project a convincing window illusion in a small condo, you must first understand how the projector’s lens interacts with your room’s physical limits. The most critical technical specification for tight spaces is the throw ratio, which determines how far the projector must be placed from the wall to create a specific image size. Standard projectors often require several meters of distance to project a large image, which is rarely feasible in a typical studio or one-bedroom condo unit. For compact rooms, a short-throw or ultra-short-throw projector is highly advantageous because it can project a wide, clear image from just a few feet or even inches away from the wall. When shopping, always check the manufacturer’s throw distance chart to verify if the device can produce a realistic window size (such as 50 to 80 inches diagonally) within your available room length.
Brightness and contrast are equally important when selecting a projector for ambient lighting. Projector brightness is typically measured in ANSI lumens or LED lumens, and the required level depends heavily on how much natural light enters your condo during the day. If you plan to use the fake window during daylight hours in a room with partial sunlight, you will need a projector with a higher lumen rating to prevent the image from looking washed out. For nighttime use or in completely dark, windowless rooms, a lower lumen rating is often sufficient and can even prevent eye strain. Contrast ratio also plays a vital role in realism; a higher contrast ratio ensures that shadows and dark areas in your projected window scene look deep and natural, rather than a flat, hazy gray.
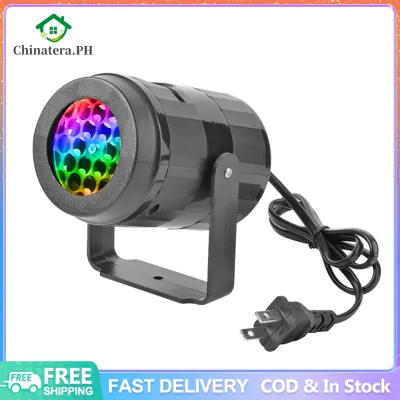
Products mentioned in this guide
![[pantorastar] Halloween Projector Halloween Window Projector Lights With Tripod For Home Show Christmas Movies Party Decorations 100-240V UK Plug](https://img.lazcdn.com/g/p/f6345019910d1c2ca4d132ab5c022c48.jpg_400x400q80.jpg_.webp)
Prices are valid at publication and may change. Please refer to the product page for the latest price.
Another key consideration is how you will play the window content. Many modern projectors come with built-in media players, smart operating systems, or USB ports that allow you to play looping videos directly from a flash drive or streaming applications. This built-in functionality is highly beneficial for small condos because it eliminates the need to connect external media players, laptops, or streaming sticks. Minimizing external devices directly reduces cable clutter, which is essential for maintaining a clean, minimalist aesthetic. If you must use an external device, look for projectors with well-positioned HDMI ports and built-in USB power outputs to keep your cabling as short and discreet as possible.
Evaluating Your Wall Space and Layout Constraints
Before purchasing any projection equipment, you must carefully measure your available wall space and identify potential physical obstructions. In small condos, walls are rarely completely empty; they are often partially blocked by wardrobes, air conditioning units, shelving, or tall headboards. Use a measuring tape to determine the exact width and height of the clear, unobstructed wall area where you want your fake window to appear. Keep in mind that a realistic window illusion should be positioned at a natural height—typically starting around waist or chest level—rather than touching the ceiling or floor. If your furniture cannot be moved, you may need to adjust your projected image size or choose a projector with digital scaling features to fit the available space.

The texture and color of your wall will also significantly affect the clarity and realism of the projected image. Most Philippine condos are finished with standard concrete walls covered in plaster and paint. If your wall has a highly textured finish, such as a rough stucco or orange-peel texture, the projected image will lose sharpness, and the shadows cast by the texture can ruin the illusion of looking through glass. Additionally, the paint color and finish play a major role in light reflection. A matte white or light off-white wall is ideal because it reflects light evenly without creating hot spots. Glossy or semi-gloss paints reflect light like a mirror, which can cause distracting glare and ruin the window effect. If your wall is painted a dark or vibrant color, the projected colors will appear distorted, and you may need to consider temporary wallpaper or a dedicated projection screen.
Power management is another practical layout constraint that requires early planning. Projectors require a continuous power source, and running long extension cords across a small room can create tripping hazards and look unsightly. Identify the nearest electrical outlet to your planned projector location and plan a clear path for the power cable. You can use self-adhesive cable raceways or paintable cord covers that match your wall color to hide the wires. If you are renting your condo and cannot install permanent fixtures, look for flexible cable management solutions like reusable hook-and-loop straps or decorative clips that can be easily removed without damaging the paint.
Verifying Technical Specs and Safety Before You Buy
Electrical safety and compatibility must be verified before purchasing any electronic device, especially when importing products from online marketplaces. In the Philippines, the standard household electrical system operates at 220V and 60Hz. Many projectors sold internationally are designed for 110V systems, and plugging a 110V device directly into a 220V outlet will cause permanent damage and pose a serious fire hazard. Always check the product specifications or the label on the power adapter to ensure it supports a wide voltage range (typically labeled as 100V-240V, 50/60Hz). Additionally, verify the plug type; most outlets in the Philippines accept Type A (two flat parallel pins) or Type B (two flat pins with a grounding pin), so you may need to check if the projector comes with a compatible plug or if you will need a safe, high-quality adapter.
Operational noise and heat dissipation are critical factors that are often overlooked until the projector is running in a small room. Projectors generate a significant amount of heat from their light sources, which requires internal fans to keep the components cool. In a small, enclosed condo room, a noisy fan can be highly distracting, especially if you are trying to use the fake window to create a relaxing, peaceful atmosphere. Look for projectors with noise ratings below 30 decibels (dB) for quiet operation. Furthermore, because the tropical climate in the Philippines can lead to high ambient temperatures and humidity, ensure the projector has adequate ventilation space around its vents. Placing a high-heat projector in a tight, unventilated corner or inside a cabinet can lead to overheating, automatic shutdowns, and a shortened product lifespan.
To prevent your fake window from looking like a blurry, pixelated projection, you must match the projector’s native resolution to your desired image size. Native resolution refers to the actual physical pixels on the projector’s display chip, which is different from ‘supported resolution’ (which only means the projector can accept a high-definition signal but will downscale it to a lower quality). For a convincing window effect, a native resolution of at least 1080p (Full HD) is highly recommended. A lower native resolution, such as 480p or 720p, will result in visible pixel grids and jagged edges when projected onto a large wall area, breaking the illusion of a real outdoor view. Additionally, ensure the projector’s native aspect ratio is 16:9, which matches standard widescreen video content and fits the typical proportions of a modern window frame.
Planning the Setup and Placement in Tight Spaces
Positioning your projector in a small condo requires balancing spatial efficiency with optimal image alignment. There are three primary mounting options, each with its own set of trade-offs. Ceiling mounting is the most space-efficient option because it keeps the projector completely out of your living space and prevents people from blocking the light beam. However, ceiling mounting requires drilling, running cables through or along the ceiling, and ensuring the mount can safely support the projector’s weight. If you are renting or want to avoid drilling, a high shelf placement on the opposite wall is an excellent alternative. This keeps the projector high and out of the way, though you must ensure the shelf is sturdy and level. The third option is a freestanding floor position using a small tripod or side table, which offers the most flexibility but takes up valuable floor space and leaves the projector vulnerable to being bumped.
When a projector cannot be placed directly perpendicular to the center of the wall, you must rely on keystone correction and digital zoom to align the image. Keystone correction allows you to adjust the shape of the projected image if the projector is tilted up, down, or to the side, turning a distorted trapezoid back into a perfect rectangle. While vertical keystone correction is common, horizontal keystone correction is highly useful in tight rooms because it allows you to place the projector off-center—such as on a bedside table—and still project a straight image onto the wall. However, keep in mind that extreme digital keystone correction can slightly reduce image sharpness at the edges. Digital zoom is another helpful feature that lets you shrink the image size without physically moving the projector closer to the wall, giving you more flexibility in tight layouts.
Managing ambient light leakage is essential for maintaining the contrast and realism of your fake window. In a small condo, light from actual windows, glass balcony doors, hallway gaps, or neighboring electronic screens can easily wash out the projected image. To combat this, consider installing high-quality blackout curtains or blinds on your real windows to block external sunlight during the day. If light leaks under your main entry door from a brightly lit hallway, a simple door draft stopper can block the light while also reducing hallway noise. Additionally, try to position your other electronic devices, such as computer monitors or television screens, so their light does not shine directly onto the projection wall, ensuring your fake window remains the focal point of the room.
Recognizing Limitations and Exploring Lighting Alternatives
While fake window projectors offer an immersive experience, they are not always the right fit for every condo layout or lifestyle. Physical dealbreakers can make a projector impractical. For instance, if your room is extremely narrow and lacks the minimum throw distance required for a clear image, the projection will be too small to look like a real window. Highly textured walls, such as rough concrete or decorative brick, will distort the image beyond usability, and painting or smoothing the wall may not be allowed under your condo’s association rules. Furthermore, some high-wattage projectors generate significant heat, which can strain your air conditioning system in the tropical climate, leading to higher electricity bills.
If a projector is not suitable for your space, there are several excellent ambient lighting alternatives that can still enhance your condo’s atmosphere. LED light panels are a popular option; they are thin, lightweight, and can be mounted directly to the wall using non-destructive adhesive strips. Some panels can be configured to mimic the natural color temperature of daylight, providing a bright, window-like glow without the need for throw distance. Neon art and custom LED neon signs are another stylish alternative, offering vibrant colors and personalized designs that add a modern, artistic touch to your walls. Smart color-changing LED bulbs and light strips can also be placed behind furniture or along the ceiling to create indirect, atmospheric lighting that makes your room feel larger and more dynamic.
When deciding between a projector and alternative lighting, conducting a cost-to-benefit analysis in Philippine Pesos (₱) can help guide your investment. For temporary renters, a high-end projector might represent a significant financial commitment that may not fit the layout of a future home. In this case, more portable and affordable options like smart light strips or adhesive LED panels may offer better value and easier relocation. For long-term condo owners, investing in a high-quality short-throw projector, proper wall preparation, and professional cable management can significantly increase the aesthetic value and daily enjoyment of the living space, making the higher initial cost in ₱ a worthwhile long-term investment in your home’s comfort.
Frequently Asked Questions (FAQ)
Do fake window projectors consume a lot of electricity?
The electricity consumption of a fake window projector depends primarily on its light source and wattage rating. Traditional lamp-based projectors typically consume between 150 to 300 watts per hour, which can add up if you run the device for several hours a day as ambient lighting. In contrast, modern LED and laser projectors are much more energy-efficient, often consuming between 30 to 100 watts per hour while producing similar brightness levels. To estimate your daily running costs, check the manufacturer’s wattage rating on the power adapter and multiply it by your average daily usage hours and your local electrical utility rate. Opting for an energy-efficient LED model is generally the most cost-effective choice for continuous daily use.
Can I use a projector if my condo has strict drilling rules?
Yes, you can easily set up a fake window projector without drilling holes or damaging your condo walls. If you want to position the projector high up, you can use a tall, freestanding bookshelf or an adjustable tension pole system that wedges securely between your floor and ceiling without screws. For lightweight portable projectors, heavy-duty adhesive mounting strips or removable wall clamps can secure small shelves to the wall safely. Additionally, using a compact tripod on a side table or dresser allows you to adjust the projection angle easily while keeping the setup completely mobile and renter-friendly.
How do I maintain the projector lens in a dusty room?
Maintaining optical clarity in a dusty environment requires gentle, regular cleaning to prevent scratches on the sensitive lens coating. Always turn off and unplug the projector, allowing it to cool down completely before cleaning, as heat can make the lens more vulnerable to damage. Use a manual air blower or a soft-bristled lens brush to gently remove loose dust particles from the surface. For smudges or fingerprints, use a clean, dry microfiber cloth designed specifically for camera lenses or eyeglasses, wiping gently in circular motions from the center outward. Avoid using harsh chemical solvents, household glass cleaners, or paper towels, as these can strip the protective optical coatings or scratch the lens; if a deeper clean is needed, consult the manufacturer’s manual for approved cleaning solutions.
Community discussion
Share your experience or ask a question. Comments are reviewed before publication.