
Selecting the right living room ceiling light is one of the most effective ways to counteract the closed-in feeling of a low-ceiling condo. In modern high-rise developments, residential units often feature concrete slab ceilings that limit the installation of recessed lighting. This structural constraint means that any fixture you choose must sit directly on the ceiling surface, making its physical profile and light distribution pattern critical to how spacious the room feels. By understanding how light interacts with physical boundaries, you can select a fixture that visually raises the ceiling and opens up your entire living space.
Creating an illusion of height is not just about choosing a small light; it requires a strategic combination of fixture depth, frame finish, light dispersion, and color temperature. A well-chosen ceiling light can transform a compact, shadow-filled living room into a bright, airy environment that feels larger than its physical dimensions. This guide provides a practical framework to help you evaluate your space, read product specification labels, and select a ceiling light that maximizes both headroom and visual openness.
Identify Why Your Low Ceiling Feels Cramped
Before purchasing a new living room ceiling light, it is helpful to analyze why your current setup might be making the space feel restricted. The visual weight of a light fixture plays a significant role in spatial perception. Bulky, low-hanging fixtures or designs with dark, heavy frames draw the eye downward, creating a strong visual anchor that emphasizes the low clearance of the ceiling. When your gaze is constantly pulled to a low-hanging point, the entire room can feel compressed and cave-like.
Products mentioned in this guide
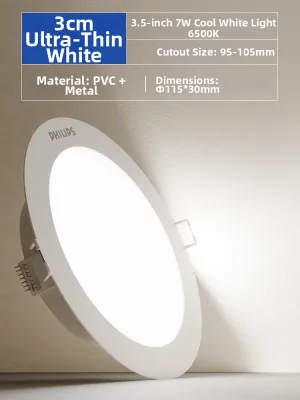
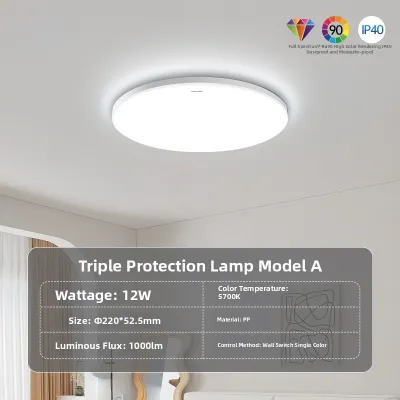
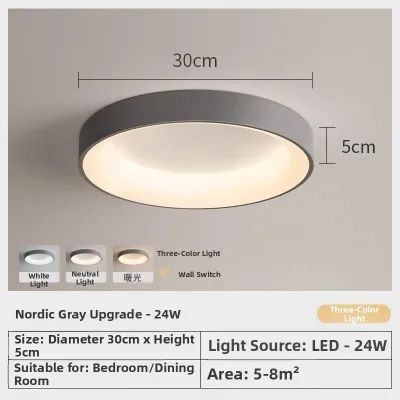
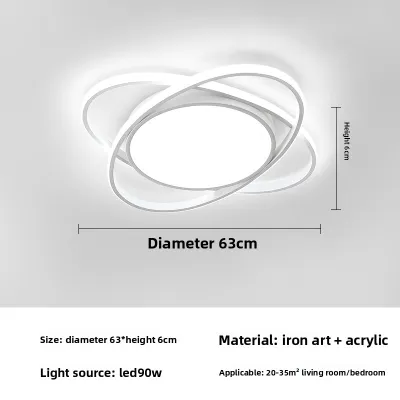
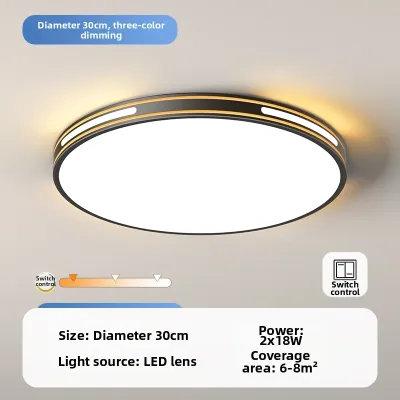
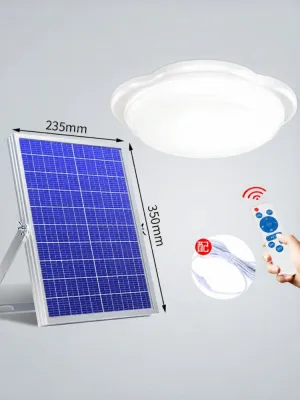
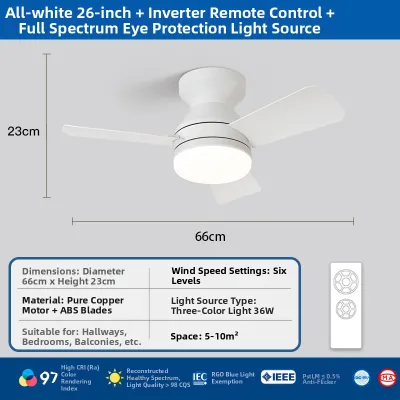
Prices are valid at publication and may change. Please refer to the product page for the latest price.
Shadow patterns also heavily influence how we perceive room boundaries. Fixtures with narrow beam angles project light in a tight, downward cone, leaving the upper walls and the ceiling itself in deep shadow. This spotlight effect makes the corners of the room recede into darkness, effectively shrinking the perceived boundaries of your living area. When the ceiling remains dark, it feels physically lower and closer to the floor.
Furthermore, dark wall surfaces and poorly lit corners absorb light rather than reflecting it, which pulls the walls inward visually. In compact condo living rooms, where natural light from windows or balconies may only reach certain areas, a ceiling light that fails to distribute light evenly across all surfaces compounds this issue. Identifying these lighting gaps allows you to choose a fixture specifically designed to wash the entire room in balanced, ambient light.
Select a Low-Profile Flush Mount and Reflective Finish
To preserve precious vertical clearance, prioritize ultra-thin flush mount ceiling lights over semi-flush or hanging designs. An ultra-thin flush mount, often measuring less than two inches in depth, sits tight against the ceiling surface, minimizing physical intrusion into the room. This low profile ensures that the fixture does not interfere with walking paths or the visual field, keeping the overhead space clear and unobstructed. When comparing fixtures, check the product dimensions on the packaging to ensure the total depth aligns with your ceiling height.

The finish of the fixture frame is another critical element in reducing visual clutter. Selecting a frame color that closely matches your ceiling paint—typically a flat white—allows the fixture to blend seamlessly into the background when turned off. If you prefer a metallic touch, opt for reflective finishes such as polished chrome, brushed nickel, or glossy white. These reflective surfaces bounce ambient light around the room, helping to brighten the ceiling area and create a subtle illusion of extra height.
Shade materials also dictate how light is dispersed and how heavy the fixture appears visually. Look for diffused acrylic or frosted glass shades on the product label, as these materials soften the light and distribute it evenly in all directions. Avoid heavy, opaque metal or dark fabric shades that block lateral light transmission, as they direct all illumination downward and leave the ceiling in shadow. A lightweight, translucent shade ensures the fixture itself looks airy and unobtrusive.
Choose Light Distribution and Color Temperature for Openness
The way a fixture distributes light is fundamental to expanding the perceived boundaries of a compact room. Prioritize wide-beam or edge-lit LED ceiling lights, which project light outward at a wide angle—often 120 degrees or more. Edge-lit technology guides light from the sides of the fixture across a diffuser panel, creating a smooth, even glow that minimizes harsh shadows and washes the ceiling and upper walls with light. This wide distribution pattern helps eliminate dark corners, making the walls feel as though they are receding.
Color temperature, measured in Kelvins (K), significantly affects the atmosphere and perceived spaciousness of your living room. In tropical climates, neutral white light (around 4000K) is often preferred because it provides a clean, refreshing ambiance that mimics natural daylight without the heat. This crisp light is highly effective at reflecting off light-colored walls, making the space feel open and clean. Alternatively, warm white light (around 3000K) offers a cozy, inviting feel, though it may make a very small room feel slightly more enclosed if the light distribution is too narrow. Evaluate your personal preference and existing wall colors to choose the temperature that best complements your space.
Dimmability is another essential feature to verify on the product specification label. A dimmable ceiling light, paired with a compatible wall dimmer switch, allows you to adjust the brightness level to suit different times of day and activities. During overcast rainy afternoons, you can run the light at full brightness to keep the room feeling open, while in the evening, you can dim the light to create a relaxed, comfortable environment without causing harsh glare in a compact space.
Size and Scale the Fixture for Your Compact Living Room
Sizing your living room ceiling light correctly is crucial to maintaining a balanced visual scale. A fixture that is too small will look lost and fail to provide adequate illumination, while a fixture that is too large will dominate the ceiling and make the room feel cramped. To find a suitable baseline diameter, measure the length and width of your living room area in meters. A practical guideline is to choose a fixture diameter that is roughly one-tenth of the room’s width; for example, a living area that is three meters wide can comfortably accommodate a fixture with a diameter of approximately 30 to 40 centimeters.
In open-plan condo layouts where the living, dining, and kitchen areas flow into one another, fixture placement requires careful planning. Instead of placing one massive light in the center of the entire open space, consider zoning your lighting. Install a low-profile flush mount over the main living room seating area, and use separate, coordinated low-profile fixtures or slim track lighting for the dining and kitchen zones. This approach defines distinct functional areas without cluttering the ceiling plane with heavy, oversized fixtures.
Before finalizing your purchase, always verify the weight limits of your ceiling junction box. Concrete ceilings in high-rise condominiums often feature pre-cast junction boxes that have strict weight capacities. Avoid heavy multi-ring LED fixtures, solid wood frames, or elaborate crystal flush mounts unless you have verified that your ceiling box can safely support the load. Checking these structural limits beforehand prevents installation delays and ensures long-term safety.
Verify Condo Electrical Safety and Installation Limits
Working with electrical fixtures in a condominium requires strict adherence to safety protocols and local building guidelines. First, verify that the fixture’s voltage rating matches your condo’s electrical supply, which is typically 220V to 240V. Installing a fixture designed solely for 110V without a transformer can damage the unit and pose a serious fire hazard. Check the manufacturer’s specification label carefully to confirm compatibility before proceeding.
Next, inspect the condition of the existing ceiling junction box. Turn off the main circuit breaker in your condo’s electrical panel before removing any old fixtures or touching exposed wires. Use a non-contact voltage tester to double-check that the power is completely isolated. Look for signs of wear, such as loose mounting screws, damaged threads, or corroded wires, which are common in humid tropical environments. Ensure the junction box is securely anchored to the concrete slab or ceiling joists to prevent the fixture from sagging or falling.
Understand the boundaries of do-it-yourself installation. While replacing a basic surface-mounted light on an existing, functional junction box is often straightforward, certain scenarios require professional assistance. If you encounter damaged or brittle wiring, lack a proper grounding wire, or need to drill into the concrete slab to install new anchors, stop immediately. Hiring a licensed electrician ensures that the installation complies with electrical codes, preserves your condo’s warranty, and guarantees a safe, secure setup.
Frequently Asked Questions (FAQ)
Can I use a chandelier in a low-ceiling condo living room?
Yes, but only under specific conditions that preserve physical clearance and visual comfort. For safety and comfort, maintain a minimum clearance of at least 2.1 meters (7 feet) from the floor to the bottom of any hanging fixture along walking paths. If you plan to place a chandelier directly over a coffee table where people will not walk, you can afford a slightly lower clearance, though it may still create visual clutter. As a space-saving alternative, look for modern semi-flush or flush-mount chandeliers that feature low-profile, multi-directional arms to provide decorative flair without hanging too low.
Do recessed lights work better than flush mounts for low ceilings?
Recessed lights are excellent for low ceilings because they sit completely flush with the ceiling plane, but they require a hollow ceiling cavity, such as a dropped gypsum board ceiling. In many condos with solid concrete slab ceilings, installing recessed lights is not possible without constructing a false ceiling, which actually reduces your overall room height by several inches. In such cases, an ultra-thin surface-mounted flush mount is a highly practical choice because it preserves the maximum physical height of the room. For the best results, you can combine a central flush mount with slim, surface-mounted track lights or floor lamps to layer your lighting without sacrificing headroom.
How do I clean a flush mount light safely?
To clean your flush mount ceiling light safely, always start by turning off the wall switch and isolating the power at your condo’s main circuit breaker. Allow the fixture and its bulbs to cool completely to avoid burns or thermal shock to glass components. Use a stable step ladder positioned on a flat, even surface to reach the fixture comfortably. For routine maintenance, gently dust the exterior with a dry microfiber cloth. If the shade requires deeper cleaning to remove dust or insect debris, refer to the manufacturer’s instructions; typically, acrylic or glass shades can be removed and wiped with a soft, damp cloth and mild soap, then dried completely before reinstallation.
Community discussion
Share your experience or ask a question. Comments are reviewed before publication.