
Selecting the right solar-powered security light for your garden requires balancing weather resistance, power efficiency, and reliable motion detection. In tropical environments like the Philippines, where heavy downpours, high humidity, and intense heat are common, these factors determine whether an outdoor light performs consistently through the night or fails after the first major storm. By focusing on verifiable technical specifications rather than generic marketing promises, you can build a dependable shortlist of fixtures that keep your outdoor spaces well-lit and secure.
Evaluating outdoor lighting involves understanding how environmental exposure affects electrical components. Because solar security lights operate entirely outdoors, they must withstand constant exposure to ultraviolet rays, fluctuating temperatures, and moisture. This guide breaks down the essential criteria for selecting a durable, high-performing waterproof solar motion sensor light tailored to your garden’s layout and local weather conditions.
Understanding Waterproof Ratings for Outdoor Garden Lights
When shopping for outdoor garden lights, generic terms like “waterproof” or “weather-resistant” offer no guarantee of actual durability. Instead, you must look for the Ingress Protection (IP) rating, which is a standardized scale measuring a fixture’s resistance to solids and liquids. The rating consists of two digits: the first measures protection against solid objects like dust, while the second measures protection against water penetration. For outdoor security lights, the liquid protection digit is the most critical factor to analyze.
Products mentioned in this guide
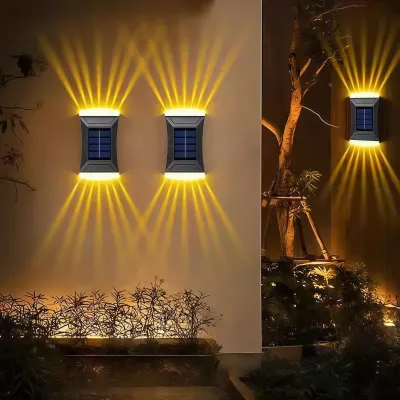
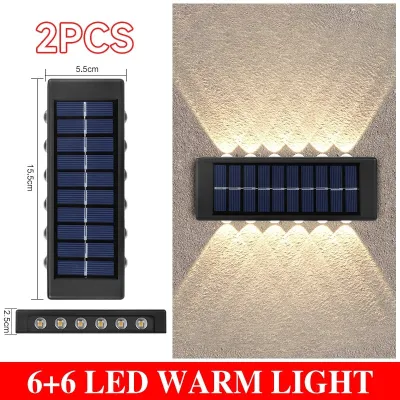
Prices are valid at publication and may change. Please refer to the product page for the latest price.
An IP65 rating is the standard baseline for outdoor garden lighting. This rating indicates that the fixture is completely dust-tight and can withstand low-pressure water jets from any direction, making it highly capable of handling normal rainfall and garden hose sprays. However, if your light will be mounted in an exposed area subject to severe tropical storms, typhoons, or high-wind rain, upgrading to an IP66-rated fixture is highly recommended. IP66 ratings ensure the housing can resist powerful, high-pressure water jets, preventing moisture from forcing its way past the rubber seals during intense downpours.
For low-lying garden areas, pathways prone to temporary flooding, or locations near ground-level sprinklers, look for IP67-rated fixtures. An IP67 rating means the light can withstand temporary submersion in water up to one meter deep for up to thirty minutes. While you should avoid permanently installing solar lights in areas with standing water, an IP67 rating provides an extra layer of security against heavy ground-level splashing and localized pooling during the monsoon season.
To verify these claims, always check the physical product packaging, embossed markings on the light housing, or the manufacturer’s official specification sheet. High-quality manufacturers will clearly display the certified IP rating rather than relying on vague marketing descriptions. Additionally, inspect the physical construction of the light; look for thick silicone or rubber gaskets around the battery compartment, lens cover, and power switch, as these seals are the primary defense against high humidity and moisture ingress.
Evaluating Solar Panel and Battery Capacity for Reliable Security
A solar security light is only as reliable as its power generation and storage system. The solar panel, which converts sunlight into electrical energy, generally comes in two main types: monocrystalline and polycrystalline. Monocrystalline panels are characterized by their dark, uniform appearance and offer the highest energy conversion efficiency, typically converting around 15% to 22% of sunlight into usable power. This high efficiency makes them the preferred choice for regions that experience frequent overcast days, afternoon rain showers, or partial shading from nearby trees.

Polycrystalline panels, which have a blue, speckled appearance, are more cost-effective to manufacture but have a lower conversion efficiency, usually ranging from 13% to 16%. While they perform adequately in areas with consistent, unobstructed sunlight, they require a larger surface area to generate the same amount of power as a monocrystalline panel. If your garden has limited space or experiences variable weather, investing in a monocrystalline solar panel ensures your light’s battery receives a sufficient charge even on cloudy or rainy days.
Battery chemistry and capacity determine how long the light can operate after the sun goes down. Most modern solar security lights use either Lithium-ion (Li-ion) or Lithium Iron Phosphate (LiFePO4) batteries. LiFePO4 batteries are highly regarded for outdoor applications because they have a significantly longer lifespan, often lasting for thousands of charge-discharge cycles, and they tolerate high ambient temperatures much better than standard Li-ion batteries. This thermal stability is particularly important in tropical climates where daytime temperatures can cause enclosed light housings to heat up rapidly.
When reviewing battery specifications, look for the capacity measured in milliampere-hours (mAh) or watt-hours (Wh). A higher capacity allows the battery to store more energy, providing a buffer for consecutive rainy days when solar charging is minimal. Be skeptical of product descriptions that promise multiple nights of runtime but fail to list the battery capacity or panel wattage. A reliable security light should have a battery capacity that is proportional to its light output; for example, a light emitting 500 lumens should ideally be paired with a battery of at least 2000mAh to ensure consistent performance throughout the night.
Matching Motion Sensor Range and Lighting Modes to Your Garden Layout
To maximize security and energy efficiency, your light’s motion sensor must align with the physical layout of your garden. Most solar security lights utilize Passive Infrared (PIR) sensors, which detect movement by measuring changes in infrared radiation (heat signatures) within their field of view. When a person, animal, or vehicle enters the detection zone, the sensor triggers the light to turn on or brighten.
When evaluating PIR sensors, pay close attention to the detection angle and the maximum detection distance. Standard sensors typically offer a detection angle of 120 degrees, which is ideal for monitoring narrow pathways, side gates, or specific entry points. If you need to cover a wider area, such as a broad driveway or an open backyard, look for multi-sensor designs or wide-angle lenses that offer up to 270 degrees of coverage. The detection distance usually ranges from 3 to 10 meters; ensure this range matches the distance from the mounting location to the area you wish to monitor.
Matching the light’s operational modes to your security needs is equally important for managing battery consumption. Most high-quality solar motion lights offer three primary modes:
- Motion-Activated Only: The light remains completely off during the night and only switches to full brightness when the PIR sensor detects movement. This mode is highly energy-efficient and is ideal for conserving battery power during prolonged periods of rainy weather.
- Dim-to-Bright: The light emits a low, ambient glow continuously from dusk to dawn, instantly switching to maximum brightness when motion is detected. This provides continuous low-level visibility for pathways while maintaining a strong security deterrent when someone approaches.
- Constant Low Light: The light stays on at a set, medium brightness level throughout the night, bypassing the motion sensor entirely. This mode drains the battery quickly and should only be used if your light has a large solar panel and receives maximum daily sunlight.
To prevent the light from turning on unnecessarily, careful positioning is required. Avoid pointing the PIR sensor directly at large trees, heavy foliage, or busy streets, as wind-blown leaves and passing vehicles can cause frequent false triggers. If your light is constantly turning on and off due to environmental movement, it will rapidly deplete the battery, leaving you without security lighting when you need it most. Some advanced models feature adjustable sensitivity dials or physical blinders to help you fine-tune the detection zone.
Building Your Shortlist: Key Specifications to Check Before Buying
Before purchasing a solar security light from a local hardware retailer or an online marketplace, compile a structured checklist to compare different models. Start by verifying the actual lumen output rather than relying on exaggerated claims. Lumens measure the total amount of visible light emitted by the fixture. For general garden pathways and entryways, a light output of 300 to 600 lumens is usually sufficient. For high-security areas, driveways, or large open lawns, look for fixtures that deliver 800 to 1,200 lumens.
Color temperature, measured in Kelvin (K), is another critical specification that affects both visibility and garden aesthetics. Cool white light (5000K to 6500K) provides a bright, high-contrast illumination that is excellent for security purposes, as it makes details easier to see and mimics daylight. Warm white light (2700K to 3000K) offers a softer, more inviting glow that blends seamlessly with decorative landscaping but may not provide the same level of crisp visibility for security cameras. Choose the color temperature that best balances your security requirements with your aesthetic preferences.
Inspect the physical build quality and mounting hardware of the candidates on your shortlist. The housing should be constructed from UV-stabilized ABS plastic or rust-resistant aluminum to prevent cracking, fading, and degradation under intense sunlight. Ensure the mounting brackets are robust and allow for independent adjustment of both the solar panel and the light heads. Adjustable heads enable you to angle the solar panel toward the path of the sun while directing the light beam precisely where illumination is needed.
Evaluate the price-to-specification ratio in local currency (₱) to ensure you are getting genuine value. While budget-friendly options priced between ₱300 and ₱500 are widely available, they often feature lower-capacity batteries, plastic lenses that yellow over time, and basic IP64 or lower weatherproofing. Investing in a mid-range fixture priced between ₱1,000 and ₱2,500 typically yields a product with a verified IP65 or IP66 rating, a durable monocrystalline panel, a high-capacity LiFePO4 battery, and a reliable manufacturer warranty of at least one year.
Finally, review the warranty terms and the availability of replacement parts. A manufacturer that stands behind their product with a clear return policy and a multi-month warranty is a strong indicator of build quality. Additionally, check if the battery is user-accessible and replaceable. Over several years of continuous use, all rechargeable batteries eventually lose their capacity; being able to replace the battery pack rather than discarding the entire fixture is a highly cost-effective and environmentally friendly feature.
Installation and Maintenance Checks for Long-Term Performance
Proper installation and routine maintenance are essential to preserve your solar light’s waterproofing and ensure optimal charging efficiency. When choosing a mounting location, prioritize an area that receives at least 4 to 6 hours of direct, unobstructed sunlight daily. Avoid placing the solar panel directly under deep roof eaves, thick tree canopies, or in the shadow of adjacent walls, as even partial shading can drastically reduce the panel’s power output.
When mounting the fixture to a wall, fence, or post, always use the appropriate anchors and screws provided by the manufacturer. If you are drilling into concrete, brick, or masonry, ensure you use a hammer drill with the correct bit size and insert wall plugs to create a secure, vibration-resistant hold. For installations at height, always use a stable ladder, work with an assistant, and ensure the power to any nearby fixed electrical wiring is isolated to prevent accidental contact. Ensure the mounting bracket is fastened tightly to prevent the light from shifting or vibrating during strong winds.
To maintain the light’s performance, establish a simple cleaning routine. Over time, dust, pollen, bird droppings, and salt residue can accumulate on the surface of the solar panel, blocking sunlight and reducing charging efficiency. Wipe the panel clean every few months using a soft, damp microfiber cloth and clean water. Avoid using abrasive scrubbing pads, harsh chemical solvents, or high-pressure washers, as these can scratch the protective coating of the panel or damage the waterproof seals.
During your routine cleaning, take a moment to inspect the physical condition of the fixture. Check the lens cover for any signs of cracking or yellowing, and ensure the rubber seals around the battery compartment and switches remain pliable and intact. If you notice any loose screws or brackets, tighten them immediately to prevent wind damage. Taking these simple preventative steps will significantly extend the operational lifespan of your garden security light.
Frequently Asked Questions (FAQ)
Can I install a solar motion light under a dense tree canopy or deep eave?
Installing a standard, integrated solar light directly under a dense tree canopy or deep eave is not recommended, as the lack of direct sunlight will prevent the battery from charging fully. This results in significantly reduced runtime, dim light output, or a complete failure to turn on at night. If you must illuminate a shaded area, look for a split-panel solar light. These models feature a separate solar panel connected to the light fixture via a long, weatherproof cable, allowing you to mount the panel in a sunny location on your roof or fence while placing the light fixture exactly where you need security coverage.
How do I test the motion sensor before permanently mounting the light?
To test the motion sensor and light coverage before drilling permanent holes, temporarily secure the light to your intended mounting location using heavy-duty zip ties, removable mounting tape, or by having an assistant hold it safely. First, ensure the light has received a full day of charge in direct sunlight. Because solar lights only activate in the dark, you must cover the solar panel completely with a piece of cardboard or a dark cloth to simulate nighttime. Walk across the detection zone at various distances and angles to verify that the sensor triggers reliably, and adjust the physical angle of the light head until you achieve the desired coverage.
What should I do if the light stops working after heavy monsoon rains?
If your light stops working after a severe storm, turn off the power switch immediately to prevent electrical short circuits. Uninstall the fixture and inspect it for visible signs of water accumulation or condensation behind the lens. If moisture has penetrated the housing, carefully open the battery compartment, remove the battery if it is designed to be user-replaceable, and place the components in a warm, dry, and well-ventilated indoor area to dry completely for 24 to 48 hours. Do not attempt to turn on or charge the unit while moisture is present. Once fully dry, reassemble the unit, check that the rubber seals are properly seated, and test its operation; if it still fails to function, contact the manufacturer to check if the issue is covered under warranty.
Community discussion
Share your experience or ask a question. Comments are reviewed before publication.