
Selecting the ideal ceiling light for a low-ceiling condominium requires a careful balance between vertical clearance and horizontal proportions. In compact living spaces, a poorly sized fixture can quickly make a room feel cramped, visually cluttered, or physically oppressive. To maintain an open, airy atmosphere, you must select a fixture with a shallow profile height that preserves headroom, while calculating the correct diameter to ensure the light scales naturally with your room’s floor area.
By understanding how flush mount profiles interact with typical condo dimensions, you can make informed design and structural choices. This guide details how to measure your space, calculate the perfect fixture diameter, select visually light designs, and navigate the specific electrical and installation challenges common in concrete-slab condominium units.
Understanding Ceiling Clearance and Flush Mount Profiles
Condominium units in the Philippines frequently feature ceiling heights ranging from 2.4 to 2.7 meters. In many modern developments, structural concrete beams, utility ducts, or dropped gypsum boards in entryways and bathrooms can reduce this clearance even further, sometimes down to 2.3 meters. A ceiling height of 2.4 meters (approximately 7 feet, 10 inches) or lower is the practical threshold where vertical clearance becomes a primary concern for safety, comfort, and visual balance.
Products mentioned in this guide
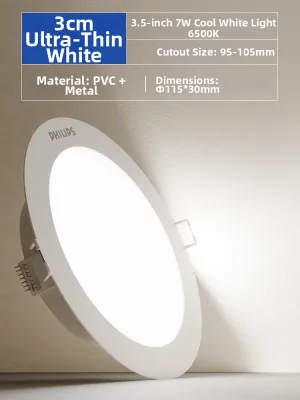
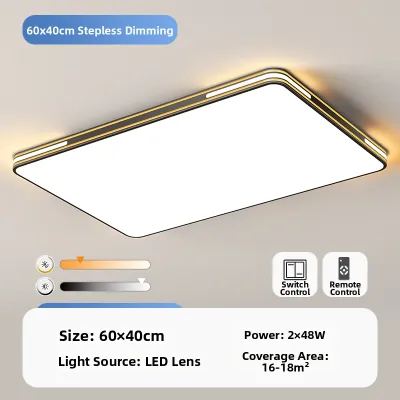
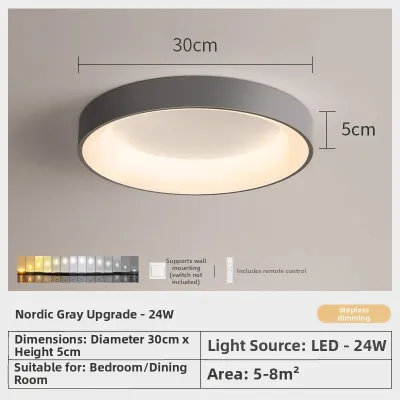
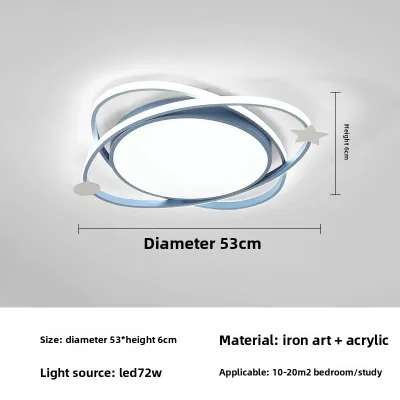
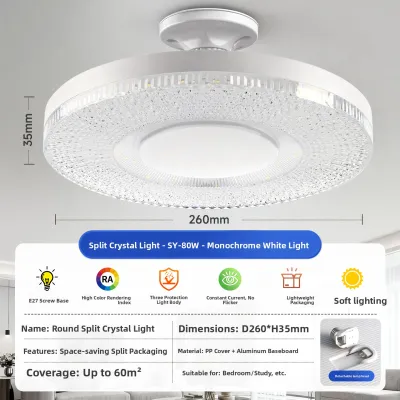
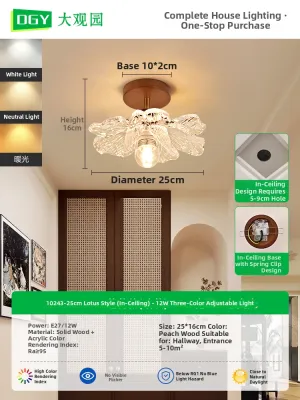
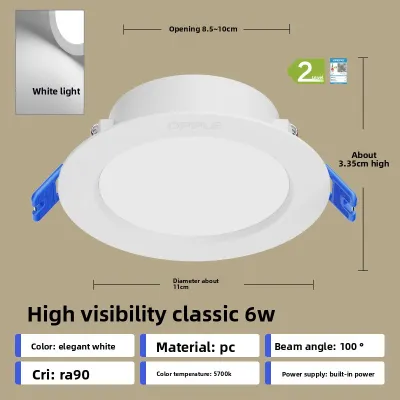
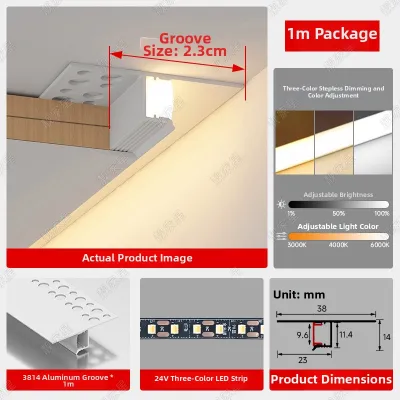
Prices are valid at publication and may change. Please refer to the product page for the latest price.
When choosing a ceiling light for these restricted heights, the physical profile of the fixture is your most critical decision. True flush mount fixtures are designed to sit directly against the ceiling surface with zero gap, typically keeping their total vertical drop under 5 to 10 centimeters. In contrast, semi-flush mount fixtures feature a small stem or collar that suspends the light body, creating a gap of 10 to 25 centimeters between the fixture and the ceiling. For ceilings under 2.4 meters, true flush mounts—especially ultra-slim integrated LED discs—are highly recommended to maximize vertical clearance and prevent a claustrophobic atmosphere.
To determine your actual clearance, measure the distance from the finished floor to the lowest point of the ceiling slab. Be sure to account for thick floor coverings, such as high-pile rugs, laminate underlayments, or raised platform beds, which elevate the walking surface and reduce headroom. Additionally, note the location of structural beams or adjacent ceiling fans; maintaining a consistent visual plane across these elements prevents the room from feeling disjointed.
Matching Light Diameter to Room Dimensions
To ensure your ceiling light looks balanced, you must match its horizontal scale to the overall dimensions of the room. A fixture that is too wide will overpower a compact space, while a fixture that is too small will look lost and fail to distribute light effectively. A reliable industry rule of thumb is to measure the room’s length and width in feet, add those two numbers together, and convert the sum directly into inches to find the ideal fixture diameter.

For example, a typical condo bedroom measuring 3 meters by 3 meters is roughly 10 feet by 10 feet. Adding 10 and 10 yields 20, which means a ceiling light with a diameter of approximately 20 inches (about 50 centimeters) will be visually proportional. If your room is rectangular, such as a 3-meter by 4-meter study (roughly 10 feet by 13 feet), the ideal diameter would be around 23 inches (approximately 58 centimeters).
When applying these proportions, adjust the scale based on the specific functional zones of your condo:
- Narrow Hallways and Foyers: Stick to compact diameters between 20 and 30 centimeters. Because these spaces are narrow, a wider fixture will crowd the walls and disrupt the flow of passage.
- Compact Bedrooms and Bathrooms: Aim for mid-sized diameters between 30 and 40 centimeters. This ensures adequate light coverage without dominates the central ceiling space above the bed or vanity.
- Open-Plan Living and Dining Areas: In combined studio or one-bedroom layouts, you can opt for larger diameters between 45 and 60 centimeters. However, to keep a large fixture from looking heavy in a low-ceiling space, ensure its vertical profile remains under 8 centimeters.
In larger low-ceiling rooms, relying solely on a single wide flush mount can lead to harsh, flat lighting. Instead of choosing an excessively large central fixture to cover the entire space, select a moderately sized flush mount for general ambient light and supplement it with layered accent lighting, such as slim wall sconces or low-profile floor lamps.
Visual Proportions and Design Choices for Cramped Spaces
The visual weight of a ceiling light—how heavy or prominent it appears to the eye—is just as important as its physical measurements. Color choices and finishes play a major role in this perception. Selecting a flush mount with a frame or canopy that matches the color of your ceiling (typically matte white) allows the fixture to blend seamlessly into the background, reducing visual clutter and making the ceiling appear higher. Conversely, high-contrast finishes like matte black, industrial brass, or dark bronze draw the eye upward; while stylish, these should be used sparingly and only in ultra-thin profiles to avoid making the ceiling feel lower.
Shape and structural design also dictate how a fixture impacts a room’s volume. Wide, flat, or geometric designs—such as square or rectangular low-profile panels—spread their visual weight horizontally across the ceiling plane. This is generally much more effective in low spaces than downward-projecting dome lights or heavy, ornate glass bowls, which concentrate weight in a single downward point and emphasize the lack of vertical height.
Material selection is another key factor in tropical condo environments. Edge-lit LED panels or fixtures featuring frosted acrylic or polycarbonate diffusers are excellent choices. These materials provide soft, even, glare-free light across the entire room, eliminating the dark corners and harsh shadows that make small spaces feel enclosed. Additionally, high-quality acrylic diffusers are highly practical in humid tropical climates, as they do not collect condensation or rust over time like cheap iron or steel frames.
Common Sizing and Placement Mistakes to Avoid
One of the most frequent errors in condo lighting is choosing a fixture based solely on its design without verifying its physical depth. Homeowners often purchase beautiful semi-flush mounts only to realize during installation that the drop height interferes with tall family members or blocks the swing of nearby wardrobe doors. Always measure the clearance of high-traffic pathways and door swings before finalizing your purchase.
Another common mistake is ignoring the visual center of functional zones in irregular or open-plan condo layouts. In many modern developments, the main electrical junction box is pre-cast into the concrete ceiling directly in the center of the physical room. However, your furniture layout—such as a dining table pushed closer to a wall or a sofa offset to one side—might create a completely different visual center. Installing a large, heavy flush mount directly in the physical center of an asymmetrical layout can make the entire space feel unbalanced and disorganized.
Additionally, pay close attention to the size of the fixture’s mounting canopy or base plate. Some flush mounts feature relatively small decorative shades but rely on bulky, deep metal backplates to house drivers and wiring connections. This added depth can make a low-profile light look surprisingly clumsy once mounted. Always check the manufacturer’s detailed specification sheet to confirm both the overall depth of the fixture and the height of the mounting bracket.
Condo Installation and Electrical Considerations
Installing ceiling lights in condominiums presents unique structural challenges, primarily because most modern units are constructed with solid concrete pre-cast slabs. Unlike traditional timber-framed homes with hollow ceiling cavities, you cannot easily cut holes to recess wiring, drivers, or junction boxes into a concrete condo ceiling. If your unit does not have a dropped gypsum ceiling, you must use surface-mounted utility boxes or run wiring through surface-mounted plastic or metal conduits (molding).
Because concrete ceilings require drilling for installation, you must pay close attention to the weight of your chosen fixture. Heavy flush mounts made of thick glass, solid brass, or crystal require robust anchoring systems, such as concrete expansion bolts or heavy-duty plastic tox plugs. Never rely on standard lightweight wall plugs for suspended ceiling loads. Before purchasing a heavy fixture, consult your condominium’s property management office (PMO) to verify their guidelines regarding structural drilling, as some buildings strictly limit drilling depth to protect post-tension structural cables embedded in the concrete slabs.
Before undertaking any installation or replacement, prioritize safety by following these essential steps:
- Isolate the Power: Turn off the main circuit breaker at your unit's electrical panel. Never rely solely on the wall switch to cut the power.
- Verify Voltage and Hertz: Ensure the fixture and any integrated LED drivers are rated for the standard Philippine electrical supply of 220V to 230V at 60Hz.
- Check Wattage Limits: Verify that the wattage of your light bulbs or integrated LED module does not exceed the maximum rating marked on the fixture's socket or driver.
- Confirm Electrical Certification: Look for safety certification marks, such as the Philippine Standard (PS) mark or Import Commodity Clearance (ICC) sticker, to ensure the fixture complies with local safety regulations.
If your installation requires modified fixed wiring, concrete drilling, or working at heights, or if you are unsure of the existing wiring conditions, always stop and hire a licensed electrician to complete the work safely and in compliance with local building codes.
Frequently Asked Questions (FAQ)
Can I use a semi-flush mount light if my condo ceiling is slightly low?
You can use a semi-flush mount light, but only under specific conditions. If your condo ceiling is around 2.5 to 2.6 meters high, a semi-flush mount with a very short stem—dropping no more than 15 centimeters—can add elegant visual interest. However, to maintain safety and comfortable headroom, restrict these fixtures to zones where people do not walk directly underneath, such as centered over a dining table, a kitchen island, or a coffee table. For high-traffic pathways, entryways, and ceilings below 2.4 meters, stick strictly to true flush mounts.
Do flush mount LED ceiling lights provide enough brightness for a whole room?
Yes, modern integrated LED flush mount ceiling lights can easily provide sufficient brightness for an entire room, often delivering between 1,500 and 3,000 lumens depending on the model’s wattage. To ensure adequate illumination, verify the lumen output and select a color temperature that matches the room’s function—such as warm white (2700K to 3000K) for cozy bedrooms or cool white (4000K to 5000K) for kitchens and workspaces. Because a single central light can sometimes create a flat appearance in low-ceiling rooms, pairing your flush mount with secondary light sources like floor lamps or task lights will create a more balanced and inviting atmosphere.
Community discussion
Share your experience or ask a question. Comments are reviewed before publication.