
Living in a modern condominium in metropolitan Philippine cities often means adapting to compact, functional spaces. One of the most common architectural features of these high-rise units is a lower ceiling height, typically ranging from 2.4 meters down to 2.2 meters. When overhead space is limited, choosing the wrong room lights can make a room feel cramped, cast harsh shadows, or even present a physical hazard for taller residents. Flush mount ceiling lights offer a practical solution by sitting directly against the ceiling surface, preserving precious headroom while distributing light evenly across the living space.
Selecting the ideal fixture requires balancing aesthetic preferences with strict technical and structural realities. In the tropical climate of the Philippines, where humidity levels can be high and concrete slab construction is standard, your choice of lighting must also account for heat dissipation, electrical safety, and building regulations. By understanding how to measure your space, evaluate technical specifications, and navigate condo-specific installation rules, you can transform a low-ceiling unit into a bright, airy, and visually spacious home.
Assessing Ceiling Constraints and Room Dimensions
Before browsing online catalogs or visiting local home improvement centers, you must obtain precise measurements of your condo’s vertical and horizontal dimensions. To calculate your maximum allowable fixture profile, use a reliable steel tape measure to find the exact distance from the finished floor to the concrete ceiling slab or gypsum board drop ceiling. As a general rule of thumb for safety and comfort, the bottom of any ceiling fixture should remain at least 2.1 meters above the floor. Subtracting this minimum clearance from your total ceiling height gives you the absolute maximum drop or thickness your new room lights can have. For example, if your ceiling is 2.4 meters high, your fixture should ideally have a profile of 30 centimeters or less; if your ceiling is a tighter 2.2 meters, you will want an ultra-slim profile of 10 centimeters or less.
Products mentioned in this guide
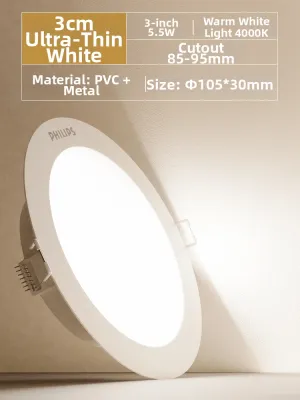
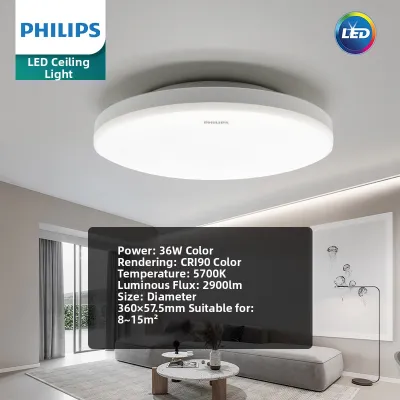
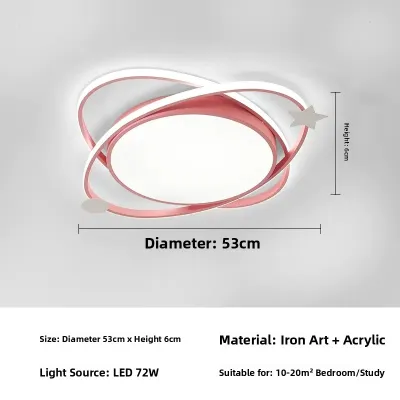
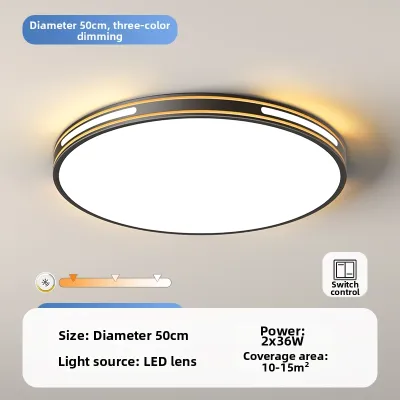
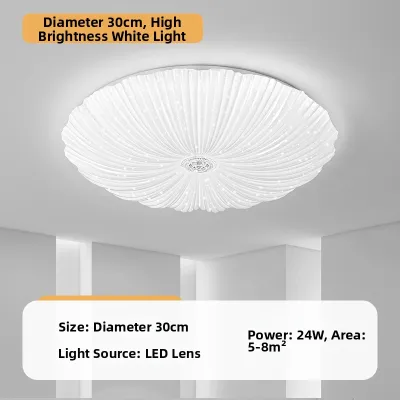
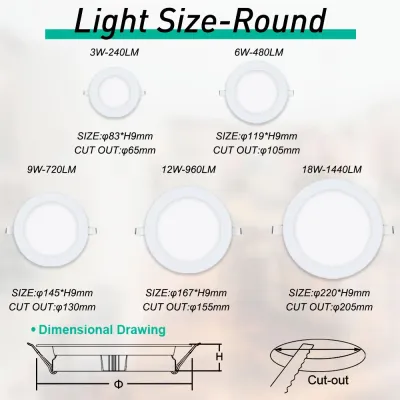
Prices are valid at publication and may change. Please refer to the product page for the latest price.
Beyond basic height, you must inspect the ceiling surface for structural obstacles that are common in high-rise developments. Walk around the room and note the locations of exposed concrete beams, fire sprinkler heads, smoke detectors, and air conditioning vents or ducts. Fire sprinklers and smoke detectors must never be blocked or obstructed by a light fixture, as doing so violates building safety codes and compromises your safety. If a junction box is located close to a structural beam, a wide-diameter fixture might not sit flush against the ceiling, leaving an unsightly gap or putting uneven pressure on the mounting bracket.
Finally, evaluate the overall floor area of the room to determine the appropriate diameter of the fixture. A light that is too small will look lost and fail to illuminate the corners, while a fixture that is too large will visually overwhelm a compact condo living room or bedroom. To find a balanced diameter, you can use a simple design guideline: measure the length and width of the room in meters, add those two numbers together, and multiply the sum by 10 to get a starting fixture diameter in centimeters. For a typical 3-meter by 4-meter condo bedroom, a fixture with a diameter of approximately 70 centimeters or smaller will provide a balanced visual scale and an appropriate light spread.
Essential Technical Specifications for Low-Profile Room Lights
When evaluating potential room lights, you must carefully review the technical specifications printed on the product packaging or detailed in the manufacturer’s specification sheet. The first dimension to verify is the total drop or profile height. True flush mount fixtures typically have a depth of less than 10 centimeters, allowing them to sit tight against the ceiling. Avoid semi-flush mounts, which feature a small stem or gap between the canopy and the light source, as even a minor 15-centimeter drop can make a low ceiling feel significantly lower and increase the risk of accidental contact during daily activities.

Electrical compatibility is another critical factor that requires careful verification. In the Philippines, the standard residential electrical system operates at 220V to 240V at a frequency of 60Hz. Ensure that any fixture you purchase is explicitly rated for this voltage range to prevent premature driver failure, flickering, or electrical hazards. Additionally, check the maximum wattage limit of the fixture, especially if you plan to use replaceable bulbs. Exceeding the recommended wattage can cause excessive heat buildup within the enclosed housing of a flush mount, which can damage the ceiling material, degrade the fixture’s wiring insulation, and shorten the lifespan of the light source.
Lumen output and color temperature directly influence how spacious and comfortable your condo feels. Lumens measure the total amount of visible light emitted by a source, and compact spaces require careful calibration to avoid both dim corners and blinding glare. For a standard condo living area, aim for a light output that provides sufficient brightness without over-illuminating the space. Color temperature, measured in Kelvin (K), should match the function of the room. Warm white (2700K to 3000K) is ideal for creating a cozy, relaxing atmosphere in bedrooms, while cool white (4000K) or daylight (6500K) is better suited for task-oriented areas like kitchens and study nooks.
You must also decide between integrated LED fixtures and those with replaceable bulb sockets, such as the standard E27 base. Integrated LED flush mounts are highly popular for low-ceiling condos because they do not require bulky bulb sockets, allowing manufacturers to design incredibly slim, low-profile housings. However, these fixtures require replacing the entire unit if the LED driver or module fails. On the other hand, fixtures with replaceable bulb sockets are slightly deeper but offer the convenience of easily swapping out individual bulbs when they burn out, allowing you to adjust the brightness and color temperature over time without replacing the entire fixture.
Design Strategies to Maximize Space and Illumination
The visual design of your ceiling fixture plays a significant role in how large or small your condo feels. To create an illusion of height and openness, prioritize slim, minimalist profiles with clean lines. Fixtures with light-colored finishes, such as matte white, brushed silver, or light natural wood, tend to blend seamlessly into typical white condo ceilings. This reduces the visual weight of the fixture, making the ceiling appear higher and less cluttered. Dark, heavy, or highly contrasting finishes can draw the eye downward, emphasizing the low clearance and making the room feel more enclosed.
The choice of diffuser material is equally important for comfort and spatial perception in low-ceiling rooms. Because the light source is closer to your eye level than it would be in a high-ceiling house, direct glare can cause eye strain and discomfort. Look for flush mounts equipped with high-quality frosted glass or acrylic diffusers. These materials soften the light and scatter it evenly across the room, eliminating harsh shadows and hot spots. Acrylic diffusers are particularly well-suited for the Philippine climate because they are lightweight, shatter-resistant, and less prone to trapping moisture or attracting insects compared to complex glass enclosures.
When selecting a design, avoid ornate, heavy, or downward-pointing elements such as crystals, dangling metalwork, or multi-tiered structures. These design features not only physically reduce headroom but also disrupt the clean sightlines of a compact room. Instead, opt for flat, disc-shaped, or shallow dome designs that direct light both downward and slightly outward toward the walls. Illuminating the upper portion of the walls helps wash the entire room in light, which visually expands the boundaries of the space and makes the ceiling feel lifted.
Electrical Compatibility and Safe Installation Boundaries
Installing a new ceiling fixture in a condominium requires a clear understanding of safety protocols and building regulations. Before undertaking any electrical work, you must locate your condo unit’s main electrical panel board and isolate the power to the specific lighting circuit by switching the circuit breaker to the “off” position. Never rely solely on the wall switch to cut the power, as some wiring configurations may still leave live current at the ceiling junction box. Use a reliable non-contact voltage tester to confirm that the wires are completely dead before touching them.
Next, inspect the existing ceiling junction box to ensure it is securely anchored and capable of supporting the weight of your new fixture. In many Philippine condos, ceilings are made of solid concrete slabs or suspended gypsum boards. If the junction box is mounted directly into concrete, it can typically support standard flush mount fixtures easily. However, if you are mounting to a suspended gypsum ceiling, you must verify that the junction box is attached to the metal framing studs rather than just the drywall plasterboard, as drywall alone cannot safely bear the weight of a permanent light fixture over time.
It is also essential to consult your condominium administration or property management office before starting any installation. Most condo associations have strict guidelines regarding structural modifications, drilling into post-tensioned concrete slabs, and electrical alterations. You may need to submit a work permit application, coordinate with the building’s maintenance team, or hire an accredited contractor. If your condo has older wiring, lacks a grounding wire, or if the installation requires drilling new holes into a concrete ceiling slab, stop immediately and hire a licensed electrician. A professional installer ensures compliance with the Philippine Electrical Code and prevents accidental damage to hidden utility conduits inside the concrete.
Building Your Shortlist and Verifying Purchases
Once you have measured your space and understood the technical requirements, you can begin building a shortlist of potential room lights. Create a comparison checklist that includes the exact physical dimensions of each fixture, its total drop height, voltage rating, and lumen output. Cross-reference these specifications with your measured ceiling clearance and the size of your existing junction box to guarantee a perfect fit. This step is crucial when shopping online, where product photos can sometimes make a fixture look smaller or slimmer than it actually is in reality.
When comparing options, look at products available at reputable local hardware stores and established online marketplaces. Compare prices in ₱, keeping in mind that extremely cheap, unbranded fixtures may lack proper electrical certifications or use low-quality drivers that flicker and fail quickly. Check the seller’s return policies and warranty terms, especially for integrated LED fixtures, which should ideally come with at least a one-year manufacturer’s warranty. Reading customer reviews can also provide valuable insights into the ease of installation and the actual color quality of the light.
Finally, before finalizing your purchase, confirm that the product package includes all necessary mounting hardware, such as brackets, screws, wire connectors, and a clear, detailed installation manual. Having the correct mounting bracket is particularly important for concrete ceilings, as standard brackets may require specific masonry wall plugs to secure the fixture safely. By verifying these details beforehand, you can ensure a smooth, safe, and successful installation that enhances both the beauty and functionality of your low-ceiling condo.
Frequently Asked Questions (FAQ)
Can I install a flush mount light if my condo ceiling has no existing junction box?
Installing a permanent flush mount light requires a certified, securely anchored junction box to house the electrical wire connections safely. A junction box protects your ceiling structure from heat and potential electrical sparks, making it a mandatory safety requirement under the Philippine Electrical Code. You should never attempt to surface-mount a heavy light fixture or use temporary adhesives, double-sided tape, or exposed wiring runs across the ceiling, as these methods pose severe fire and physical safety hazards. If your room lacks a ceiling light point, consult your building management and hire a licensed electrician to safely route new wiring through approved surface-mounted conduits or within a suspended ceiling system.
Are integrated LED flush mounts better than those with replaceable bulbs for condos?
Integrated LED flush mounts and fixtures with replaceable bulbs each have distinct advantages depending on your priorities. Integrated LED models are generally superior for extremely low ceilings because they do not require space for a bulb socket, allowing for ultra-slim profiles of less than 5 centimeters that blend perfectly into the ceiling. They also offer excellent energy efficiency and even light distribution. However, if the LED module or driver fails, you must replace the entire fixture. Replaceable bulb fixtures have a slightly thicker profile but offer easier long-term maintenance, as you can replace a burned-out bulb in seconds without touching the fixture’s wiring. Check the manufacturer’s rated lifespan and warranty to help decide which option fits your lifestyle.
Community discussion
Share your experience or ask a question. Comments are reviewed before publication.