
Choosing the right size of linear LED panel lights can transform how a room feels, functions, and breathes. In modern homes, especially across the Philippines where sleek, minimalist designs are increasingly popular, these long lights for ceiling installations offer an elegant alternative to traditional bulky fixtures. However, selecting the wrong length can easily lead to a room that is either blindingly bright or cast in awkward, uncomfortable shadows.
To find the perfect length, you must balance the physical dimensions of your ceiling with the functional lighting requirements of the space. It is not just about choosing a fixture that looks good; it is about understanding how light spreads across a room’s specific footprint. By calculating your room’s square footage and matching it to standard fixture outputs, you can achieve seamless, comfortable illumination that enhances your daily living.
Understanding Standard Linear LED Panel Dimensions
Before diving into layouts, it is essential to understand the standard sizes available in the market. Linear LED panel lights typically come in nominal lengths of 600mm (approximately 2 feet) and 1200mm (approximately 4 feet). Some specialized architectural brands also offer 1500mm (5 feet) or custom continuous lengths, but the 600mm and 1200mm variants remain the most accessible options for residential projects.
Products mentioned in this guide
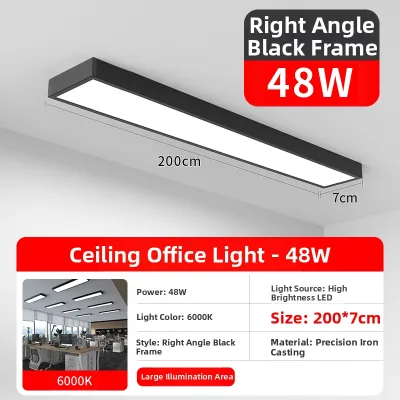
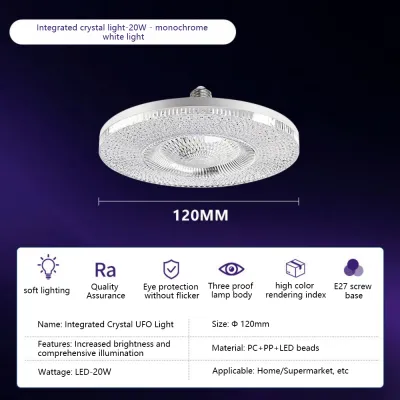
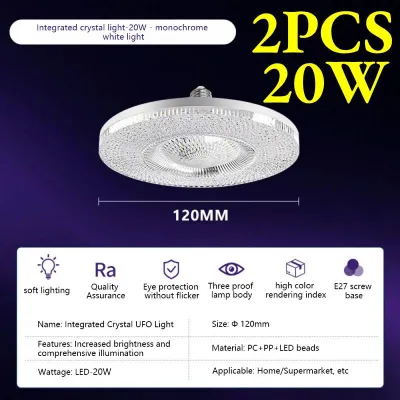
Prices are valid at publication and may change. Please refer to the product page for the latest price.
A common misconception is that a longer light panel is automatically brighter than a shorter one. While it is true that longer panels generally house more individual LED diodes and can produce higher total lumens, brightness is not strictly determined by physical length. For instance, a high-efficiency 600mm panel can sometimes emit more lumens than a lower-quality 1200mm panel while consuming less energy.
Therefore, you should never purchase these fixtures based on length alone. Always verify the manufacturer’s specification sheet for the exact lumen output, wattage, and luminous efficacy (measured in lumens per watt). Additionally, check the voltage rating to ensure compatibility with local electrical standards (typically 220V to 240V at 60Hz in the Philippines) and look for recognized quality or safety certifications, such as the Philippine Standard (PS) mark or Import Commodity Clearance (ICC) sticker.
The physical width and depth of the panel are also critical factors to consider. Wider panels provide a broader surface area for light emission, which can soften the overall glow and reduce harsh glare. Furthermore, the depth of the housing dictates how much space is required inside your ceiling cavity for heat dissipation. In tropical climates where ambient temperatures run high, adequate heat dissipation is vital to prevent the LED drivers from overheating and failing prematurely.
In terms of cost, linear LED panels span a wide range depending on build quality and features. Broadly speaking, prices range from budget-friendly options under ₱1,000 to premium architectural profiles costing over ₱5,000. Investing in mid-to-high range fixtures often yields better thermal management and longer-lasting drivers, saving you money on replacements in the long run.
Matching Light Length and Quantity to Room Dimensions
Determining the ideal length and number of long lights for ceiling setups requires a basic understanding of room area and lighting density. In lighting design, the target illumination level is often measured in lux (lumens per square meter). Different rooms require different lux levels depending on their primary function. For example, a task-heavy space like a kitchen or home office typically requires 300 to 500 lux, while a relaxing bedroom or living room may only need 100 to 200 lux.

To calculate your total required lumens, start by measuring the length and width of your room in meters to find the total square meters. Multiply this area by your target lux level. For instance, a 15-square-meter home office requiring 300 lux will need a total of 4,500 lumens. If you select a 1200mm linear panel that outputs 3,000 lumens, you can easily see that one panel will not be enough to illuminate the entire room evenly, whereas two panels will provide comfortable, well-distributed light.
Relying on a single, highly powerful fixture in the center of the room often leads to harsh hotspots directly underneath and dark, unusable corners. Distributing the light by using multiple shorter panels or spacing out two longer panels is almost always the superior choice. This approach ensures that light overlaps naturally, eliminating shadows and creating a more visually balanced environment.
Sizing for Small to Medium Spaces (Bedrooms and Home Offices)
In compact rooms, such as standard bedrooms or study areas measuring under 12 square meters, shorter linear panels are generally the most practical choice. A 600mm panel is highly versatile in these environments because it provides localized illumination without overwhelming the space. Using one or two of these shorter fixtures allows you to target specific areas, such as a study desk or a wardrobe closet, while keeping the resting areas softer and more relaxing.
When positioning these long lights for ceiling installations in small rooms, visual comfort should be your main priority. Avoid placing linear panels directly over the head of a bed or directly behind a computer screen where they can cause uncomfortable direct glare or screen reflections. Instead, offset the fixtures slightly to the sides or run them parallel to the main seating or sleeping arrangements to maintain a soothing, glare-free ambiance.
Sizing for Large and Open Areas (Living Rooms and Kitchens)
For expansive, open-concept spaces like combined living and dining areas or large kitchens, 1200mm linear panels are excellent for achieving broad, uniform coverage. These longer fixtures help draw the eye across the room, emphasizing the architectural lines of the ceiling while throwing a wide wash of light. In a spacious living room, arranging multiple 1200mm panels in a parallel configuration or a continuous linear layout can make the entire area feel bright, airy, and cohesive.
Rather than simply placing fixtures in the absolute center of a large room, align their placement with specific functional zones. For example, position a 1200mm panel directly over a kitchen island or a dining table to serve as both functional task lighting and a striking design element. By grouping your long ceiling lights into distinct, switchable zones, you can easily control the mood of different areas independently throughout the day.
Checking Ceiling Space and Installation Requirements
Before purchasing any linear LED panels, you must verify how they will physically integrate with your ceiling structure. Linear panels are generally available in three mounting styles: recessed (flush with the ceiling), surface-mounted (fixed directly to the surface), and suspended (hung by cables). Recessed options provide the cleanest, most seamless look, but they also require the most rigorous spatial planning and preparation.
For a successful recessed installation, you must carefully measure the depth of your ceiling cavity to ensure there is enough clearance for the fixture housing and its external LED driver. You must also check the thickness of your plasterboard or gypsum ceiling panels to ensure the mounting clips can grip securely. Most importantly, use a stud finder or consult your architectural blueprints to locate structural joists, steel framing, or concrete beams. These structural elements cannot be cut or modified without compromising the safety of your home.
Working with electrical systems and ceiling structures carries inherent risks. Any installation step involving fixed electrical wiring, cutting into ceiling materials, or working in tight, unventilated ceiling cavities demands strict safety precautions. Always turn off the power at the main circuit breaker before touching any wires or preparing the ceiling opening. If you are dealing with complex wiring, high ceilings that require working at height, or structural ceiling modifications, do not attempt to guess the electrical load or structural integrity. Instead, hire a licensed electrician or a qualified professional contractor to handle the installation safely.
Additionally, pay close attention to the installation environment. If you plan to install long lights for ceiling areas in high-humidity zones—such as bathrooms, laundry areas, or covered outdoor dirty kitchens common in Philippine homes—ensure the fixtures carry an appropriate Ingress Protection (IP) rating. A rating of IP44 or higher is highly recommended for damp environments to protect the internal electronics from moisture, dust, and insects, thereby ensuring a long and safe operating life.
Common Sizing and Layout Mistakes to Avoid
Achieving the perfect lighting layout requires avoiding several common design pitfalls that can ruin the comfort and functionality of your space. One of the most frequent mistakes is placing linear fixtures too close to vertical walls. When a long light is positioned right against a wall, it creates a harsh “wall-washing” effect that highlights every minor plastering imperfection, paint bump, or dust speck, while casting deep, unflattering shadows downward. Maintain a buffer of at least 60 to 90 centimeters from the walls to allow the light to blend smoothly into the room.
Another critical error is ignoring the fixture’s beam angle. Linear LED panels can have beam angles ranging from narrow (around 30 to 60 degrees) to very wide (110 degrees or more). A narrow beam angle on a long ceiling light will project sharp, concentrated pools of light, leaving significant dark gaps on your floor if the fixtures are spaced too far apart. Conversely, a wide beam angle provides a soft, general ambient wash that is much easier to distribute evenly across a residential room.
Many homeowners also overlook dimmer compatibility. Not all linear LED panels are designed to be dimmable. Attempting to control a non-dimmable LED panel with a standard wall dimmer switch can lead to annoying flickering, buzzing noises, and permanent damage to the LED driver. Always check the product specifications to confirm that both the linear panel and your wall dimmer switch are explicitly rated as compatible with each other.
Finally, avoid the temptation to buy fixtures based solely on their wattage. Wattage simply measures how much electrical power the light consumes, not how much light it actually produces. Thanks to rapid advancements in LED technology, highly efficient modern fixtures can deliver the same brightness (lumens) as older models while using a fraction of the wattage. Focus on the lumen rating to ensure your room gets the correct amount of light, and use the wattage rating only to calculate your energy efficiency.
Frequently Asked Questions (FAQ)
Can I link multiple linear LED panels together in a continuous line?
Whether you can link multiple linear panels together depends entirely on the specific design of the product you purchase. Some architectural linear lights are specifically engineered for continuous runs, featuring seamless male-to-female interlocking connectors and specialized mounting brackets that hide the joints. However, standard residential panels are often standalone units and cannot be physically or electrically linked without custom modifications. If you attempt to connect multiple panels, you must strictly adhere to the manufacturer’s maximum run-length guidelines. Exceeding the recommended number of linked fixtures can overload the electrical driver or the wiring circuit, leading to severe overheating, flickering, or premature component failure.
Does the color temperature affect how bright a long ceiling light feels?
Color temperature, measured in Kelvin (K), does not alter the actual physical light output (lumens) of a fixture, but it profoundly influences how bright and intense the light feels to the human eye. Cooler color temperatures, such as cool white (4000K) or daylight (5000K to 6500K), appear crisper and more intense, making them ideal for task-oriented spaces like home offices, kitchens, and clinics where high alertness is required. In contrast, warmer color temperatures, such as warm white (2700K to 3000K), emit a cozy, golden glow that feels softer and less intense, making them perfect for bedrooms and living areas. When planning your room, keep your target lumen calculations consistent, but select the Kelvin rating based on the specific mood and activity level of each space.
Community discussion
Share your experience or ask a question. Comments are reviewed before publication.