
Choosing the right recessed panel ceiling light depends on matching the physical dimensions of your ceiling structure with the specific illumination requirements of your room’s activities. Selecting the wrong size can result in a cluttered ceiling layout, while choosing an incorrect wattage or lumen output can leave your space either uncomfortably dim or blindingly bright. By evaluating your room’s dimensions, ceiling height, and structural layout, you can establish a balanced lighting plan that fits your home perfectly.
Quick Guide: Matching Panel Size and Brightness to Your Room
Every room has a unique footprint that dictates both the physical size and the light output of the fixtures you install. A small bathroom or utility closet will feel overwhelmed by a large rectangular panel, whereas a spacious living room will look under-lit and sparse if you only install small, low-output fixtures. The key is to balance the visual scale of the panel with the volume of space it needs to illuminate.
Standard recessed panel dimensions generally fall into square or rectangular configurations, such as 1×1 foot, 2×2 feet, and 2×4 feet, alongside smaller circular and square slim downlights ranging from 4 to 8 inches. Smaller fixtures are highly effective for localized ambient lighting or tight spaces, while larger panels are designed to distribute light over broader areas. Matching these physical sizes to your room layout ensures that the fixtures look proportional to your ceiling.
Products mentioned in this guide
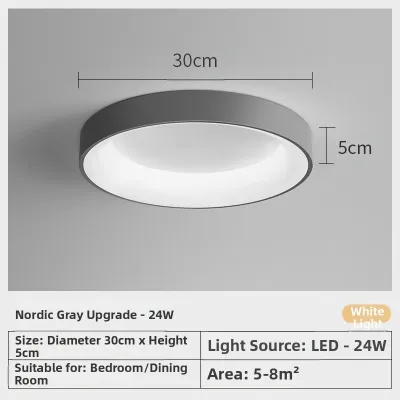
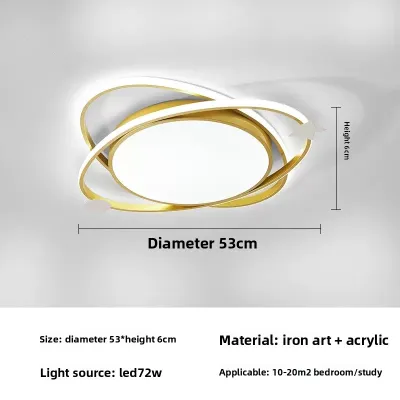
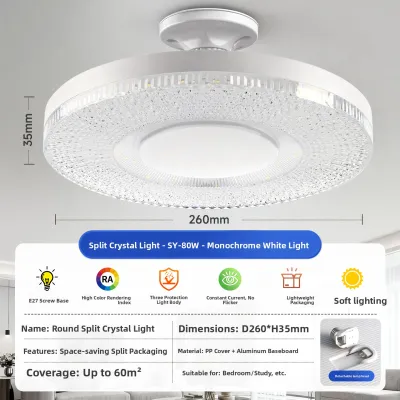
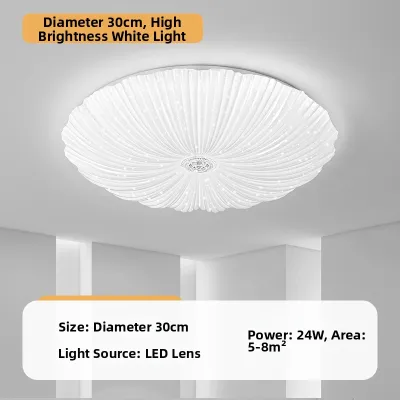
Prices are valid at publication and may change. Please refer to the product page for the latest price.
Historically, homeowners relied on wattage to judge how bright a light bulb would be. With modern LED technology, wattage only measures the electrical power consumed, not the light produced. To determine actual brightness, you must look at the lumen output and the beam distribution of the panel. A high-efficiency LED panel can deliver the same brightness as an older fixture while using a fraction of the wattage, making lumen ratings the essential metric for your planning.
Calculating Required Lumens and LED Wattage
To avoid under-lighting or over-lighting your space, you must first calculate the total light output required for the room. Begin by measuring the length and width of the room in feet to find the total square footage. For irregularly shaped rooms, divide the space into smaller rectangular sections, calculate the area of each, and add them together to get the total usable floor space.

Once you have the square footage, you can apply the concept of foot-candles, which represents the number of lumens needed per square foot. Different rooms require different levels of illumination based on the tasks performed there:
- Bedrooms and Living Rooms: 10 to 20 lumens per square foot.
- Kitchens and Dining Areas: 30 to 40 lumens per square foot.
- Home Offices and Study Areas: 40 to 50 lumens per square foot.
- Bathrooms and Utility Rooms: 70 to 80 lumens per square foot.
To find your total required light output, multiply your room’s square footage by the recommended lumens per square foot. For example, a 150-square-foot bedroom requiring 15 lumens per square foot will need a total of 2,250 lumens.
After determining the total lumens, you can find the appropriate LED wattage by checking the luminous efficacy of the panels you are considering. Luminous efficacy is listed on the manufacturer’s packaging as lumens per watt (lm/W). If a chosen panel has an efficacy of 100 lm/W, you would divide your total required lumens by 100 to find the total wattage needed. In our bedroom example, 2,250 lumens divided by 100 lm/W equals 22.5 watts of total LED power, which you can distribute across multiple fixtures.
Choosing Physical Panel Dimensions for Your Ceiling
Selecting the physical dimensions of your recessed panels requires a careful look at your ceiling’s structural makeup. Standard commercial-grade grid sizes like 2×2 feet or 2×4 feet are excellent for suspended drop ceilings, but they are often too dominant for residential drywall ceilings. For standard residential plasterboard or gypsum ceilings, smaller square or round slim panels are generally preferred because they blend seamlessly into the ceiling plane.
Before purchasing any fixtures, you must verify the spacing of your ceiling joists. Standard wooden or metal framing joists are typically spaced 16 or 24 inches apart on center. If you select a wide 2×2 foot recessed panel for a drywall ceiling with 16-inch joist spacing, installation will require cutting through structural framing, which compromises the ceiling’s integrity. Always measure the clear space between your joists to ensure your chosen panel size fits without structural interference.
Spacing multiple panels evenly across the ceiling is crucial to prevent dark spots and harsh glare. A reliable layout strategy is to space the fixtures at a distance equal to half the ceiling height from the walls, and a distance equal to the full ceiling height between each fixture. This layout ensures that the light cones overlapping at floor level create a continuous, even plane of illumination across the entire room.
Adjusting Light Output for Ceiling Height and Room Use
Ceiling height plays a major role in how light behaves as it travels from the fixture to the floor. Standard residential ceilings of 2.4 to 2.7 meters work exceptionally well with wide-angle panels that have a beam spread of 110 to 120 degrees. However, if your room features high ceilings exceeding 3 meters, the light will disperse and lose intensity before reaching the floor, requiring you to select panels with higher lumen outputs or narrower beam angles to project the light downward.
You must also tailor your brightness expectations to the specific activities in each room. A kitchen island or a home office desk requires focused, high-intensity light to prevent eye strain during detailed tasks. Conversely, a living room or bedroom benefits from softer, indirect light that promotes relaxation. If a single room serves multiple purposes, such as a dining room that doubles as a homework station, installing dimmable LED drivers is highly recommended.
When planning for dimmable lighting, always verify the compatibility between the LED driver and the wall dimmer switch. Standard incandescent dimmers often cause LED panels to flicker, buzz, or fail prematurely. Look for trailing-edge or electronic low-voltage dimmers specifically rated for LED loads, and check the manufacturer’s documentation to ensure the panel’s driver supports the specific dimming protocol you plan to use.
Verifying Installation Clearances and Electrical Safety
Safety must be your top priority when installing recessed ceiling fixtures. The space above your ceiling, known as the plenum, must have adequate clearance to allow heat to dissipate from the LED driver and the back of the panel. In warm, humid tropical environments, heat buildup in enclosed ceiling cavities can drastically shorten the lifespan of electronic components. Always check the manufacturer’s specifications for the minimum vertical clearance required above the fixture.
Electrical compatibility is another critical factor to verify before purchase. Ensure that the LED driver is rated for your local utility voltage, which is typically 220V to 240V at 60Hz. Additionally, verify whether the fixture requires a dedicated junction box or if it features an integrated connection system. All electrical connections must be housed in an approved enclosure to prevent fire hazards and protect the wiring from moisture and pests.
Always isolate the power at the main circuit breaker before attempting any electrical work or handling exposed wires. If your installation involves cutting through concrete slab ceilings, routing new electrical conduits through solid walls, or modifying structural ceiling joists, stop the DIY process immediately. These complex tasks require the expertise of a licensed professional electrician to ensure compliance with local building and electrical codes.
Frequently Asked Questions (FAQ)
Can I Retrofit an Existing Fluorescent Troffer with an LED Panel?
Yes, you can retrofit an old fluorescent troffer, but you must perform several physical and electrical checks first. Verify that the existing ceiling grid matches the exact dimensions of the new LED panel, as older commercial grids can sometimes vary. For the electrical setup, you must completely bypass or remove the old magnetic or electronic ballast. Connecting an LED panel directly to an active ballast will damage the fixture and void the warranty, so always follow the manufacturer’s direct-wire installation instructions.
How Do I Calculate the Number of Panels Needed for a Room?
To find the number of panels required, divide the total calculated room lumens by the lumen output of a single panel. For example, if your kitchen requires 4,000 total lumens and you have chosen a slim panel that produces 1,000 lumens, you will need four panels. Once you have this number, adjust the physical placement on your ceiling layout to avoid structural obstructions like ceiling fans, support beams, or existing utility pipes.
Do Slim Edge-Lit Panels Require Less Ceiling Clearance?
Yes, slim edge-lit panels require significantly less vertical clearance than back-lit panels. Edge-lit designs place the LEDs around the frame, directing light sideways through a light guide plate, resulting in an ultra-thin profile that often requires less than an inch of plenum space. Back-lit panels place the LEDs directly behind the diffuser, requiring a deeper housing to prevent visible hot spots. Always check the manufacturer’s specification sheet to verify the exact minimum clearance needed for safe heat dissipation.
Community discussion
Share your experience or ask a question. Comments are reviewed before publication.