
Selecting the correct lighting for a pool table requires looking beyond simple aesthetic appeal. To achieve a professional-quality playing environment, your light fixture must deliver uniform illumination across the entire slate bed, eliminating distracting shadows under the cushions and preventing harsh glare from reflecting off the balls. Achieving this balance depends on matching the physical dimensions of your fixture to the size of your table and hanging it at the precise height.
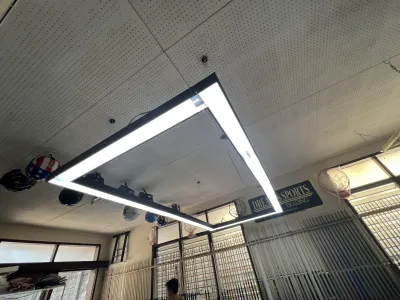
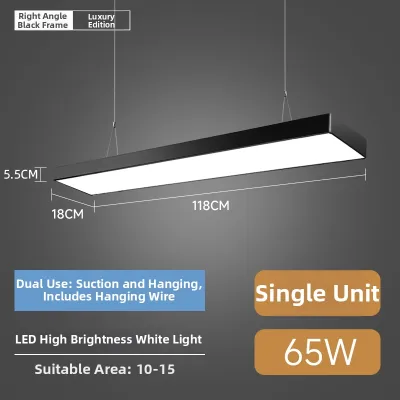
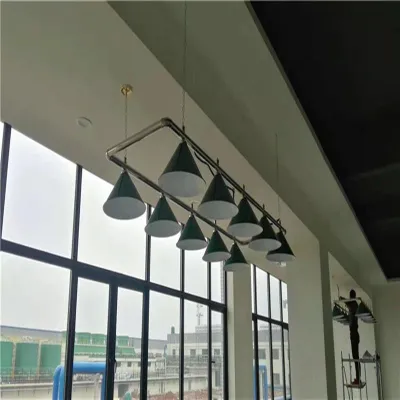
Traditional game rooms often rely on linear multi-shade pendants, while modern setups frequently utilize rectangular LED perimeter frames. Regardless of the style you prefer, the physical size of the light source directly dictates how effectively it distributes light to the outer edges and corner pockets. By understanding the geometric relationship between your light fixture and the playing surface, you can create a comfortable, shadow-free space that enhances both your play and your room’s design.
Match the Fixture Length to Your Pool Table Size
To ensure even light distribution, the length of your light fixture must be proportional to the size of your pool table. A fixture that is too short will leave the corner pockets and short rails in deep shadow, while an excessively long fixture will spill light into the surrounding room, causing visual discomfort for spectators. As a general rule, the active light-emitting portion of the fixture should span approximately two-thirds of the length of the table’s playing surface.
Products mentioned in this guide
Prices are valid at publication and may change. Please refer to the product page for the latest price.
When calculating these proportions, always measure the actual playing area—the green cloth inside the cushion rails—rather than the outer wooden frame of the table. The outer rails add significant width and length, which can skew your calculations if you rely solely on the manufacturer’s nominal table size. Once you have the precise dimensions of the cloth bed, you can select a fixture configuration that matches your table’s footprint.
Standard billiard tables generally pair best with specific linear or perimeter lighting configurations:
- 7-Foot Tables (Playing surface approx. 39 by 78 inches): A 3-shade linear pendant measuring between 40 and 48 inches in length provides excellent coverage. Alternatively, a rectangular LED perimeter frame measuring 4 feet in length will align perfectly with the playing boundaries.
- 8-Foot Tables (Playing surface approx. 44 by 88 inches): This highly common home size requires a fixture length of 50 to 60 inches. A larger 3-shade or a compact 4-shade linear pendant ensures the light reaches the far cushions without fading at the corners.
- 9-Foot Tables (Playing surface approx. 50 by 100 inches): Professional-size tables demand a robust 4-shade linear pendant measuring 60 to 70 inches, or a 6-foot rectangular LED perimeter light to maintain consistent brightness across the larger surface area.
- Snooker and 10-to-12-Foot Tables: These oversized tables require specialized multi-shade configurations, often utilizing 5-shade or 6-shade bars, or modular, expandable LED perimeter lighting systems designed specifically for extended playing fields.
To maintain a balanced aesthetic and prevent physical hazards, the light fixture should never extend past the outer edges of the table’s wooden rails. A fixture that protrudes beyond the table footprint creates an awkward visual weight in the room and increases the risk of players bumping their heads when walking around the table or leaning in for a shot. Keeping the fixture slightly shorter than the outer frame ensures a clean, integrated look while keeping the playing area safely illuminated.
Determine the Ideal Hanging Height to Prevent Glare and Shadows
Once you have selected the correct fixture length, establishing the proper mounting height is the next critical step. The most important rule of billiard light installation is that the hanging height must always be measured from the playing surface (the bed of the table), not from the floor. Because pool table heights can vary slightly depending on the model and leveling adjustments, measuring from the floor will often result in an inaccurate installation.

For optimal playability, the bottom edge of the light fixture should hang between 32 and 40 inches (approximately 81 to 102 centimeters) above the table bed. Hanging the light within this range ensures the shades direct the light downward onto the slate, shielding the players’ eyes from direct bulb exposure. If the fixture is positioned higher than 40 inches, the light will spill outward, causing blinding glare for standing players and casting distracting body shadows across the table when a player leans over to shoot.
Conversely, hanging the fixture lower than 32 inches creates a cramped, claustrophobic playing environment. A low-hanging light restricts the players’ field of view and increases the risk of accidental contact with cue sticks during high-angled shots or break shots. It also concentrates the light too intensely in the center of the table, leaving the perimeter rails in relative darkness.
Your ceiling height and chosen suspension method will dictate how you execute this installation. Standard residential spaces in the Philippines often feature concrete ceilings, which require robust surface-mounted junction boxes and adjustable chains or steel aircraft cables to manage the drop height. High ceilings offer more flexibility but require longer support chains, while low ceilings may necessitate rigid downrods cut to a specific length.
Before finalizing any electrical connections or cutting support chains, perform a physical test of the height. Have a helper hold the fixture at your target height while you stand at the table and simulate various shooting stances. Bend down as if taking a low cue shot to verify that the light source does not obstruct your line of sight or create direct glare in your eyes. This temporary test allows you to make precise adjustments before the fixture is permanently secured.
Evaluate Brightness, Bulb Type, and Light Distribution
The physical size of your fixture works hand-in-hand with its optical design to determine the quality of light on the table. Traditional billiard lights utilize deep, bowl-shaped shades made of metal, thick glass, or acrylic to funnel light directly downward. This physical barrier is essential because it prevents the raw glow of the bulb from shining horizontally into the room, protecting the eyes of both players and spectators.
When selecting bulbs for a multi-shade fixture, LED options are highly recommended due to their energy efficiency and low heat emission. In the warm, humid climate of the Philippines, traditional incandescent or halogen bulbs can generate significant heat directly above the players’ heads, making long games uncomfortable. Look for frosted LED bulbs rather than clear filament styles, as frosted glass diffuses the light more evenly and minimizes harsh, specular reflections on the polished surfaces of the billiard balls.
To achieve uniform brightness without creating hot spots, you must balance the total lumen output. For a standard 3-shade or 4-shade fixture, aim for bulbs that deliver approximately 800 to 1,100 lumens each (the equivalent of a traditional 60W to 75W incandescent bulb). This level of brightness provides a crisp, clear view of the table without overwhelming the space or causing eye strain over hours of play.
Color temperature is another key factor that influences how you perceive the table. Avoid warm white bulbs (under 3000K), which can cast a yellow dinginess over the green cloth and make it difficult to distinguish similarly colored balls, such as the blue 2-ball and the black 8-ball. Avoid extremely cold daylight bulbs (above 6000K) as well, as they can create a harsh, clinical atmosphere. A neutral, crisp white light between 4000K and 5000K is ideal, as it renders colors accurately and keeps the eyes relaxed.
Before purchasing bulbs or fixtures, always verify the electrical specifications on the product label. The standard electrical grid in the Philippines operates at 220V to 230V at 60Hz. Ensure that your fixture, integrated LED drivers, and replacement bulbs are rated for this voltage range and carry recognized local safety certifications, such as the Philippine Standard (PS) or Import Commodity Clearance (ICC) marks, to guarantee safe and reliable operation.
Common Sizing and Installation Mistakes to Avoid
Avoiding common pitfalls during the planning and installation phases will save you time and prevent safety hazards in your game room. One of the most frequent errors is choosing a fixture that is simply too short for the table. While a compact pendant might look appealing in a store, installing it over an 8-foot or 9-foot table will leave the outer cushions and corner pockets in deep shadow, making precise bank shots nearly impossible to judge.
Another common mistake is failing to account for existing room fixtures, particularly ceiling fans. In tropical homes, ceiling fans are often centered in the room to maximize airflow. If a billiard light is installed too close to a spinning ceiling fan, it will create a highly distracting strobing shadow effect across the playing surface. You must plan the layout carefully to ensure that the light fixture and fan blades have adequate physical clearance and do not interfere with each other’s performance.
Ignoring the weight of the fixture and the structural capacity of your ceiling is a serious safety risk. Multi-shade metal billiard lights and heavy wooden linear pendants can weigh anywhere from 10 to 20 kilograms. Suspending this much weight from standard drywall or thin fiber-cement ceiling boards using simple plastic anchors is highly dangerous. The mounting bracket must be anchored directly into solid wooden ceiling joists or secured into a concrete slab using heavy-duty expansion bolts.
Because installing a heavy, suspended light fixture involves working at heights and making permanent connections to your home’s electrical wiring, safety must be your top priority. Always isolate the power at the main circuit breaker before starting any installation work, and use a reliable voltage tester to confirm the wires are dead. If your installation requires reinforcing the ceiling structure, running new wiring, or navigating complex mounting brackets, strongly consider hiring a licensed, professional electrician to ensure the job complies with the Philippine Electrical Code.
Frequently Asked Questions (FAQ)
Can I use a standard linear island pendant instead of a dedicated billiard light?
While a standard kitchen island pendant can physically hang over a pool table, it rarely provides the specialized light distribution required for billiards. Kitchen island lights are typically designed for general ambient or task lighting and often feature shallow or semi-translucent shades that allow light to spill horizontally into the room, creating glare for standing players. Dedicated billiard lights and perimeter LED frames utilize deep, opaque shades or specialized downward-facing optics engineered specifically to direct light evenly across the table’s flat surface while shielding the players’ eyes.
How do I ensure the light is perfectly centered over the table?
To find the absolute center point of your pool table, do not rely on visual estimation or measurements from the surrounding walls, as rooms are rarely perfectly symmetrical. Instead, take a measuring tape and measure the diagonals of the table’s outer frame from the outer edge of one corner pocket to the opposite corner pocket on both sides. The point where these two diagonal lines intersect is the exact center of your playing surface. You can then use a plumb bob or a self-leveling laser level placed on this intersection point to project the exact center coordinate directly onto your ceiling, marking the precise spot to install your mounting bracket.
Community discussion
Share your experience or ask a question. Comments are reviewed before publication.