
Arranging photo card holders on a wall to create a balanced gallery layout requires a thoughtful combination of spatial planning, visual weight distribution, and precise installation. Whether you are displaying cherished family photographs, postcards, or collectible photo cards, the key to a successful gallery wall lies in treating the entire arrangement as a single, unified art piece. By establishing clear boundaries, choosing a layout style that complements your room, and using physical templates to test your design, you can achieve a balanced display that enhances your living space.
In tropical environments like the Philippines, planning a wall display also involves considering environmental factors such as high humidity and intense sunlight, which can affect both the mounting hardware and the delicate paper items themselves. Taking the time to assess your wall conditions, select the right tools, and follow a systematic hanging process will ensure your photo card gallery remains secure, level, and visually captivating for years to come.
Planning Your Gallery Wall Space and Layout
Before purchasing hardware or selecting photo cards, you must carefully measure the available wall space. Use a metal measuring tape to record the width and height of the wall section you plan to use. Identify the natural focal point of the room, which is typically at eye level—approximately 140 to 150 centimeters from the floor. This central point should serve as the anchor for your entire display, ensuring that the gallery feels integrated into the room rather than floating awkwardly too high or too low.
Products mentioned in this guide
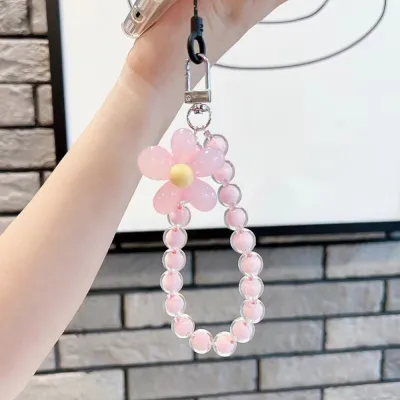

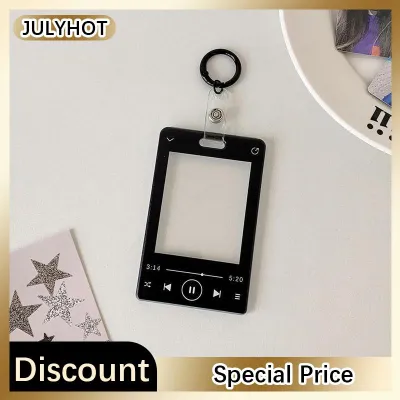
Prices are valid at publication and may change. Please refer to the product page for the latest price.
Defining the outer boundaries of your gallery wall is essential for preventing visual clutter, especially in smaller rooms or high-traffic areas. You can establish these boundaries by deciding on a maximum width and height for the entire arrangement. For instance, if you are placing the display above a piece of furniture like a console table or a sofa, the total width of the gallery should ideally span about two-thirds to three-quarters of the furniture’s width. This proportion creates a grounded, balanced look that prevents the display from overpowering the furniture.
Nearby furniture placement, lighting, and natural sightlines play a significant role in how your gallery wall is experienced. Avoid placing delicate photo cards directly opposite large windows where intense afternoon sunlight can cause rapid fading. Similarly, keep the display away from direct air conditioning drafts or high-humidity zones, such as walls adjacent to bathrooms or kitchens, as moisture can warp paper cards over time. Ensure there is enough clearance from high-traffic pathways so that passing household members do not accidentally bump into the holders.
Lighting is another critical element to consider during the planning phase. Natural ambient light is suitable for viewing, but you may want to supplement it with dedicated accent lighting, such as adjustable track lights or wall-mounted picture lights. If you plan to install lighting fixtures, verify the voltage, base interface, and wattage limits of any bulbs you select. Ensure that any electrical work or fixed wiring is handled safely, isolating the power before installation or consulting a qualified professional if you are adding new fixtures to your wall.
Choosing a Visual Arrangement Style
The arrangement style you choose sets the tone for the entire room. A structured grid layout is highly formal and works exceptionally well with photo card holders of identical sizes, shapes, and frame colors. This style relies on precise symmetry and consistent spacing, making it ideal for minimalist or modern interiors. A linear layout, where holders are aligned along a single horizontal or vertical axis, offers a clean, contemporary look that guides the viewer’s eye smoothly across the wall.

For a more dynamic and personalized feel, an eclectic or salon-style layout allows you to mix different sizes, orientations, and even frame materials. While this style appears casual, achieving balance requires careful planning. You must distribute the visual weight evenly across the layout. Place larger or darker photo card holders near the center or bottom-left of the arrangement to anchor the display, and balance them with lighter or smaller holders on the outer edges. Mixing portrait and landscape orientations can add visual interest, but try to maintain a consistent theme or color palette to keep the collection cohesive.
To avoid making unnecessary holes in your wall, create paper templates of each photo card holder before hanging them. Trace the outline of each holder onto plain paper, cut out the shapes, and label them so you know which card goes where. Use low-tack painter’s tape to arrange these paper templates on the wall. This allows you to step back, view the arrangement from different angles, and easily adjust the spacing and layout until you achieve the ideal visual balance.
Step-by-Step Hanging and Installation
Once you are satisfied with the paper template layout, gather the necessary tools for installation. You will need a pencil, a tape measure, a spirit level, a hammer, and a drill with bits that match your wall type. In many homes, walls are constructed from solid concrete, hollow blocks, or plaster-covered brick, which require masonry drill bits and plastic wall plugs to hold screws securely. If you are working with drywall, you will need specialized drywall anchors. For lightweight holders, reliable adhesive strips designed for humid climates may be an option, but always check the manufacturer’s weight limits first.
To mark your drill points accurately, keep the paper templates taped to the wall. Use a spirit level placed across the top of each template to ensure it is accurately horizontal. Locate the hanging bracket or wire on the back of your actual photo card holder, measure its distance from the top edge of the frame, and mark this exact spot on the corresponding paper template with a pencil. You can then drill directly through the marked point on the paper, ensuring the hole is positioned precisely where the mounting hardware needs to sit.
When drilling into concrete or masonry, hold the drill perpendicular to the wall and apply steady, firm pressure. Insert the plastic wall plug into the drilled hole, tapping it gently with a hammer until it sits flush with the wall surface. Insert the screw, leaving a few millimeters protruding so you can easily hang the photo card holder. If you encounter unexpected resistance, hit a metal stud, or find that the wall material is crumbling and cannot support the anchor, stop immediately.
Safety should always be your top priority during installation. Never attempt to hang heavy or oversized displays on weak or damaged walls, and avoid overloading anchors beyond their rated weight capacity. If your gallery wall involves working at significant heights, installing complex suspended loads, or running wiring near existing electrical conduits, do not hesitate to consult a qualified professional. Taking these precautions prevents damage to your walls and ensures your display remains safely secured.
Fine-Tuning and Maintaining Your Display
After hanging all your photo card holders, step back to evaluate the overall alignment. Use your spirit level one final time on top of each holder to verify they are accurately straight. If a holder is slightly tilted, you can often make minor adjustments by adding a small piece of double-sided foam tape or a rubber bumper to the bottom corners of the frame. This not only keeps the frames level but also prevents them from scratching the wall paint over time.
Periodically check the stability of your mounting hardware, especially in the weeks following the initial installation. Temperature fluctuations and humidity changes can cause walls and wooden frames to expand and contract slightly, which may loosen screws or weaken adhesive bonds. Gently wiggle each holder to ensure it remains firmly anchored to the wall. If you notice any sagging or loose hardware, remove the holder immediately and reinforce the mounting point with a larger anchor or a more secure screw.
Maintaining your display requires gentle, non-damaging cleaning techniques to protect both the holders and the delicate photo cards inside. Dust the frames regularly using a clean, dry microfiber cloth or a soft-bristled brush. Avoid using liquid glass cleaners or chemical sprays directly on the frames, as moisture can seep behind the glass or acrylic protective layers and ruin the paper cards. If your cards are highly valuable or sensitive to light, consider using UV-filtering acrylic inserts in your holders to prevent fading from ambient light exposure.
Frequently Asked Questions (FAQ)
How much space should I leave between photo card holders?
For a cohesive and balanced look, a standard spacing of 5 to 10 centimeters (about 2 to 4 inches) between each photo card holder is generally recommended. If your holders are small or have delicate frames, keeping the gap closer to 5 centimeters helps the individual pieces read as a single, unified collection. For larger holders or thicker frames, wider spacing of up to 10 centimeters prevents the arrangement from feeling cramped. Whichever distance you choose, maintain this spacing consistently throughout the entire layout to preserve visual harmony.
Can I mix photo card holders with other wall decor?
Yes, mixing photo card holders with other wall decor elements is an effective way to add depth and personality to your gallery wall. You can integrate small items such as floating shelves, miniature mirrors, or small botanical prints. To keep the display cohesive, establish a unifying element, such as matching frame finishes, a consistent color palette, or a shared theme. Ensure you balance the visual weight by placing heavier items, like a small shelf, lower in the arrangement or offset by a cluster of smaller photo card holders on the opposite side.

Community discussion
Share your experience or ask a question. Comments are reviewed before publication.