
Creating a cohesive gallery wall with family posters requires balancing visual weight, choosing a consistent layout strategy, and using precise physical spacing. By planning the arrangement on the floor first and selecting hardware suited to your wall type, you can transform a collection of mismatched family memories into an intentional, structured display.
In tropical climates like the Philippines, high humidity and concrete walls present unique challenges for hanging paper prints. Moisture can cause posters to warp inside their frames, while solid concrete walls require more robust mounting techniques than standard drywall. Addressing these environmental factors early ensures your family posters remain secure and pristine for years to come.
Planning Your Gallery Wall Layout
Choosing the right layout style is the first step in visually balancing varying poster sizes, orientations, and frame designs. A grid layout is ideal for uniform frames and identical poster sizes. It creates a clean, modern, and highly structured look. This style works well when you have a series of family portraits taken during the same photoshoot or printed in the same color scheme, such as all black-and-white. The symmetry of a grid layout brings an immediate sense of order, but it requires absolute precision during installation, as even a millimeter of misalignment will be highly visible.
Products mentioned in this guide



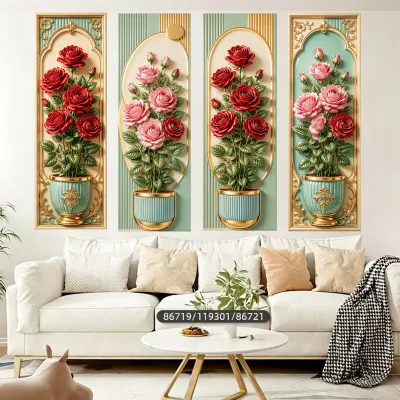

7 Lazada user ratings
maganda sya kaya maliit lang din pala sya sakto lang ang sukat nya pro
Modern abstract design, High quality canvas,
Prices are valid at publication and may change. Please refer to the product page for the latest price.
For collections with different dimensions, orientations, and frame designs, a salon or eclectic layout is more suitable. This approach allows you to combine older, candid family snapshots with large, formal portraits. Instead of relying on perfect symmetry, an eclectic layout relies on visual balance. You can achieve this by placing the largest or most visually heavy frames near the center of the arrangement and distributing smaller frames outward.
Before driving a single nail into your wall, visualize the entire arrangement using paper templates or cardboard cutouts. Trace each framed poster onto kraft paper, newspaper, or cardboard, and cut out the shapes. Label each cutout with the corresponding family poster’s description. Use painter’s tape to stick these templates to your wall, allowing you to experiment with different configurations, heights, and spacing without leaving permanent marks. This step is crucial for identifying how the layout interacts with nearby furniture and room lighting.
Gathering Tools and Materials for Installation
To execute a flawless installation, gather a measuring tape, a reliable spirit level, a pencil for marking, painter’s tape, and a hammer or drill. A spirit level is indispensable for ensuring that horizontal lines remain perfectly flat, preventing the subtle tilts that ruin the cohesive look of a gallery wall.

The choice of hardware depends heavily on your wall construction. In many homes in the Philippines, interior walls are made of solid concrete or hollow concrete blocks rather than drywall. Standard picture hanging nails will bend or break against concrete. Instead, you will need plastic wall plugs (anchors) and matching screws, which require a rotary hammer drill. For lighter frames on concrete, specialized hardwall hangers with pre-installed steel pins can work, but heavier frames always require anchored screws.
Always check the weight limits specified on your hardware packaging. Framed family posters, especially those with solid wood frames and thick glass covers, can be surprisingly heavy. Weigh each framed poster on a scale before choosing your hooks. Ensure the combined weight capacity of your wall anchors or hooks exceeds the actual weight of the frame to prevent catastrophic falls, which could damage both your family posters and your flooring.
Step-by-Step Guide to Measuring and Hanging
A common mistake is hanging wall art too high. For a balanced display, the center of the entire gallery wall arrangement should sit at eye level. In the design industry, this is generally calculated as 57 to 60 inches (approximately 145 to 152 centimeters) from the floor to the center point of the display. If you are hanging the gallery wall above a piece of furniture, such as a sofa or a console table, aim for the bottom of the lowest frames to sit about 6 to 8 inches above the top of the furniture piece.
Cohesion relies on consistent spacing between individual frames. A gap of 2 to 3 inches (about 5 to 7.5 centimeters) between frames is generally recommended. If the frames are very large, you can increase this spacing slightly, but keeping the distance uniform across the entire arrangement is what binds the different elements together into a single, unified installation.
With your paper templates still taped to the wall in your desired layout, use your measuring tape to locate the hanging bracket on the back of each actual frame. Measure the distance from the top of the frame to the hook or wire. Mark this exact distance downward on the corresponding paper template on the wall. Use a pencil to mark the drill or nail point directly through the paper template. This technique ensures that your hardware aligns perfectly with the frame’s built-in mounting points.
Drill your holes, insert your wall anchors, and secure the screws or hooks. Once the hardware is in place, gently tear away the paper templates from the wall. Hang your framed family posters onto the hooks. Place your spirit level on top of each frame to verify that it is perfectly horizontal. Adjust the frame slightly until the bubble in the level sits precisely between the two center lines.
Adjusting and Finalizing Your Display
Step back several paces to view the entire gallery wall from a distance. Look at the arrangement from different angles in the room. Sometimes, even when measurements are technically correct, certain frame combinations can feel visually heavy on one side. If a particular area feels cluttered, you may need to swap the positions of two smaller frames or adjust the spacing slightly to restore visual harmony.
In tropical environments, ambient humidity can cause frames to shift slightly over time, and vibrations from nearby doors closing or street traffic can knock them out of alignment. To keep your frames perfectly straight, apply a small piece of museum putty or adhesive rubber bumper pads to the bottom corners of each frame. This not only prevents tilting but also creates a small air gap between the frame and the wall, which helps prevent moisture buildup and protects your paint from scratches.
To finish your display, clean the protective glass or acrylic covers. Avoid spraying liquid glass cleaner directly onto the frame, as the moisture can seep under the edges and permanently stain or warp your family posters. Instead, spray a small amount of ammonia-free glass cleaner or a mild water-and-vinegar solution onto a microfiber cloth, then gently wipe the surface. For acrylic covers, use a specialized acrylic cleaner and a soft cloth to avoid scratching the plastic.
Frequently Asked Questions (FAQ)
How do I hang heavy family posters on concrete walls?
Hanging heavy items on concrete requires a hammer drill and masonry drill bits. First, mark your hanging point on the concrete wall. Use a masonry drill bit that matches the diameter of your plastic wall plugs (anchors). Drill a hole slightly deeper than the length of the anchor, clear out the concrete dust, and tap the plastic anchor into the hole until it sits flush with the wall surface. Insert a screw into the anchor, leaving a few millimeters protruding to hold the frame’s hanging bracket. If you encounter structural uncertainty, suspect hidden electrical wiring, or are unsure about the load-bearing capacity of the wall, stop immediately and consult a qualified professional to avoid damaging your home’s infrastructure.
How do I mix different frame styles?
Mixing different frame styles successfully requires finding a common thread to unify the eclectic collection. One effective method is to use consistent matting colors, such as using identical white or off-white mats for every family poster, regardless of the frame style. Alternatively, you can choose a single dominant frame color, such as black, and mix different textures, widths, and materials within that color family. To maintain visual balance, place your largest, darkest, or most ornate frames near the center of the gallery wall, and distribute lighter, thinner, or simpler frames toward the outer edges to keep the arrangement from feeling top-heavy or lopsided.
Community discussion
Share your experience or ask a question. Comments are reviewed before publication.