
Transforming a personal collection of BL manhwa photo cards into a curated gallery wall is an excellent way to celebrate your favorite series, characters, and iconic scenes. Whether your collection features limited-edition prints, pre-order benefits, or standard album cards, displaying them elevates them from tucked-away collectibles into a striking focal point for your room. To achieve a professional-looking gallery wall, you must balance visual design with strict preservation techniques, ensuring your cherished cards remain safe from environmental wear.
Planning Your Wall Space and Gathering Tools
Before hanging a single frame, you must carefully evaluate the physical environment of your room. In tropical climates like the Philippines, high ambient humidity and intense sunlight pose significant risks to paper collectibles. Choose a wall that never receives direct sunlight, as UV rays can rapidly fade the vibrant inks of your manhwa illustrations. Additionally, avoid walls adjacent to damp areas, such as bathrooms, or those directly beneath air conditioning units where condensation might accumulate.
Once you have selected the ideal wall, measure the available space precisely using a metal measuring tape. Note the height and width of the display area to determine how many frames can comfortably fit without looking overcrowded. Having these dimensions on hand will also help you calculate the spacing between frames, which typically looks best when kept uniform at around two to three inches.
Products mentioned in this guide
![[500gsm] Jinx Manhwa BL Photocards Joo Jaekyung - Matte](https://img.lazcdn.com/g/p/6e3665f319b9ca6fe09ee3b76d643121.png_400x400q80.png_.webp)
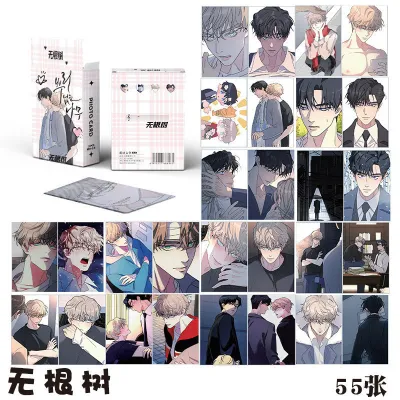

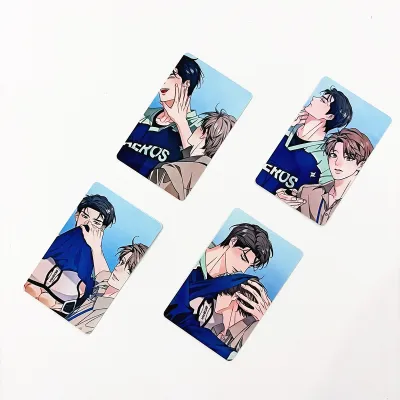

Prices are valid at publication and may change. Please refer to the product page for the latest price.
Gathering the correct tools beforehand prevents mid-project delays and ensures a clean installation. Your basic toolkit should include a measuring tape, a bubble level, painter’s tape, a pencil, and your chosen hanging hardware. If you are mounting frames on concrete or masonry walls—which are highly common in local residential construction—you will need a hammer drill, masonry drill bits, and plastic wall anchors paired with matching screws.
For renters or those who prefer not to drill into their walls, heavy-duty adhesive strips offer a reliable alternative. When selecting adhesive strips, verify their weight capacity against the weight of your fully assembled frames. Ensure the wall surface is clean, dry, and free of peeling paint before application, as tropical humidity can sometimes weaken the bond of low-quality adhesives over time.
Designing a Cohesive Layout for Mixed Card Sizes
BL manhwa photo cards come in various dimensions, ranging from standard pocket-sized cards to larger postcard-sized prints and bookmarks. Designing a layout that accommodates these mixed sizes requires a thoughtful approach to visual balance. You can choose between a structured grid layout or an organic, salon-style arrangement.

A structured grid layout works exceptionally well if your frames are identical in size and shape. This style creates a clean, modern, and highly organized look that draws immediate focus to the individual cards. If your collection consists of uniform standard-sized cards, placing them in identical small frames arranged in a precise three-by-three or four-by-four grid offers a sophisticated aesthetic.
If your collection features a mix of portrait and landscape cards of varying sizes, an organic salon-style layout is more accommodating. This approach allows you to mix different frame sizes and orientations within a loose, cohesive boundary. To prevent a salon layout from looking chaotic, establish a central focal point using your largest or most detailed frame, then arrange the smaller frames outward from the center.
To test your layout without damaging your walls, create paper templates of each frame using kraft paper or newspaper. Cut the paper to match the exact dimensions of your frames, label them, and use painter’s tape to arrange them on the wall. This physical mockup allows you to step back, assess the overall composition, and adjust the spacing until the layout feels balanced. Alternatively, you can arrange the physical frames on the floor and photograph the setup from above to compare different configurations.
Achieving visual balance also requires distributing the visual weight of your cards evenly. Darker illustrations, highly detailed scenes, or larger frames carry more visual weight than lighter, minimalist designs. Distribute these heavier elements across the layout rather than clustering them in one corner, ensuring the viewer’s eye moves naturally across the entire gallery wall.
Choosing Frames and Archival Protection
Protecting your collectible photo cards from environmental degradation is just as important as the visual design of your gallery wall. Standard commercial frames often use materials that can damage delicate paper over time. To preserve the value and condition of your BL manhwa cards, you must select frames equipped with archival-grade components.
First, verify that the frame glass or acrylic glazing offers UV protection. Ambient indoor light, including fluorescent bulbs and indirect sunlight, contains UV radiation that can cause paper to yellow and inks to fade or discolor. Acrylic glazing with a certified UV-filtering rating is highly recommended, as it is lightweight, shatterproof, and provides excellent clarity.
Second, ensure that the mats and backing boards used inside the frames are strictly acid-free. Standard cardboard or cheap paper mats contain lignin, which releases acids as it breaks down, leading to irreversible yellowing and brittle edges on your photo cards. Look for mats labeled as “archival-grade” or “100% cotton rag” to create a safe barrier between the card and the frame backing.
The aesthetic style of your frames should complement the manhwa artwork without overpowering the delicate illustrations. Minimalist frames with thin profiles in solid black, white, or natural wood tones are versatile options that suit most modern interiors. If your collection features vibrant, colorful webtoon art, simple white or light wood frames can make the colors pop, while black frames add a dramatic, high-contrast border that suits darker, atmospheric series.
Step-by-Step Installation and Hanging
With your layout finalized and your frames prepared, you can begin the installation process. Start by transferring your paper template layout directly to the wall, ensuring each template is perfectly level. Use a bubble level placed on top of each paper template to adjust its position before securing it firmly with painter’s tape.
Mark the exact hanging points directly onto the paper templates. To do this, measure the distance from the top of the frame to the hanging bracket or wire on the back of the frame, then transfer this measurement to the corresponding paper template on the wall. Marking these points on the paper ensures that your drill holes or adhesive placements align perfectly with the frame hardware.
Before drilling or applying adhesives, verify your wall type to select the correct hardware. For concrete, brick, or masonry walls, use a hammer drill to create a pilot hole, insert a plastic wall anchor, and drive in the screw, leaving the head slightly protruding to catch the frame bracket. For drywall, use self-drilling drywall anchors to prevent the screws from pulling out under the weight of the frames.
Safety must be your top priority during installation. Always check for the presence of electrical outlets, light switches, or plumbing fixtures on or near the wall you are working on. Never drill directly above or below an outlet or switch, as electrical conduits typically run vertically behind the wall. If you encounter unexpected resistance while drilling, or if you are unsure of what lies behind the wall surface, stop immediately and consult a qualified professional.
Maintaining and Rotating Your Display
Keeping your gallery wall clean and well-maintained ensures that your collection remains a beautiful feature of your home for years to come. Dust the frames regularly using a dry, clean microfiber cloth or a soft-bristled static duster. Avoid spraying liquid glass cleaners or water directly onto the frames, as moisture can seep through the edges of the frame and damage the paper matting or the photo cards inside.
If you need to clean the glass or acrylic, spray a small amount of specialized, ammonia-free cleaner onto a microfiber cloth first, then gently wipe the surface. When rotating your display to showcase new releases or seasonal favorites, handle the frames with clean, dry hands or wear cotton gloves to prevent transferring skin oils to the frame surfaces or the cards.
In humid tropical environments, monitor your gallery wall closely for signs of moisture accumulation. Check the backs of the frames periodically for any signs of warping, dampness, or mildew. If you notice high humidity levels affecting your display, consider running a dehumidifier in the room, improving air circulation with a ceiling fan, or relocating the gallery wall to a more climate-controlled area of your home.
Frequently Asked Questions (FAQ)
Can I use magnetic or floating frames for standard photo cards?
Magnetic acrylic blocks and floating frames can be used for photo cards, but you must verify that the frame specifications match your card thickness. Standard photo cards are thin and may slip inside a floating frame if the glass panes do not press together tightly enough. Conversely, avoid magnetic frames that exert excessive, uneven pressure on the edges of the card, as this can cause permanent crushing or indentation of the cardstock over time.
How do I prevent my cards from slipping inside the frames?
To secure your photo cards safely within a frame mat without causing damage, use archival-grade photo corners or acid-free hinging tape. Photo corners are highly recommended because they hold the card in place by its corners without any adhesive actually touching the collectible itself, allowing you to remove the card in pristine condition later. Strictly avoid using standard household adhesive tapes, double-sided tape, or glue, as these contain harsh chemicals that will permanently stain, tear, or ruin the cardstock.
Community discussion
Share your experience or ask a question. Comments are reviewed before publication.