
Designing a custom infinity mirror for your condo is an excellent way to introduce depth, modern lighting, and a striking focal point into a compact urban living space. By sandwiching a high-density LED light strip between a standard mirror and a partially reflective two-way mirror, you create an optical illusion of a tunnel of light stretching into infinity. In a condominium setting, executing this project successfully requires balancing spatial aesthetics, structural safety for concrete walls, and proper electrical planning to suit local voltage standards.
Whether you want to create a dramatic entryway statement or a functional piece of glowing wall art, designing your own fixture allows you to customize every detail. From calculating the exact depth of the light tunnel to choosing materials that can withstand tropical humidity, a methodical approach ensures your custom lighting piece is both safe and visually spectacular.
Planning Dimensions and Layout for Your Condo
Before purchasing any materials, you must carefully evaluate your condo layout to determine the mirror’s optimal size, shape, and placement. High-rise units, particularly in dense urban centers like Metro Manila, often feature compact footprints where every square meter of wall space must be used intentionally.
Products mentioned in this guide
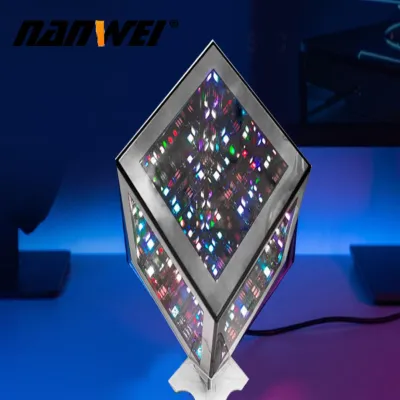
Prices are valid at publication and may change. Please refer to the product page for the latest price.
Assessing Wall Space and Viewing Distance
To fully appreciate the optical depth of an infinity mirror, you need adequate viewing distance. If a mirror is placed in a narrow hallway where viewers can only stand a few inches away, the deep tunnel effect loses its visual impact. Aim for a placement that allows at least 1.5 to 2 meters of clear viewing distance, such as opposite a dining table, behind a living room sofa, or at the end of a main foyer. Measure your target wall space carefully, leaving a visual border of at least 15 to 20 centimeters of empty wall space around the frame so the installation does not overwhelm the room.
Choosing the Shape
The geometric shape of your mirror should complement your condo’s existing architectural lines and furniture. Circular infinity mirrors soften the hard angles of modern, minimalist condo interiors and work exceptionally well above console tables or vanities. Rectangular or square designs align seamlessly with door frames, tall ceilings, and low-profile sofas, offering a structured, clean look. If you want a highly personalized centerpiece, custom polygons or hexagonal frames can serve as standalone geometric art installations.
Mounting Style Decisions
Deciding how the mirror will sit in your space affects both its construction and your lease agreement. Wall-mounted mirrors are the most secure and space-efficient option, but they require drilling into the wall. If you are renting a condo with strict drilling restrictions, a heavy, floor-leaning full-length infinity mirror or a tabletop design is a highly practical alternative. Freestanding designs also make it much easier to access the back panel for maintenance or to relocate the fixture when you move.
Choosing Glass, LEDs, and Frame Materials for Your Infinity Mirror
The materials you select dictate the safety, weight, and optical performance of your mirror. Because high-rise environments can experience structural vibrations and high ambient humidity, selecting stable, high-quality components is essential.

Reflective and Transparent Surfaces
The magic of the infinity effect relies on two distinct layers: a standard glass mirror at the back and a semi-reflective two-way mirror at the front.
- Standard Back Mirror: A high-quality, 4mm to 6mm thick float glass mirror provides the sharpest reflection. Avoid cheap plastic mirror sheets for the back layer, as they warp easily and distort the light tunnel.
- Two-Way Front Mirror: You can choose between two-way glass (often called spy glass) or clear acrylic treated with a one-way reflective window film. Two-way glass offers unmatched optical clarity and scratch resistance, but it is heavy and expensive. Acrylic is lightweight and highly shatter-resistant, making it safer for high-traffic areas, but it can flex under tension, which causes the infinity tunnel to appear curved or distorted.
In local glass shops, custom-cut glass options generally range from ₱1,500 to ₱4,000 depending on the dimensions, while acrylic alternatives are more budget-friendly but require careful handling to avoid surface scratches.
LED Color Temperature and Density
The light source inside your mirror determines its ambient mood. For a cozy, inviting atmosphere that complements warm wood finishes, choose warm white LEDs (2700K to 3000K). For a clean, ultra-modern, or industrial aesthetic, opt for cool white LEDs (5000K to 6500K). If you want maximum versatility, addressable RGB or RGBW LED strips allow you to change colors or run dynamic patterns via a remote control or smart home integration.
To prevent the illusion from looking like a series of disconnected, blurry dots, select high-density LED strips. Standard strips with 30 or 60 LEDs per meter will show noticeable gaps. Instead, look for strips with at least 120 LEDs per meter, or utilize Chip-on-Board (COB) LED strips, which provide a seamless, unbroken line of continuous light.
Frame Materials
The frame must support the weight of two heavy panels and house the internal electronics.
- Aluminum: Lightweight, structurally rigid, and highly resistant to moisture. Aluminum profiles also act as excellent heat sinks, dissipating the heat generated by high-density LED strips to prolong their lifespan.
- Finished Wood: Offers a classic, premium furniture feel. However, wood is heavier and must be properly sealed with polyurethane to prevent warping in humid tropical environments.
- 3D-Printed Enclosures: Ideal for smaller, custom-shaped tabletop mirrors, allowing for integrated wire channels and precise spacer slots.
Step-by-Step Assembly and Depth Illusion Tuning
Assembling your mirror requires patience, cleanliness, and precise spacing. A single speck of dust or a slight misalignment can ruin the optical illusion once the unit is sealed and illuminated.
Preparation and Wiring
Begin by thoroughly cleaning your workspace. Any dust trapped inside the mirror cavity will reflect light and appear as bright, distracting specks in your infinity tunnel.
Before mounting the electronics, verify your power supply specifications. In the Philippines, household power is standard 220V AC at 60Hz. Ensure your LED power adapter (driver) is rated for 220V input and steps the voltage down safely to 12V or 24V DC, matching your LED strip. Prior to installation, test the entire length of the LED strip, the controller, and any dimmer switches or smart plugs to confirm they function correctly. Drill a small, discrete exit hole at the bottom or back of your frame to route the low-voltage DC power cable out of the unit.
Layering the Components
Assemble the mirror in a clean, dry room using the following sequence:
- Install the Front Panel: Place your two-way mirror (glass or treated acrylic) into the front rabbet of the frame, ensuring the reflective side faces inward toward the cavity.
- Mount the Spacer Frame: Insert a wooden or plastic spacer frame directly behind the front glass. This spacer creates the physical gap between the two mirrors and serves as the mounting surface for your lights.
- Apply the LED Strip: Adhere your high-density LED strip to the inner face of the spacer frame, facing inward toward the center of the mirror. Use a high-quality, heat-resistant adhesive backing to prevent the strip from peeling off over time due to operational heat.
- Install the Back Mirror: Place the standard mirror directly behind the spacer, with the reflective side facing forward toward the front glass.
- Secure the Backing Board: Place a rigid backing board (such as MDF or plywood) over the back mirror to hold the entire sandwich tightly in place, securing it with frame clips or screws.
Tuning the Depth Illusion
The physical thickness of your spacer frame dictates the perceived depth of your infinity tunnel. A thin spacer (e.g., 1.5 to 2 centimeters) creates a dense, tightly packed series of light reflections that appear to recede quickly. A thicker spacer (e.g., 4 to 6 centimeters) creates a much deeper, more dramatic plunge, but it requires a deeper outer frame to accommodate the thickness.
Before permanently securing the back mirror, temporarily power on the LEDs. Look through the front panel to verify that the light source itself is completely hidden behind the frame’s front lip. You should only see the reflections of the lights, not the physical LED chips themselves.
Sealing and Finishing
High relative humidity can trap moisture inside a sealed mirror frame, leading to glass fogging, mold growth, or premature degradation of the LED adhesive. To prevent this, place a small, fresh packet of silica gel (desiccant) inside the frame cavity before closing it. Seal the outer back seams of the frame with a thin bead of neutral-cure silicone sealant to block ambient air and dust from entering the unit.
Safe Mounting and Power Management in Condos
Once your custom infinity mirror is assembled, you must mount it securely and manage its power source safely, respecting the structural and electrical realities of condo living.
Wall Assessment and Anchoring
Most high-rise condominiums feature solid concrete walls, structural shear walls, or concrete hollow blocks (CHB) finished with plaster. Hanging a heavy mirror on these surfaces requires proper tools:
- Do not use standard nails or simple plastic drywall plugs. They will slip out of concrete under heavy loads.
- Use a hammer drill equipped with a carbide-tipped masonry drill bit to create clean pilot holes.
- Insert heavy-duty expansion anchors (commonly called tox plugs in the Philippines) or concrete sleeve anchors that match the weight of your completed mirror.
- Verify your mounting brackets. Heavy-duty steel French cleats are highly recommended for large mirrors because they distribute the weight evenly across the wall and keep the mirror flush against the vertical surface.
Discreet Power Routing
To maintain the clean, magical aesthetic of your infinity mirror, you must manage the power cable discreetly. If you cannot route cables inside the wall due to concrete structural constraints or rental rules, use paintable PVC wire trunking (molding). Run the trunking straight down from the bottom of the mirror frame to the nearest electrical outlet, and paint it to match your condo’s wall color. Alternatively, place a console table directly beneath the mirror to hide the power adapter, controller, and excess wiring.
Professional Help Boundaries
While assembling the mirror housing is a straightforward DIY project, electrical safety must remain your top priority. Always check the manufacturer’s instructions for your specific LED strips, power supplies, and controllers before making any connections.
If you plan to hardwire the mirror directly into your condo’s existing 220V lighting circuits, or if you intend to install the mirror in a high-moisture environment like a bathroom vanity, do not attempt to do this yourself. Stop and consult a licensed electrician to ensure the installation complies with local electrical codes, utilizes proper ground-fault circuit interrupter (GFCI) protection, and maintains the integrity of your condo’s electrical system.
Community discussion
Share your experience or ask a question. Comments are reviewed before publication.