
Finding the perfect night light projector film is essential to restoring the vibrant, relaxing ambiance of your bedroom or living space. If your current film is scratched, faded, or warped, simply buying the first replacement pack you see online often leads to disappointment. To determine which night light projector film is compatible with your device, you must match the physical shape (diameter or diagonal), the mounting mechanism (notches, slots, or gear tracks), and the material’s heat tolerance to your projector’s specifications. Because these ambient devices use different optical systems and motor-driven carousels, a film that looks identical in a product photo may fail to fit or rotate in your specific unit.
Identify Your Projector's Base Specifications
Before browsing online marketplaces for a replacement night light projector film, you must gather the baseline technical data of your existing device. Turn the projector over and locate the manufacturer’s sticker or printed label, which is typically found on the bottom or back of the housing. This label contains critical information, including the exact model number, voltage requirements (such as a 5V USB input or 220V mains power), and electrical certifications. If your device is powered by a standard wall outlet, verifying these electrical ratings ensures you operate the unit within safe parameters.
Relying solely on visual similarity or generic product titles like “starry sky” or “sunset” is a common mistake. Two projectors might project similar cosmic patterns, but their internal motor mechanisms, focal lengths, and tray dimensions can vary significantly. A film designed for a static, manual-focus lamp will not function in a high-speed, auto-rotating projector. If the label on your device has worn off, consult the original packaging, check the user manual, or visit the manufacturer’s official website to search for the specific film diameter or replacement part number.
Products mentioned in this guide

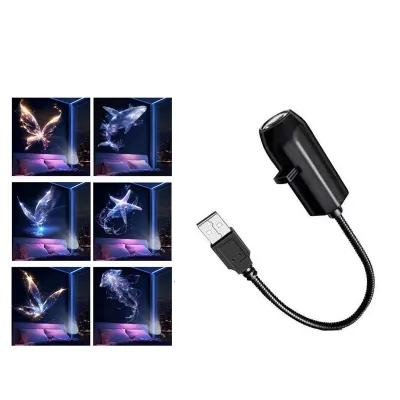
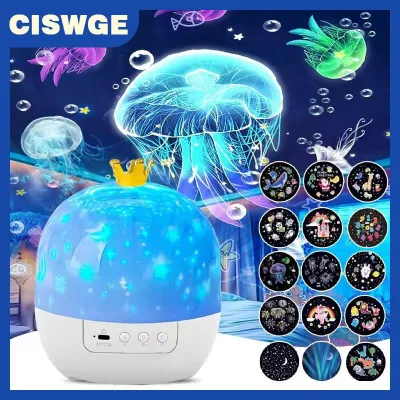
Prices are valid at publication and may change. Please refer to the product page for the latest price.
Decode Key Film Specifications for Compatibility
Finding a replacement film that works flawlessly requires looking past the visual design of the slide. True compatibility relies on physical and material dimensions that dictate how the film sits inside the projector, how it interacts with the rotation motor, and how it handles thermal energy.

Physical Dimensions and Mounting Shape
The physical size of the night light projector film is the most critical factor for a proper fit. For circular films, you must match the exact outer diameter down to the millimeter. For square or rectangular slides, the diagonal and edge lengths must be precise. Even a minor deviation of 1 to 2 millimeters can prevent the film from sitting flat in the tray, causing it to slip during operation or jam the rotation motor entirely.
Beyond basic dimensions, pay close attention to the mounting features along the edges of the film. Some projectors use simple friction slots where the film slides into place and is held by tension. Others utilize specialized notches, alignment tabs, center holes, or even molded gear teeth that directly engage with the projector’s internal rotation motor. If these mounting features do not align perfectly with your projector’s carousel, the film will remain static, and the motor may overheat as it struggles to turn a misaligned disc.
Material Type and Heat Tolerance
The material of the replacement film must match your projector’s light source and heat profile to prevent safety hazards. Common projector films are made from rigid plastics like polyethylene terephthalate (PET) or polycarbonate (PC), while premium or high-output models may use specialized glass or thin metal slides. The choice of material directly correlates with the amount of heat generated inside the projector housing.
Standard LED-based projectors generate minimal heat, making them highly compatible with affordable PET or PC plastic films. However, if your projector uses a high-wattage halogen bulb or an incandescent light source, the internal temperatures will rise significantly during extended use. These high-heat environments require heat-resistant glass or specialized high-temperature plastic films. Always check the material and thickness of your original film as a baseline; installing a standard plastic film in a high-heat halogen projector can lead to melting, toxic fumes, and permanent damage to the lens.
How to Safely Measure Your Existing Film
If you cannot find your projector’s model number or specifications online, manually measuring your original film is the most reliable way to ensure a correct match. Before attempting to open the film compartment, always isolate the power source. Unplug the projector from the wall outlet or disconnect the USB cable, and allow the device to cool down completely for at least 15 minutes to avoid burns.
Once the device is cool and safe to handle, carefully extract the original film. Use a pair of digital calipers or a highly precise ruler to measure the outer diameter of a circular film, or the exact width and height of a flat sheet. If the film features a central mounting point, measure the inner hole diameter as well. Additionally, check the thickness of the film; a replacement that is too thick will not slide into the retaining slots, while a film that is too thin may wobble and distort the projected image.
While measuring, inspect the edges of the film for any unique physical characteristics. Look for small cutouts, raised tabs, or textured tracks that help the motor grip the film. Take clear, well-lit reference photos of the film next to a ruler. You can use these photos to compare against the detailed dimension diagrams provided by sellers on local e-commerce platforms. If your original film is completely warped, melted, or missing, you must measure the internal slot or carousel tray of the projector itself to determine the maximum allowable clearance.
Installation Safety and Heat Boundaries
Installing your new night light projector film requires careful handling to protect both the delicate optical elements and your personal safety. Before opening the housing, verify once more that the power is fully disconnected. Never attempt to replace or adjust a film while the projector is plugged in, as this poses electrical risks and exposes your eyes to intense, concentrated light sources.
When handling the interior of the projector, avoid touching the light bulb or LED element with your bare fingers. This is especially critical for halogen bulbs; the natural oils from your skin can deposit onto the glass, creating hot spots that cause uneven thermal expansion and premature bulb failure. If you accidentally touch the bulb, clean it gently with a microfiber cloth dipped in rubbing alcohol before turning the device back on.
Once the new film is positioned, perform a manual rotation test if your projector model allows it. Gently turn the carousel with your finger to ensure it moves freely without catching on the housing. After plugging the device back in, observe the first few minutes of operation closely. Listen for any strained humming, clicking, or grinding noises from the motor, and watch for any wobbling in the projected image. If the motor sounds strained or the film does not rotate smoothly, turn off the device immediately to prevent stripping the plastic gears. Never force a film into a slot; if it does not slide in smoothly with light pressure, it is the incorrect size.
Frequently Asked Questions (FAQ)
Can I use a sunset lamp film in a starry sky projector?
No, sunset lamp films and starry sky projector films are generally not interchangeable due to fundamental differences in their optical and mechanical designs. Sunset lamps typically use a single high-power LED light source behind a thick, stationary convex lens to project a solid gradient of light, sometimes using a slowly rotating internal color wheel. In contrast, starry sky projectors rely on complex multi-lens systems, lasers, and fast-rotating flat or cylindrical film carousels to cast intricate patterns across a wide area. Because the focal lengths, film shapes, mounting slots, and rotation mechanisms differ entirely, a sunset lamp film will not physically fit or project correctly in a starry sky projector.
Why does my replacement film warp or smell like burning plastic?
Warping or a distinct burning plastic smell indicates that the replacement film’s material cannot withstand the thermal output of your projector’s light source. This issue typically occurs when a standard, low-cost plastic film designed for cool-running LED projectors is installed in a device that utilizes a high-wattage halogen or incandescent bulb. If you experience this, immediately turn off and unplug the projector to prevent a fire hazard or permanent damage to the internal lenses. Remove the damaged film once it has cooled, and verify whether your projector requires specialized heat-resistant glass slides or high-temperature polycarbonate films instead of standard PET plastic.
Community discussion
Share your experience or ask a question. Comments are reviewed before publication.