
Setting up a beautiful holiday photo booth or family portrait station brings festive warmth to any home, but a creased, sagging backdrop can instantly break the holiday magic. Achieving a professional, studio-quality look right in your living room does not require expensive studio gear. By preparing the material beforehand, securing it with even tension, and positioning your subjects and lights thoughtfully, you can eliminate distracting folds and capture clean, memorable images.
A smooth setup relies on understanding your specific backdrop material and using the right physical support. Whether you are working with a vibrant vinyl sheet, a classic cotton canvas, or a lightweight polyester blend, a systematic approach to hanging and smoothing will ensure your holiday photos look polished and bright.
Gather the Right Tools and Materials
To set up a flawless holiday photo station, you need the right supporting gear to keep the material secure and undamaged.
Products mentioned in this guide

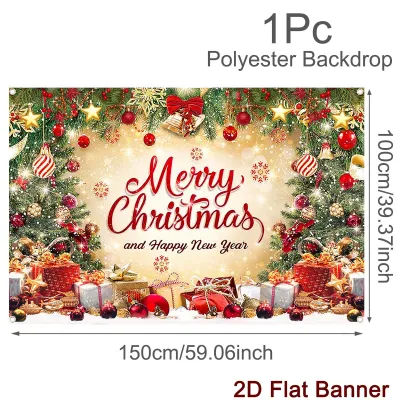
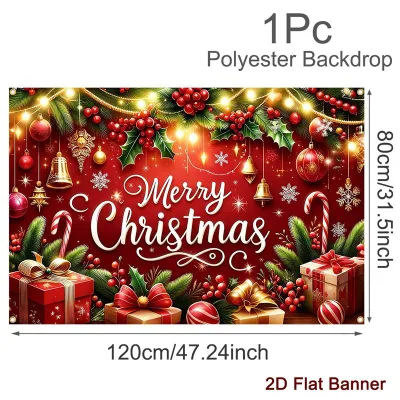
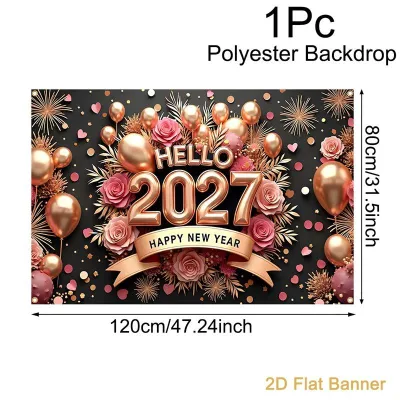

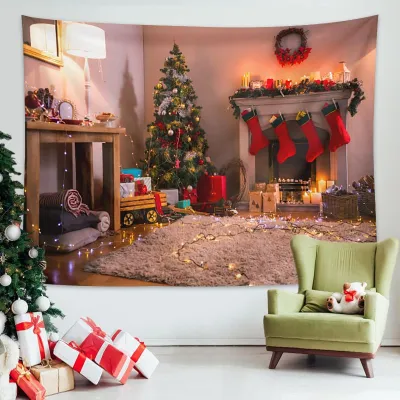

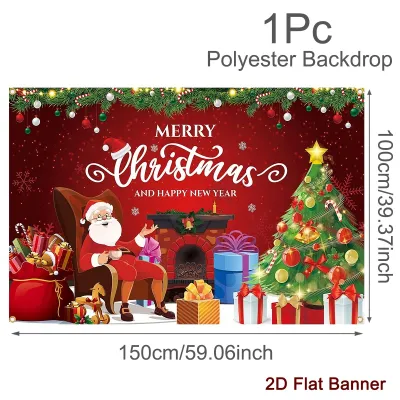
Prices are valid at publication and may change. Please refer to the product page for the latest price.
Adjustable backdrop stands are the most reliable option for support, but tension rods work well in tight spaces or doorways. For temporary setups without a stand, wall-safe adhesive hooks or heavy-duty mounting tape can secure lightweight backdrops to concrete or drywall without stripping the paint.
Spring clamps and heavy-duty binder clips are essential for pulling the fabric taut against the frame. Double-sided painter’s tape or masking tape can secure the bottom edge to the floor, preventing shifting when subjects move.
For wrinkle removal, a reliable garment steamer is the safest tool for most materials. If you use a traditional clothes iron, you will also need a clean, thin cotton pressing cloth to act as a heat barrier. A simple spray bottle filled with clean water is also useful for misting natural fabrics.
When using electric steamers or irons, verify they are rated for your local voltage—typically 220V in the Philippines—and carry valid safety certifications like the PS or ICC mark to prevent electrical hazards during your holiday preparations.
Remove Wrinkles Safely Based on Fabric Type
Different backdrop materials react differently to heat and moisture. Before applying any treatment, always locate and read the manufacturer’s care label to check for specific temperature limits, chemical restrictions, or washing instructions.

Vinyl backdrops are highly popular for Christmas scenes due to their vibrant colors, but they are extremely heat-sensitive. Never apply a hot iron directly to vinyl, as it will melt instantly. Instead, use a garment steamer on its lowest setting. Hold the steamer nozzle at least 15 to 20 centimeters away from the backside of the backdrop, moving it constantly to relax the synthetic fibers without overheating them.
Polyester and cotton-blend backdrops are much more forgiving. You can iron these on a flat, heat-resistant surface using a low-to-medium heat setting. Always place a damp pressing cloth between the iron and the backdrop to distribute the heat evenly and prevent shiny scorch marks. Work in small sections, moving the iron continuously.
For heavy canvas or pure cotton backdrops, misting the fabric lightly with clean water from a spray bottle can help release deep fold lines. Once misted, hang the backdrop immediately so gravity can pull the damp fibers straight as they dry.
If you do not own a steamer or iron, you can leverage natural humidity. Hang the backdrop securely in a closed bathroom while running a hot shower. The rising steam will naturally relax the creases over 20 to 30 minutes. This gentle method is highly effective for delicate or heat-sensitive materials, especially in humid tropical climates where fibers naturally absorb moisture.
Hang and Secure the Backdrop for Even Tension
Once the major wrinkles are addressed, mounting the backdrop correctly is the key to keeping it perfectly flat throughout your photo session.
Begin by assembling your backdrop stand on a level surface. Adjust the horizontal crossbar to match the width of your backdrop, ensuring the vertical uprights are locked securely at an equal height. If you are working at height to adjust the top bar, use a stable step stool and have a family member assist you to prevent tipping hazards.
Drape the top of the backdrop over the crossbar. Secure the very center of the backdrop to the bar using a strong spring clamp. From there, pull the material gently toward the left outer edge and apply another clamp, then repeat the process toward the right outer edge. Working from the center outward prevents the fabric from bunching or forming diagonal stress lines.
Next, address the sides. If your stand has side poles, use elastic backdrop clips or bungee clamps to pull the left and right edges outward. This lateral tension is crucial for removing any remaining vertical waves. If you are mounting the backdrop directly to a wall, use wall-safe tape or command hooks spaced evenly along the sides to maintain outward pull.
Secure the bottom edge to prevent it from curling or shifting when subjects step near it. You can tape the bottom hem directly to the floor using gaffer tape, which leaves no sticky residue. Alternatively, wrap the bottom edge around a heavy wooden dowel or metal pipe to act as a natural weight, pulling the entire sheet downward.
Step back and perform a thorough visual inspection. Look for any diagonal pull lines, which indicate uneven tension. Adjust individual clamps slightly until the surface looks completely uniform from top to bottom.
Position Subjects and Lights to Hide Imperfections
Even with careful preparation, minor textures may remain. You can use smart spatial arrangement and lighting techniques to make these imperfections invisible to the camera lens.
Position your subjects at least 1 to 1.5 meters away from the backdrop. This physical separation serves two purposes: it allows you to use a wider camera aperture to gently blur the background, and it prevents the subjects’ physical shadows from falling directly onto the Christmas scene.
Lighting angle is critical, especially for vinyl or semi-glossy backdrops that reflect light easily. Avoid placing your main light source directly next to the camera pointing straight at the backdrop, as this creates harsh hot spots and glare. Instead, position your lights at a 45-degree angle to the setup. This off-axis lighting allows reflections to bounce away from the camera lens rather than into it.
Use light modifiers to soften the illumination. Direct, bare bulbs create sharp shadows and highlight every tiny crease in the fabric. Attaching a diffuser, softbox, or shooting through a white umbrella scatters the light gently, creating soft, even illumination that flatters both your subjects and the holiday background. If you are using DIY lighting, ensure all fixtures are stable, kept away from flammable fabrics, and do not exceed the recommended wattage limits of your sockets.
Troubleshoot Sagging, Glare, and Static Issues
During a busy holiday photo session, unexpected setup issues can arise. Knowing how to address them quickly keeps the shoot running smoothly.
If the middle of your crossbar begins to sag under the weight of a heavy fabric backdrop, it will create unsightly V-shaped wrinkles. You can reinforce the center by adding a lightweight support pole or securing the middle section of the crossbar to an adjacent wall hook. If using a tension rod in a doorway, ensure the rubber ends are clean and firmly pressed against the frame to prevent slipping.
If you encounter persistent glare on a glossy backdrop that cannot be solved by angling the lights, try lowering the overall light intensity and raising your camera’s ISO slightly. Alternatively, verify if a specialized matte anti-glare spray is compatible with your backdrop material by testing a tiny, hidden corner first. Never spray chemicals on rented or delicate backdrops without checking the manufacturer’s guidelines.
Synthetic fabrics like polyester often suffer from static cling, which attracts dust, pet hair, and lint, making the backdrop look dirty in high-resolution photos. To neutralize static, lightly mist the back of the fabric with a mixture of water and a tiny drop of fabric softener, or wipe the surface gently with a slightly damp microfiber cloth. This simple step discharges the static electricity and keeps the surface clean throughout your holiday event.
Frequently Asked Questions (FAQ)
Can I use a regular clothes iron on a vinyl Christmas backdrop?
Using a standard clothes iron directly on a vinyl backdrop carries an extremely high risk of melting, scorching, or permanently warping the material. Vinyl is a synthetic plastic that cannot tolerate direct, high heat. Always check the manufacturer’s care label first. If you must use an iron, set it to the absolute lowest heat setting, place a thick, damp cotton towel over the vinyl as a protective barrier, and move the iron constantly without letting it rest in one spot. A safer and highly recommended alternative is using a garment steamer from a safe distance of 15 to 20 centimeters, or hanging the backdrop in a highly humid room to let the creases relax naturally.
How do I store the backdrop to prevent wrinkles for next year?
Proper storage is the best way to minimize prep work for the next holiday season. Instead of folding your Christmas backdrop—which creates deep, stubborn creases—roll it tightly around a sturdy cardboard tube or a clean PVC pipe. Ensure the printed side faces inward to protect the design from scratches. Secure the rolled cylinder with soft fabric ties or ribbon rather than tight rubber bands, which can leave permanent indentations. Store the rolled backdrop horizontally in a cool, dry place away from direct sunlight, dampness, and heavy objects that could crush the tube.
Community discussion
Share your experience or ask a question. Comments are reviewed before publication.