
Hanging led butterfly lights in your condo bedroom is an excellent way to introduce soft, whimsical ambient lighting without risking your security deposit. In a rental or condominium where drilling holes is strictly prohibited, you can achieve a secure and beautiful installation by using temporary, damage-free hanging tools like removable adhesive hooks, mounting putty, or tension-based draping methods. The key to long-lasting success lies in thorough surface preparation, choosing adhesives that can withstand the local tropical climate, and routing your wiring safely.
By taking the time to map out your design and select the correct mounting accessories, you can transform your sleeping space into a cozy sanctuary. This guide walks you through the entire process, from initial layout planning to damage-free removal, ensuring your walls remain pristine and your landlord remains happy.
Planning Your LED Butterfly Lights Layout
Before peeling any adhesive backings or mounting your lights, you must visualize the final design and identify your power sources. In a typical condo bedroom, space is often premium, making it essential to choose a focal point that maximizes visual impact without cluttering the room. Excellent focal areas include the wall space directly above your headboard, the perimeter of a vanity mirror, or draped along a window frame to catch the evening breeze.
Products mentioned in this guide
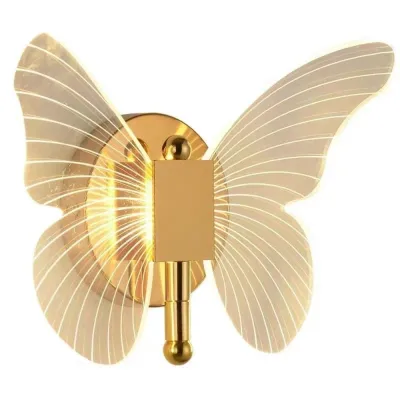
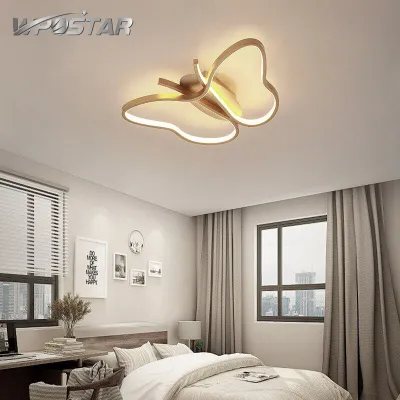
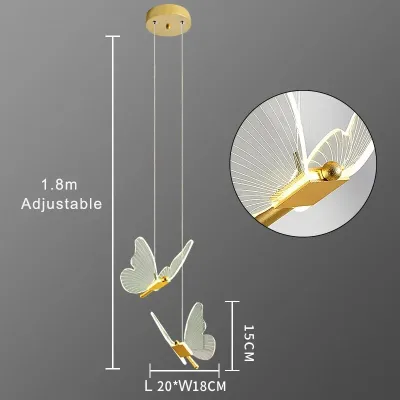
Prices are valid at publication and may change. Please refer to the product page for the latest price.
Once you have selected your location, measure the total length of your led butterfly lights. Knowing the exact dimensions of your light string prevents unexpected surprises, such as running out of wire halfway through the installation or having an excess of dangling cords at the end. If your light string is exceptionally long, plan for gentle, sweeping drapes rather than tight, straight lines, which can put unnecessary tension on the wire.
Next, locate your nearest accessible power outlet. If your butterfly lights are plug-in or USB-powered, you must ensure the cord can comfortably reach the outlet without being stretched taut. For battery-operated variants, identify a discreet spot to conceal the heavy battery box, such as behind a pillow, inside a decorative basket, or mounted flush against the side of a nightstand using removable strips.
Finally, sketch a rough path of the main wire on a piece of paper or take a quick photo of your wall and draw over it digitally. This step allows you to plan the exact placement of your support hooks and minimize visible trailing lines. A well-planned path ensures that the focus remains entirely on the delicate, glowing butterfly motifs rather than a messy web of dark wires.
Choosing the Right Damage-Free Hanging Tools
Selecting the correct mounting hardware is the most critical decision in preventing paint damage and wall peeling. Removable adhesive hooks are the gold standard for hanging lightweight string lights because they distribute weight evenly and release cleanly when pulled correctly. Clear, mini adhesive hooks are particularly useful for fairy lights as they blend seamlessly into the background, keeping the wiring discreet.

For lightweight wires or individual butterfly accents, mounting putty is an excellent alternative. This reusable, clay-like substance can be molded to hold wires flat against the wall and is easily rolled off the surface without leaving oily stains, provided you use a high-quality brand. Additionally, clear monofilament fishing line can be tied to curtain rods, wall sconces, or ceiling fixtures to drape your lights gracefully without using any wall adhesives at all.
Living in the Philippines means dealing with high relative humidity and warm tropical temperatures, both of which can significantly affect adhesive performance. Standard adhesives can soften or lose their grip when exposed to constant moisture in the air, especially in non-air-conditioned rooms. To combat this, look for moisture-resistant adhesive strips or allow double the manufacturer’s recommended curing time before subjecting the hooks to any weight.
Avoid heavy-duty double-sided mounting tapes, foam tapes, duct tape, or hot glue guns at all costs. These materials are designed for permanent bonds and will almost certainly tear away layers of drywall paper or concrete paint when removed. Similarly, avoid the temptation to use small nails, tacks, or staples; even tiny punctures can violate condo association rules and require tedious patching and painting later.
Before purchasing your hooks, check their official weight capacity against the actual weight of your light string. While LED bulbs and thin wires are incredibly light, decorative butterfly attachments made of acrylic, metal, or thick fabric add cumulative weight. Ensure your chosen hooks are rated to hold at least twice the estimated weight of the light string to account for environmental factors like humidity and accidental tugs.
Step-by-Step Installation Guide
To achieve a clean, professional-looking installation that stays secure for years, follow a systematic approach. Rushing the process often results in falling lights and damaged paint.
Preparing the Wall Surface
Adhesives require a completely clean, dry, and wax-free surface to form a strong molecular bond. Start by wiping down the specific areas of the wall where you plan to place your hooks using a clean microfiber cloth dampened with 70% isopropyl rubbing alcohol. This step effectively removes accumulated airborne dust, skin oils, and ambient humidity film that naturally settle on condo walls.
Avoid using multi-purpose household surface cleaners, glass cleaners, or dish soap to prep your walls. These products often contain silicones, moisturizers, or surfactants that leave behind a microscopic, slippery residue. This residue prevents temporary adhesives from bonding securely, causing your hooks to fall off within a few days. Allow the wiped areas to air-dry completely for at least ten minutes before proceeding.
Applying Hooks and Adhesives
When applying your removable adhesive hooks, peel the liner from one side of the adhesive strip and press it firmly to the back of the hook. Next, remove the remaining liner, position the hook along your planned layout path, and press the entire assembly firmly against the prepped wall surface. Hold pressure continuously for at least 30 seconds to activate the pressure-sensitive adhesive fully.
Once the hooks are pressed onto the wall, resist the urge to hang your lights immediately. The adhesive bond requires time to cure and settle into the microscopic pores of the wall paint. In the warm and humid climate of the Philippines, it is highly recommended to wait at least one to two hours—or even overnight—before hanging your lights. Additionally, place your hooks closer together near the heavy plug-in adapter or battery pack to distribute the concentrated weight safely.
Hanging and Adjusting the Lights
With your hooks fully cured and secure, gently drape the main wire of your led butterfly lights over the hooks. Avoid pulling the wire tight between supports; leaving a slight, natural slack prevents constant tension from slowly pulling the adhesive hooks away from the wall. Work slowly from the power source outward, ensuring the cord is not pinched or twisted.
Once the main wire is supported, take a step back to inspect the layout. Adjust the individual butterfly motifs so they face outward toward the room rather than turning backward against the wall. This ensures the ambient light diffuses beautifully and the butterfly shapes are clearly defined when illuminated.
If certain butterflies or wire sections refuse to sit flat, use small pea-sized pieces of mounting putty or clear, low-tack tape to secure them in place. This technique is particularly helpful for securing loose wire ends near the floor or keeping the butterflies aligned along a specific geometric pattern or shape.
Safe Removal and Wall Care
When it is time to move out of your condo or change your bedroom decor, removing the lights safely is just as important as installing them. To remove adhesive hooks without peeling the paint, grab the exposed tab of the adhesive strip and pull it slowly and straight down, parallel to the wall surface. Never pull the strip outward or at a 90-degree angle, as this concentration of force will instantly rip the paint and plaster off the drywall.
If you encounter a stubborn hook or find that the mounting putty has hardened over time, do not force it. Instead, use a handheld hairdryer on a low-to-medium heat setting to gently warm the adhesive for 20 to 30 seconds. The localized heat softens the acrylic polymers in the adhesive, making it pliable and significantly reducing the risk of paint damage during removal.
Always establish a clear stop condition during the removal process. If you notice the wall paint beginning to lift, bubble, or crack as you pull the adhesive strip, stop immediately. Do not attempt to rip it off quickly; instead, apply more gentle heat with your hairdryer, or use a thin plastic card (like an old membership card) to slowly slide behind the hook and release the bond.
After removing all the hardware, you may notice a slight sticky residue or oily mark left behind by the putty. To clean this up safely, apply a tiny amount of mild solvent like eucalyptus oil, baby oil, or warm soapy water to a clean cloth and gently buff the area. Avoid using harsh abrasive pads or strong chemical solvents like acetone, which can dissolve the wall paint and leave permanent dull spots.
Power and Safety Considerations for String Lights
Electrical safety is paramount when installing any decorative lighting in your bedroom. First, verify that the operating voltage of your led butterfly lights matches your local electrical supply. In the Philippines, the standard household utility voltage is 220V at 60Hz. If your lights are imported and rated only for 110V, you must use a compatible step-down transformer to prevent overheating, short circuits, or fire hazards. For USB-powered lights, always use a high-quality, certified 5V power adapter from a reputable manufacturer.
Never daisy-chain multiple sets of string lights together unless the manufacturer’s product manual explicitly states that they are designed for end-to-end connection. Overloading a single circuit or connecting incompatible light sets can cause the wires to overheat, melting the plastic insulation and creating a severe fire hazard. If you need more coverage, plug each string into a separate outlet or use a heavy-duty, surge-protected power strip.
Keep all heat-generating electrical components, including power bricks, USB adapters, and battery packs, away from highly flammable bedroom fabrics. Do not rest these components directly on curtains, bedsheets, blankets, or pillows. Ensure there is adequate ventilation around the power source so that any heat generated during operation can dissipate naturally into the room.
Finally, route all power cords and trailing wires away from primary walkways, doorways, and the immediate path beside your bed. Loose wires on the floor create a significant tripping hazard, especially when navigating your bedroom in the dark. Secure vertical cord drops flat against the wall or behind furniture legs using low-tack cord clips to maintain both safety and a clean aesthetic.
Frequently Asked Questions (FAQ)
Can I hang butterfly lights on textured or freshly painted walls?
Most removable adhesive hooks and strips require a completely smooth, flat, and non-porous surface to establish a secure vacuum-like seal. Textured walls, such as those with stucco, popcorn, or heavy plaster finishes, prevent the adhesive from making full contact, leading to premature failure. Furthermore, if your condo walls were painted within the last 30 days, the paint may feel dry to the touch but is still undergoing a chemical curing process. Applying adhesives to uncured paint will bond them permanently, causing the paint to peel off entirely when you remove the hooks. If you have textured or freshly painted walls, opt for tension-based draping methods over curtain rods, tall headboards, or bookshelves instead.
How do I hide the wire connecting the lights to the power source?
To maintain a clean and polished look, route the trailing power wire along the natural architectural lines of your bedroom. Run the cord vertically down the corner of the room, along the top edge of your baseboards, or frame it tightly around your door and window casings. You can also use paintable plastic cord covers, which stick to your walls with damage-free adhesive and can be painted to match your wall color perfectly. Alternatively, position large furniture pieces, such as your headboard, a tall dresser, or floor-length curtains, directly in front of the outlet to naturally shield the unsightly power cables from view.
Community discussion
Share your experience or ask a question. Comments are reviewed before publication.