
Hanging outdoor string lights on a condominium balcony is an excellent way to transform a plain concrete slab into a cozy, atmospheric outdoor retreat. However, high-rise living introduces unique challenges, particularly strict property management regulations that prohibit drilling into structural walls or altering the building’s exterior. Fortunately, you can achieve a beautifully illuminated balcony using non-destructive, temporary mounting methods that protect both your security deposit and the building’s structural integrity. By matching the right no-drill hardware to your balcony’s surfaces and adhering to proper electrical safety standards, you can enjoy a safe, stunning outdoor setup.
Verify Condo Rules and Electrical Safety First
Before purchasing any lighting equipment, your first step must be to review your condominium association’s deed of restrictions or consult the Property Management Office (PMO). Many high-rise developments in Metro Manila and other urban centers enforce strict guidelines regarding exterior aesthetics, visible wiring, and items hung over railings due to fall hazards. Understanding these rules beforehand prevents costly fines and the frustration of having to dismantle your setup immediately after installation.
Electrical safety is paramount when setting up temporary lighting in an outdoor environment. Begin by identifying a safe, dedicated outdoor-rated electrical outlet on your balcony. This outlet should ideally feature a spring-loaded weatherproof cover to protect the socket from driving rain. If your balcony lacks an outdoor outlet, do not simply run a standard indoor extension cord through a cracked window or sliding door. The constant opening and closing of doors can pinch the cord, damaging the insulation and creating a severe shock or fire hazard.
Products mentioned in this guide
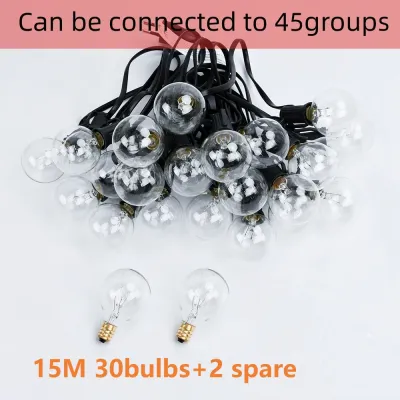
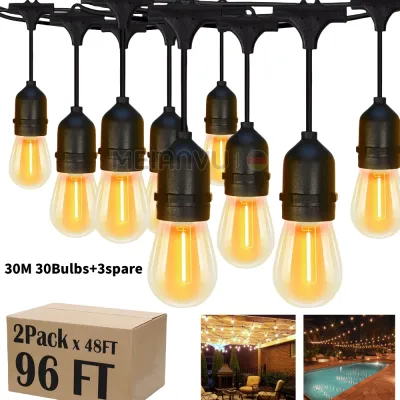
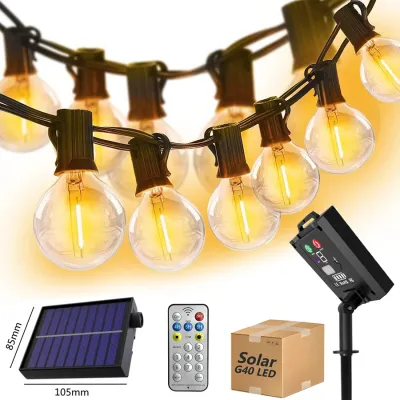
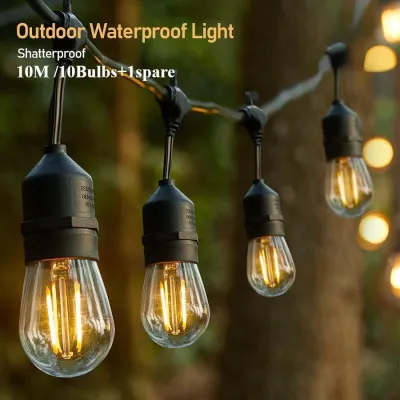
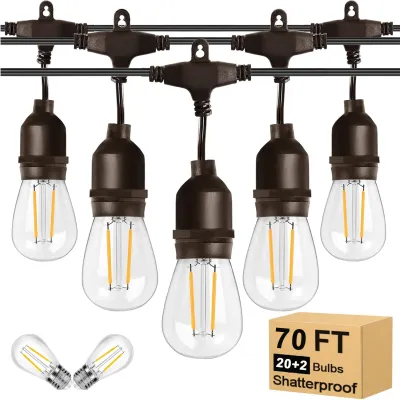
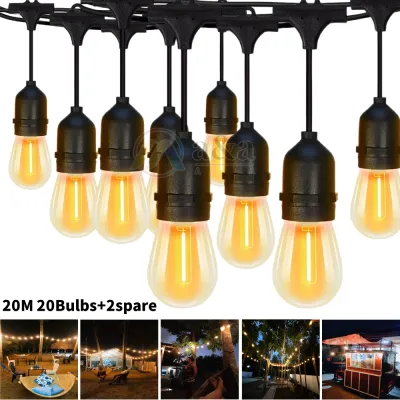
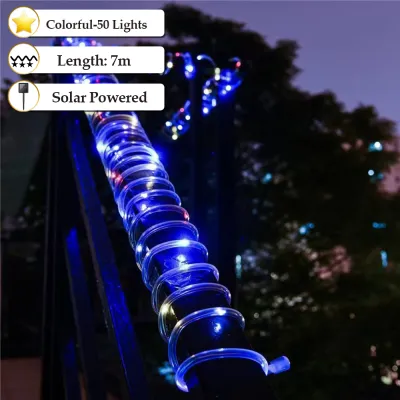
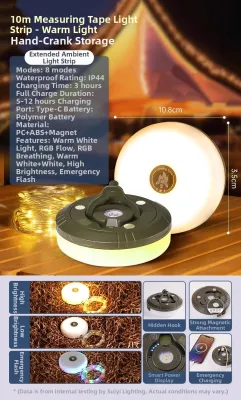
Prices are valid at publication and may change. Please refer to the product page for the latest price.
When selecting your string lights, verify that the product carries a recognized electrical certification, such as the Philippine Standard (PS) quality mark or the Import Commodity Clearance (ICC) sticker. Check the product specifications for voltage compatibility; the standard electrical system in the Philippines operates at 220V and 60Hz. Ensure your lights match this rating to avoid premature bulb failure or electrical hazards. Additionally, verify the socket base type—usually E26 for larger commercial-grade bulbs or E12 for smaller decorative strands—and check the maximum wattage limit specified by the manufacturer. Connecting too many strands in a series can overload the wire, leading to overheating.
While selecting warm white or cool white bulbs is a matter of personal decorative preference rather than a performance metric, warm white (typically 2700K) is generally preferred for creating a relaxing, cozy balcony ambiance. If your setup features dimmable LED bulbs, verify if they require a specific trailing-edge or leading-edge dimmer, and ensure the controller is rated for outdoor use.
Before performing any installation steps, adjusting the layout, or replacing bulbs, always isolate the power source by unplugging the strand or switching off the dedicated circuit breaker. If your balcony lighting plan involves tapping into fixed outdoor junction boxes, running permanent conduit, or working at heights near the edge of a high-rise balcony where fall protection is necessary, do not attempt a DIY installation. In these scenarios, always isolate the power and hire a licensed, qualified professional to handle the work safely.
Select the Best No-Drill Hardware for Your Balcony Surfaces
The key to a successful no-drill installation is matching your mounting hardware to the specific materials of your balcony, such as concrete, glass, powder-coated aluminum, or iron grilles. Using the wrong mounting method can lead to fallen lights, shattered bulbs, or damaged property surfaces.

Tension Rods and Freestanding Poles
For balconies with solid concrete ceilings and floors, or two closely spaced parallel side walls, heavy-duty tension rods offer an exceptionally stable, non-destructive support system. By wedging a spring-loaded or screw-expandable metal tension rod vertically between the floor and the ceiling, you create a sturdy vertical post without drilling a single hole. Alternatively, you can install a horizontal tension rod between two walls to drape lights directly overhead.
If your balcony has an open top or lacks parallel walls, freestanding poles are an excellent alternative. You can construct stable, self-supporting light poles by placing heavy-duty wooden dowels or metal conduits inside weighted planter bases, patio umbrella stands, or decorative pots filled with heavy gravel or concrete. This creates a completely independent frame that rests on the balcony floor.
Before choosing this method, calculate the total weight of your string lights—especially commercial-grade strands with heavy rubberized insulation and glass bulbs—and compare it against the weight capacity of your tension rods or freestanding bases. To minimize structural load and prevent sagging, consider using lightweight plastic LED bulbs instead of heavy glass alternatives.
Adhesive Hooks and Clips
When dealing with smooth, non-porous surfaces like glass sliding doors, glazed ceramic wall tiles, or finished metal window frames, heavy-duty, weather-resistant adhesive hooks are highly effective. Specialized outdoor adhesive clips are designed to withstand UV exposure and moisture, making them ideal for securing light wires directly to glass panels or metal frames.
However, temporary adhesive strips are highly sensitive to surface texture and environmental conditions. Never attempt to use standard indoor adhesive hooks on rough concrete, textured stucco, or freshly painted walls. The high humidity and intense tropical heat common in the Philippines will quickly degrade the adhesive bond, causing the hooks to peel off and potentially strip the paint or finish upon failure.
Always check the manufacturer’s packaging for specific weight limits and temperature tolerances. For outdoor applications, select adhesives rated to withstand temperatures of at least 40°C to ensure they remain secure during the hottest months of the year.
Zip Ties and S-Hooks for Railings
If your balcony features metal grilles, iron balustrades, or wooden railings, you have access to the most secure and completely reversible mounting options available: zip ties and S-hooks. Heavy-duty, UV-resistant nylon zip ties can be looped around the railing and the string light cable, securing the strand tightly in place without leaving any sticky residue behind.
For a more decorative or easily adjustable drape, metal S-hooks can be hung over the top of the railing, allowing the light strand to hang gracefully below. Because metal-on-metal contact can scratch the balcony’s paint or powder coating—leaving the exposed metal vulnerable to rust in humid coastal or tropical environments—always use a protective barrier. Sliding a small piece of clear silicone tubing, rubber padding, or wrapping electrical tape around the contact points of the S-hook will prevent surface damage.
Step-by-Step Installation Guide for Outdoor String Lights
Executing your installation in a structured, methodical order ensures a clean look, optimal performance, and long-term electrical safety. Follow these steps to hang your outdoor string lights successfully:
1. Plan the Layout and Measure Begin by measuring the perimeter of your balcony, the height of your railings, and the distance to your nearest power outlet. Map out your desired layout on paper first. Popular configurations include a simple perimeter run along the railing, a zigzag pattern across the ceiling using tension rods, or a canopy effect. Calculate the total length of string lights required. If you need to connect multiple strands, consult the manufacturer’s instructions to ensure you do not exceed the maximum allowable connected wattage or strand limit.
2. Prepare and Clean the Surfaces If you are using adhesive hooks, proper surface preparation is critical to achieving a long-lasting bond. Wipe down the target areas on your glass, tile, or metal frames using a clean microfiber cloth saturated with 70% isopropyl rubbing alcohol. This removes accumulated dirt, grease, and urban soot. Allow the surface to dry completely. Avoid using standard household glass cleaners or soapy water, as they often leave behind a thin chemical residue that prevents the adhesive from bonding securely.
3. Mount the No-Drill Hardware Install your chosen tension rods, freestanding poles, or adhesive hooks according to their specific instructions. If using adhesive hooks, press the hook firmly against the cleaned surface for at least 30 seconds to activate the pressure-sensitive adhesive. Crucially, allow the adhesive to cure undisturbed for the full manufacturer-recommended waiting period—typically 1 to 24 hours—before hanging any lights. For zip ties, loop them loosely around your railing posts so you can adjust them easily during the next step.
4. Hang and Secure the Lights Carefully drape your string lights along your planned path. Secure the main insulated cable to your hooks, clips, or zip ties. Never hang the lights by the bulb sockets or the individual bulb wires, as this can strain the electrical connections. Ensure you leave a slight amount of slack in the cable between each mounting point. Pulling the strand completely taut puts excessive tension on your non-destructive mounts and can cause them to fail during sudden gusts of wind. Once the alignment is perfect, tighten your zip ties securely, but avoid over-tightening them to the point where they pinch or cut into the wire’s protective outer insulation. Trim any excess zip tie tails with wire cutters for a clean finish.
5. Connect to Power Safely Route the male plug of your string lights toward your power source. If you must use an extension cord, ensure it is specifically rated for outdoor use and features a grounded, three-prong plug. Keep all electrical connections, including the plug interface, elevated off the balcony floor where water might pool during heavy rains. Use a plastic weatherproof connection box to seal the plug connection, or wrap it securely in outdoor-rated electrical tape.
Crucially, implement a “drip loop” in your power cable. To do this, let the cord curve downward below the level of the electrical outlet or connection box before routing it back up into the socket. This simple physical loop ensures that any rainwater running down the length of the cable drips harmlessly off the bottom of the curve rather than traveling directly into the electrical outlet.
Protect Your Setup from Heavy Rain and Strong Winds
The tropical climate of the Philippines presents severe environmental challenges for outdoor installations, including high relative humidity, intense solar radiation, torrential monsoon rains, and powerful typhoons. Protecting your setup requires proactive material selection and regular maintenance.
First, always verify the Ingress Protection (IP) rating of your string lights. Standard indoor lights offer no protection against moisture. For outdoor balcony use, your lights must carry a minimum rating of IP44, which protects against splashing water from all directions. For completely exposed balconies that experience driving rain, look for an IP65 rating, indicating the product is completely dust-tight and protected against water jets.
Wind safety is another critical concern, particularly on high-rise balconies where the surrounding architecture can create a wind-tunnel effect (the venturi effect). Unsecured, dangling bulbs can swing violently during storms, shattering against concrete columns or glass sliding doors. Secure your light strands at shorter intervals—ideally every 30 to 50 centimeters—using extra zip ties or clips to minimize movement. If your lights use glass bulbs, consider upgrading to shatterproof polycarbonate LED bulbs, which can withstand physical impacts without breaking.
Establish a strict safety boundary for severe weather. When PAGASA issues a public storm warning signal or a typhoon is approaching, do not rely on temporary, non-destructive mounts to hold your lights in place. Before the high winds arrive, completely isolate the power by unplugging the system, carefully dismantle the string lights, and bring them indoors. This prevents damage to your lights, protects your balcony glass, and ensures loose components do not fly off the balcony and injure people below.
Finally, establish a simple monthly maintenance routine. Isolate the power, then visually inspect the entire length of the cable for signs of sun damage, cracking, or exposed copper. Check all adhesive hooks to ensure they are not peeling away due to high heat, and tighten any loose zip ties. Wipe down the bulbs with a damp microfiber cloth to remove dust and salt residue, which can dim the light output over time.
Frequently Asked Questions (FAQ)
Can I use indoor string lights on my balcony if they are under a roof?
No, you should never use indoor-rated string lights on a balcony, even if the area is fully covered by a concrete roof. High ambient humidity, condensation, and wind-blown rain common in tropical climates will easily bypass the thin insulation of indoor lights. This exposure leads to rapid corrosion of the bulb sockets, short circuits, and a significantly elevated risk of electrical shock or fire. Always use lights explicitly certified for outdoor use with a minimum IP44 rating.
How do I remove adhesive hooks without damaging the balcony paint?
To remove temporary adhesive hooks cleanly without stripping your balcony paint or leaving sticky residue, use a hairdryer on a medium-heat setting to warm the adhesive backing for 30 to 60 seconds. The heat softens the glue, allowing you to slowly and gently peel the hook off the wall. If any sticky residue remains on the surface, apply a small amount of baby oil, isopropyl alcohol, or a paint-safe commercial adhesive remover, then gently wipe it away with a plastic scraper or a soft cloth.
Are solar-powered string lights a good alternative for condos?
Solar-powered string lights are an excellent, highly convenient alternative for condominiums because they eliminate the need for outdoor electrical outlets and extension cords. However, their performance is entirely dependent on the amount of direct sunlight your balcony receives daily. If your balcony is north-facing, situated on a lower floor shaded by adjacent high-rises, or deeply recessed under a large concrete overhang, the solar panel may not receive enough sunlight to charge the battery fully, resulting in dim lighting or a very short operating time at night.

Community discussion
Share your experience or ask a question. Comments are reviewed before publication.