
Integrating tabletop picture stand holders into a gallery wall layout is an excellent way to break the monotony of flat, two-dimensional displays. By combining wall-mounted frames with freestanding stands, you introduce layers, depth, and a highly curated, lived-in aesthetic to your living space. This approach transforms a standard wall display into a dynamic, multi-dimensional installation that draws the eye and showcases your favorite memories or art pieces from different angles.
In tropical climates where high humidity and warm drafts from open windows or ceiling fans are part of daily life, planning a mixed-media display requires careful consideration of both aesthetics and structural stability. Merging these two display styles successfully relies on choosing the right surfaces, balancing visual weight, and securing each piece against accidental slips. Whether you are decorating a spacious living room or a cozy hallway, this guide will help you seamlessly blend wall frames and picture stand holders into a cohesive, beautiful layout.
Planning a Mixed-Media Gallery Wall Layout
Before hammering any nails or purchasing new frames, it is essential to define the overall concept of your mixed-media gallery wall. Start by assessing the physical space available, paying close attention to any adjacent furniture that can serve as a base for your freestanding elements. Console tables, low credenzas, mantels, and even sturdy sideboards provide the perfect stage for tabletop picture stand holders, allowing them to sit directly beneath or slightly in front of your wall-mounted frames.
Products mentioned in this guide
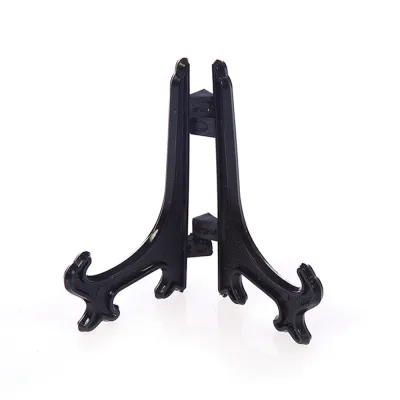
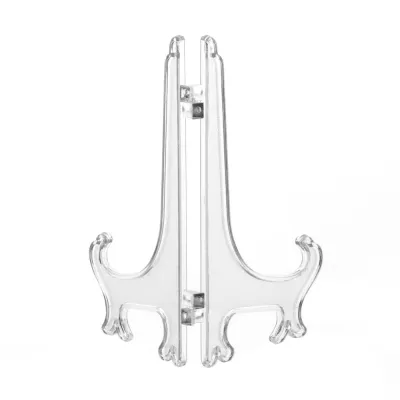
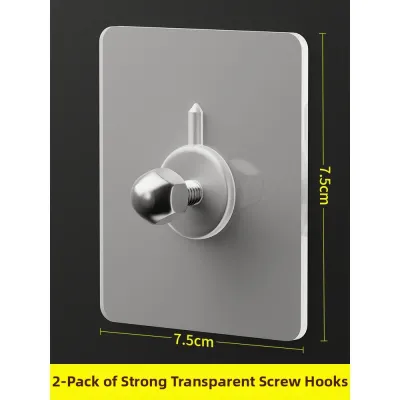
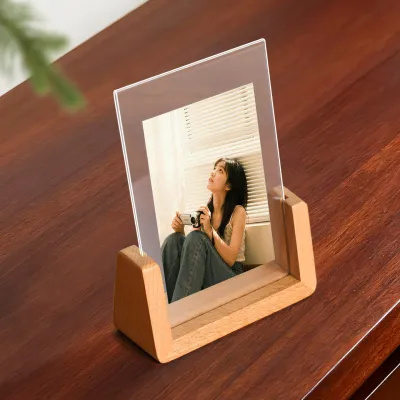
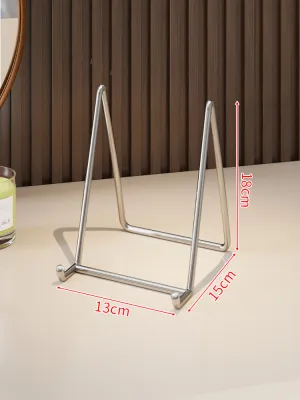
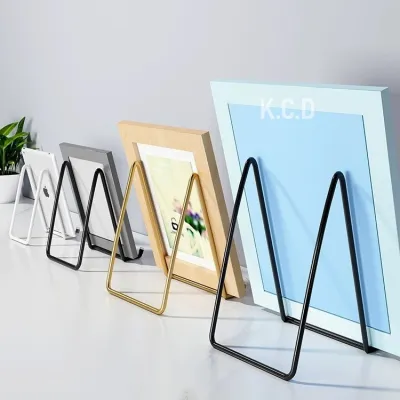
Prices are valid at publication and may change. Please refer to the product page for the latest price.
To prevent the display from looking cluttered or disjointed, establish a unifying theme or design language. This can be achieved through a consistent color palette, matching frame materials, or a shared photographic style, such as black-and-white prints or warm-toned travel photography. For instance, pairing matte black metal wall frames with brass or wooden picture stand holders creates a sophisticated, intentional contrast while maintaining a clear visual connection.
Achieving balance is all about distributing visual weight evenly across the entire layout. Use your largest wall-mounted frames as visual anchors, placing them slightly off-center or at eye level to draw the viewer in. Smaller picture stand holders can then be grouped on the surfaces below, acting as supporting elements that fill in the gaps and ground the entire arrangement. This hierarchy prevents the top of the wall from feeling too heavy while ensuring the tabletop display feels integrated rather than like an afterthought.
Selecting Safe Surfaces for Picture Stand Holders
The success of a mixed-media gallery wall depends heavily on the stability of the surfaces supporting your freestanding frames. When evaluating furniture or shelves, measure the depth, flatness, and structural integrity of each surface to ensure the base of your picture stand holder sits fully supported. Any overhang, even by a few millimeters, increases the risk of the frame tipping forward or sliding off the edge when the furniture is bumped.

If you do not have a console table or mantel directly beneath your chosen wall space, installing floating shelves or dedicated picture ledges is an excellent alternative. Ledge shelves are specifically designed with a shallow depth and a raised front lip, making them ideal for displaying leaning frames and small picture stand holders. When mounting these shelves, ensure they are perfectly level and securely anchored to the wall studs to prevent any sloping that could cause frames to slide.
Environmental factors play a significant role in the longevity and safety of your display, particularly in tropical environments. High humidity can cause paper prints to warp or stick to the glass, so it is wise to use acid-free mats and moisture-resistant backing materials. Additionally, check for high-traffic vibrations caused by nearby doors, heavy footfalls, or strong drafts from ceiling fans and air conditioning units. Placing delicate or lightweight stands in drafty pathways without proper stabilization can lead to frequent falls and damaged frames.
Step-by-Step Arrangement for Wall and Tabletop Frames
Creating a balanced layout requires a systematic approach to avoid turning your wall into a patchwork of unnecessary holes. Begin by measuring your wall space and mapping out the arrangement using paper templates. Cut out kraft paper or newspaper to match the exact dimensions of each wall frame and tabletop stand, then tape them to the wall using painter’s tape. This allows you to experiment with different configurations, spacing, and heights without committing to a permanent placement.
Once you are satisfied with the paper layout, anchor the design by hanging the largest wall-mounted frames first. These large pieces establish the boundaries and focal points of your gallery wall. In Philippine homes, where concrete or masonry walls are standard, ensure you use a masonry drill bit, plastic wall plugs, and sturdy screws rather than simple nails to support the weight of heavy frames.
With the main wall frames securely mounted, begin positioning your picture stand holders on the shelves or furniture below. To create a natural sense of depth, allow the tabletop stands to slightly overlap the bottom edges of the wall-mounted frames. Maintain consistent visual breathing room—typically around five to eight centimeters between pieces—to ensure the layout feels cohesive and organized rather than cramped. Step back frequently during this process to view the arrangement from different angles and seating positions in the room.
Securing and Stabilizing Your Frame Display
Ensuring the physical safety of your frames is crucial, especially when mixing wall-mounted art with freestanding tabletop stands. To prevent picture stand holders from sliding, shifting, or tipping over due to minor vibrations or accidental bumps, apply a small amount of museum wax or reusable adhesive putty to the underside of the stand’s base. This non-damaging adhesive secures the frame firmly to the surface but allows for easy repositioning when you want to update the photos.
For narrow floating shelves or ledges where space is limited, consider installing discreet lip guards or using frames with built-in anti-tip mechanisms. If you are using lightweight metal or acrylic picture stand holders, adding a small, non-slip silicone pad to the bottom can provide excellent grip on smooth glass or polished wood surfaces. These simple, budget-friendly solutions—often costing less than ₱100 for a pack of adhesive pads—can save your cherished frames from costly damage.
When it comes to the wall-mounted portion of your display, never cut corners on mounting hardware. Match the wall anchors to the specific material of your wall, whether it is drywall, plaster, or solid concrete. Always verify the weight capacity of your hooks and anchors before hanging, and consider using double-point hanging hardware for wider frames to keep them perfectly level over time, even when subjected to the vibrations of daily household activity.
Styling Techniques for a Cohesive Visual Flow
To elevate your gallery wall from a simple collection of pictures to a professionally styled installation, focus on layering and texture. Position your picture stand holders slightly in front of larger, wall-mounted artwork to create a layered, three-dimensional effect. This overlapping technique mimics the curated, collected-over-time look found in art galleries and designer homes, making the entire display feel more organic and less rigid.
Integrating small decorative objects around your picture stands is an effective way to bridge visual gaps and add rich texture to the arrangement. Consider placing small trailing plants, such as a pothos or heartleaf philodendron, which thrive in warm, humid indoor environments, alongside your frames. The soft, organic lines of the leaves contrast beautifully with the sharp, geometric angles of the frames, while small sculptural accents, ceramic vases, or scented candles add personal character.
To maintain dynamic visual interest across the entire display, mix portrait and landscape orientations. If all your wall frames are vertical, use horizontal picture stand holders on the tabletop to break up the linear patterns. This intentional variation guides the viewer’s eye smoothly across the layout, ensuring that every photo and decorative element receives the attention it deserves.
Frequently Asked Questions (FAQ)
Can I use picture stand holders on narrow floating shelves?
Yes, you can use picture stand holders on narrow floating shelves, provided you take a few safety precautions. First, measure the depth of the shelf and compare it to the footprint of the stand’s base; the stand must sit entirely on the shelf surface without any overhang. To prevent the frames from being accidentally bumped off, choose shelves with a built-in front lip or secure the base of each stand with a small amount of museum wax or adhesive putty. This ensures the frames remain stable even if the shelf is subjected to vibrations from nearby doors or ceiling fans.
How do I prevent tabletop frames from tipping over?
Preventing tabletop frames from tipping over starts with inspecting the frame’s structural integrity, particularly the hinge or kickstand mechanism. Ensure the kickstand is stiff enough to hold the weight of the frame without collapsing. For added stability, apply reusable adhesive putty to the bottom corners of the frame’s base to grip the surface. Alternatively, you can lean the frame slightly against the wall or place a heavier decorative object, such as a ceramic vase or a small book stack, directly behind or beside the stand to provide physical support.
Community discussion
Share your experience or ask a question. Comments are reviewed before publication.