
Installing modern accent lighting is one of the most effective ways to elevate a compact living space, making a standard studio or one-bedroom unit feel spacious, warm, and customized. For high-rise residents in metropolitan areas like Metro Manila, Cebu, or Davao, achieving this premium look often comes with a major hurdle: strict condominium association guidelines that prohibit drilling, structural alterations, or permanent modifications to walls and cabinetry. Fortunately, low-voltage led lights 12v systems offer a safe, energy-efficient, and highly customizable solution that can be installed using entirely non-destructive methods.
By choosing a 12V system over high-voltage alternatives, you benefit from a safer working environment and highly flexible strips that can be cut to fit precise alcoves, under-cabinet spaces, or ceiling coves. Achieving a flawless, professional-grade installation requires careful planning, the right protective components, and proper surface preparation to withstand tropical humidity. With a systematic approach, you can transform your condo’s ambiance overnight without risking your security deposit or compromising your electrical system.
Essential Tools and Materials for a Safe Setup
Before beginning your lighting project, gathering high-quality, compatible components is vital for ensuring both the longevity of your lights and the safety of your home. A common mistake is buying mismatched parts, which can lead to premature component failure, flickering, or even electrical hazards.
Products mentioned in this guide
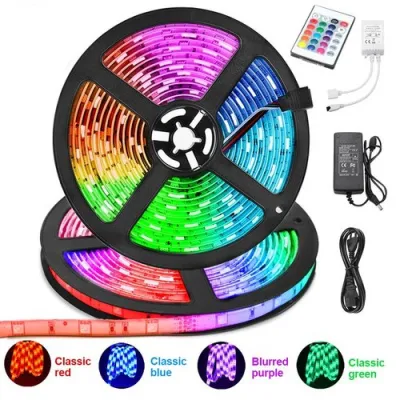
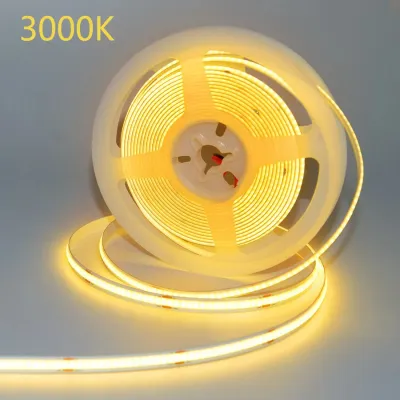
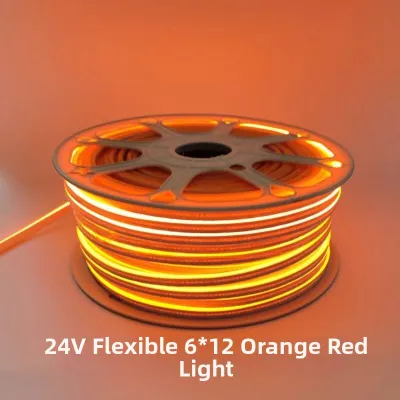
Prices are valid at publication and may change. Please refer to the product page for the latest price.
- 12V LED Strip Lights: Select a strip that matches the specific environment of your target room. For dry areas like living room coves, bedroom headboards, or behind television consoles, standard IP20-rated strips are perfectly suitable. For areas prone to moisture, such as kitchen countertops or laundry balconies, opt for water-resistant strips rated IP65 or higher to protect the circuits from steam and splashes.
- Compatible 12V DC Power Supply: This adapter converts your household high-voltage alternating current (AC) into the safe, low-voltage direct current (DC) required by the strip. To select the correct adapter, calculate the total wattage of your strip by multiplying the manufacturer's wattage-per-meter rating by the total length of your run. Always add a 20% safety buffer to this total to prevent the power supply from running at its absolute limit, which causes overheating. For example, if a 5-meter strip consumes 4.8 watts per meter, the total draw is 24 watts; adding a 20% buffer (24 x 1.2) means you should select a power supply rated for at least 28.8 watts, making a standard 30W or 36W adapter the ideal choice.
- LED Aluminum Channels with Diffusers: In the warm, tropical climate of the Philippines, ambient indoor temperatures can accelerate the degradation of LED chips. Aluminum channels serve as crucial heat sinks, drawing thermal energy away from the strip to prolong its operational lifespan. Additionally, the frosted acrylic diffusers snap over the channels to blend individual light dots into a smooth, continuous bar of light, eliminating harsh glare and reflections on polished countertops or tiled walls.
- Damage-Free Mounting Solutions: To comply with strict condo leasing agreements, bypass screws and nails. Instead, utilize heavy-duty, acrylic-based double-sided removable mounting tape designed for clean removal, or lightweight plastic mounting clips paired with removable adhesive strips.
- Basic Preparation Tools: Keep a pair of sharp scissors, a measuring tape, a clean microfiber cloth, and 70% isopropyl rubbing alcohol on hand for surface preparation.
- Electrical Grid Safety Check: Verify that your chosen 12V power adapter is certified to operate on the standard 220V/60Hz electrical grid used throughout the Philippines. Look for recognized safety certifications, such as the Philippine Standard (PS) mark or Import Commodity Clearance (ICC) stickers, to ensure the device is built to handle local voltage characteristics safely.
Planning Your Layout to Avoid Voltage Drop and Clutter
A successful installation relies heavily on preparation before peeling away any adhesive backings. Begin by mapping out your physical layout. Use your measuring tape to determine the exact length of the surfaces where the lights will be mounted, such as the underside of kitchen cabinets, the recess of a ceiling cove, or the perimeter of a media console. Note the distance from the start of the LED run to the nearest available wall outlet, as this determines how much lead wire you will need to route from the power brick to the strip.

As you plan, you must account for the physical phenomenon of voltage drop, which is particularly common in 12V electrical systems. Because 12V is a relatively low voltage, the inherent electrical resistance of the thin copper traces on the strip causes the voltage to gradually decrease as current travels further from the power source. Visually, this manifests as a noticeable dimming or a shift in color temperature toward the far end of a long strip.
For standard led lights 12v systems, the maximum recommended continuous run length from a single power feed is 5 meters. If your layout requires a continuous run longer than 5 meters—such as a large living room ceiling cove—you must plan to inject power from both ends of the strip. This is achieved by running a parallel extension wire from the power supply to the far end of the strip, ensuring uniform brightness across the entire installation without overloading the circuit.
Step-by-Step Installation: Mounting and Connecting
With your layout planned and materials prepared, you can proceed to the physical installation. Always ensure that your work area is dry and that the power supply remains completely unplugged from the wall outlet until all low-voltage connections are securely terminated.
Preparing the Surface for Damage-Free Adhesion
The primary cause of sagging or peeling LED strips is poor surface preparation. Condos in humid coastal or tropical environments often accumulate a thin, invisible layer of moisture, airborne cooking grease, or fine construction dust on walls and cabinetry, which prevents adhesives from forming a secure bond.
To prevent this, pour a small amount of 70% isopropyl rubbing alcohol onto a clean microfiber cloth and thoroughly wipe down the entire mounting path. This effectively dissolves grease and removes dust without leaving behind a slick residue. Allow the surface to dry completely for at least 15 minutes before proceeding. Avoid using multi-purpose household spray cleaners, glass cleaners, or dish soap, as these products often contain oils, silicones, or harsh chemicals that can strip wall paint, degrade cabinet laminates, or leave a chemical film that ruins the adhesive’s grip.
Mounting the Strips and Aluminum Channels
If you are using aluminum channels to protect your LEDs and achieve a polished look, you must mount the channels first. Apply your heavy-duty removable mounting tape evenly along the back of the aluminum tracks. Press the channels firmly onto your pre-cleaned mounting surface, applying steady pressure for at least 30 seconds per section to activate the pressure-sensitive adhesive. If your condo regulations permit minor drilling into wooden cabinetry, you may alternatively use the small metal mounting clips and tiny screws typically included with the channels.
Next, prepare the LED strip. If the strip is longer than your measured layout, locate the designated cut lines. These are clearly marked on the strip by copper solder pads and a small scissor icon, usually spaced every 2.5 to 5 centimeters. Use sharp scissors to cut precisely along these lines. Cutting anywhere else will sever the internal circuitry, permanently disabling that specific section of the strip.
Peel back a few inches of the adhesive backing from the start of the 12V LED strip. Carefully align it inside the aluminum channel or directly onto the prepared surface. Press down firmly along the center of the strip, taking care not to press directly on the delicate surface-mounted diode (SMD) chips or resistors, as excessive pressure can crack the micro-solder joints. To navigate 90-degree corners, do not fold the strip sharply, as this will break the internal copper pathways. Instead, use solderless corner connectors (L-shaped clip-on adapters) or leave a small, gentle loop of flexible wire between two straight segments.
Connecting the Power Supply Safely
Once the strips are securely mounted, you can make the electrical connections. Insert the bare wire leads or the pre-installed quick-connector plug of your LED strip into the DC output side of your 12V power adapter. It is absolutely critical to observe correct polarity during this step: connect the positive wire (typically marked in red or with a “+” symbol) to the positive terminal of the adapter, and the negative wire (typically black or marked with a “-” symbol) to the negative terminal.
Reversing the polarity will prevent the LEDs from illuminating and can potentially damage the strip’s internal diodes or any inline controller you have installed. Once the low-voltage DC connections are insulated and secure, you may plug the power supply adapter into your standard 220V AC wall outlet.
- Safety Boundary Warning: Never attempt to wire a 12V DC LED strip directly to your 220V AC household mains. Doing so will instantly destroy the light strip and presents an immediate risk of fire, severe electrical shock, or short-circuiting your condo's breaker panel. If your design requires hardwiring the power supply directly into a ceiling junction box or integrating it behind a wall switch, stop immediately, isolate the power at your main circuit breaker, and hire a licensed professional electrician to complete the high-voltage connections.
Condo-Friendly Ways to Hide Wires and Power Bricks
A truly professional lighting installation is defined by clean lines and the complete absence of visible clutter. Dangling wires and bulky black power bricks can quickly ruin the sleek aesthetic of a modern condo. To manage cables without drilling holes into your walls or running wires inside drywall, utilize self-adhesive, paintable PVC cable raceways. These slim, low-profile plastic tracks can be mounted along baseboards, tucked neatly into wall corners, or routed vertically behind furniture legs. You can paint the exterior of the raceways to match your condo’s wall color, making them virtually invisible.
For the bulky power supply bricks, find creative ways to tuck them out of sight. You can place them inside overhead kitchen cabinets, position them on top of tall wardrobes, or hide them behind a television console. If you store a power brick inside an enclosed cabinet or decorative cord organizer box, ensure there is adequate ventilation. Power adapters naturally generate mild heat during operation, and trapping them in airtight spaces in a warm climate can cause them to overheat and fail prematurely.
If you must route low-voltage wires across open floor areas, never run standard round cables where they can be stepped on. Instead, use flat, low-profile cable extensions designed to lie completely flat under area rugs or along high-traffic thresholds, securing them with gaffer tape to prevent tripping hazards and protect the wires from wear.
Testing Your Setup and Fixing Common Issues
Before finalizing your installation and tidying up your tools, perform a comprehensive system test. Plug the power supply into the wall and turn on the lights. Walk the length of the installation to verify that the brightness is completely uniform from start to finish and that all light segments are illuminating correctly. If you are using color-changing RGB strips, cycle through the primary colors (red, green, and blue) to ensure there are no color mismatches caused by damaged control lines.
If you encounter issues during your test, use these simple troubleshooting steps to diagnose and resolve them:
- The entire strip fails to light up: Unplug the adapter from the wall immediately. Check the connection between the strip and the power supply to ensure the positive and negative polarities are aligned correctly. Verify that the wall outlet is active by testing it with another household device.
- The lights are flickering: Flickering is almost always caused by a loose physical connection. Check all solderless clip-on connectors along the run to ensure the metal teeth are pressing firmly down onto the copper pads of the strip. If the flickering persists, verify that your total wattage does not exceed the maximum output rating of your power supply.
- The far end of the strip is dim: This is a classic symptom of voltage drop. If your strip is longer than 5 meters, you will need to run an additional pair of low-voltage wires from the power supply to the far end of the strip to inject power from both sides, balancing the voltage distribution.
- The strip is peeling off the surface: If high humidity causes the adhesive backing to fail, do not try to re-stick the dirty tape. Clean the area again, apply fresh, heavy-duty removable mounting tape to the back of the strip or channel, and press it firmly back into place.
Frequently Asked Questions (FAQ)
Can I install 12V LED strips in a condo bathroom?
Yes, you can install 12V LED strips in a condo bathroom, but you must use strips with an Ingress Protection rating of IP65 or higher to protect the electronics from high humidity, steam, and accidental water splashes. Additionally, the 12V power adapter and any AC plug connections must be kept strictly in a completely dry zone, such as inside a sealed vanity cabinet or outside the bathroom entirely, to eliminate any risk of electrical shock.
Will removing the LED strips damage my condo paint?
The highly aggressive factory adhesive pre-applied to the back of many LED strips can easily tear drywall paper or peel away latex paint when removed. To prevent damage to your condo’s walls, avoid sticking the bare strip directly onto painted surfaces. Instead, mount the strips inside lightweight aluminum channels secured with damage-free, clean-removal mounting tape, or restrict your direct-stick installations to non-porous surfaces like glass, ceramic tile, polished metal, or sealed cabinet laminates.
Community discussion
Share your experience or ask a question. Comments are reviewed before publication.