
Installing a 12V led light strip in a condominium is one of the most effective ways to elevate your space, adding modern ambiance and practical task lighting without major renovations. Whether you want to illuminate dark kitchen countertops, create a soft glow behind your television, or add dramatic cove lighting to your drop ceiling, the process is highly accessible for DIY enthusiasts. By selecting the correct power supply, preparing your mounting surfaces properly, and making precise electrical connections, you can achieve a professional-grade installation that complies with building safety standards.
In a typical high-density residential building, understanding the physical and electrical parameters of your unit is essential before beginning. Philippine condos operate on a standard 220V AC electrical grid, which means your low-voltage 12V DC LED strips will require a dedicated power adapter to step down the voltage safely. This guide outlines the exact planning steps, material selections, physical installation techniques, and safety protocols required to complete this project successfully.
Planning Your Condo 12V LED Light Layout and Power Requirements
Before purchasing any lighting components, you must map out your physical layout and calculate your electrical load. Begin by identifying the exact locations where you want to install the 12V led light strips. Common areas include under kitchen cabinets, inside wardrobes, along baseboards, or tucked into ceiling coves. Use a physical measuring tape to record the exact length of each run in meters. Having precise measurements prevents buying insufficient materials or over-purchasing unnecessary lengths.
Products mentioned in this guide
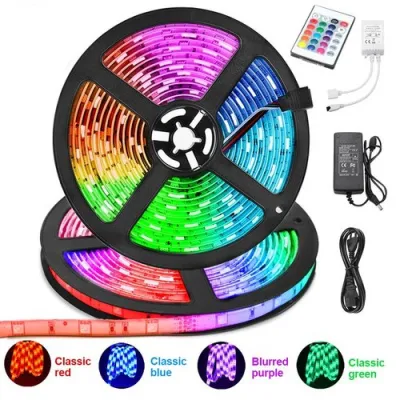
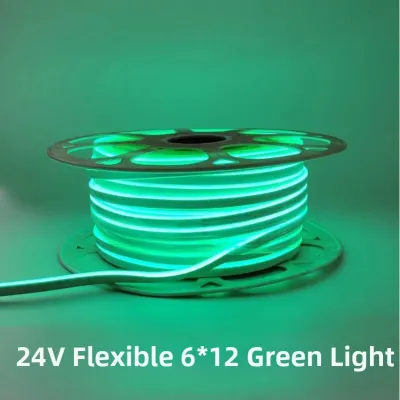
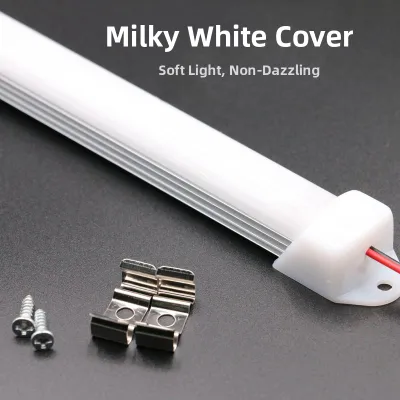
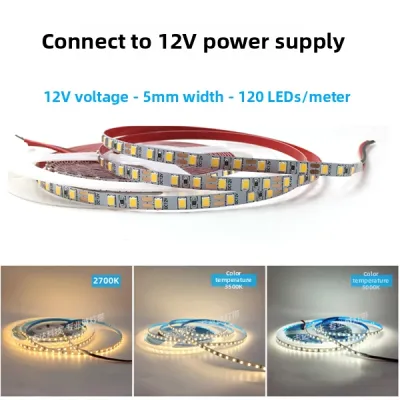
Prices are valid at publication and may change. Please refer to the product page for the latest price.
Once you have your total length, you must determine the electrical power requirements of your setup. Every LED strip has a specific wattage rating per meter, which is typically printed on the product packaging or manufacturer specification sheet. Multiply this wattage-per-meter value by the total length of the strip you plan to power from a single source. For example, if your chosen strip consumes 9.6 watts per meter and your kitchen counter run is 3 meters long, your total power consumption for that run is 28.8 watts.
Selecting the correct 12V DC power adapter requires applying a safety margin known as the 80% rule. To prevent your power supply from running at maximum capacity, overheating, and failing prematurely, you should choose a transformer with a wattage rating at least 20% higher than your calculated total load. In the previous example of a 28.8-watt load, multiplying by 1.2 yields 34.56 watts. Therefore, you should select a power adapter rated for at least 40 watts or 50 watts to ensure safe, stable operation over time.
Condo living introduces specific structural constraints that influence your planning. You must locate the nearest standard 220V wall outlet to plug in your power adapter, ensuring that the low-voltage wire can comfortably reach the start of your LED strip without stretching or creating a hazard. Additionally, consider whether you are renting or own the unit. Renters should focus on non-destructive, temporary mounting methods, whereas owners might opt for more permanent installations involving recessed profiles or concealed wiring channels.
Essential Tools and Materials for 12V LED Installation
Having the correct equipment on hand ensures a smooth installation process and prevents mid-project delays. Gather these core electrical and structural components before you begin:

- 12V LED Strip Lights: Select a strip that matches your desired brightness, color temperature (such as warm white for cozy areas or cool white for task areas), and environmental rating.
- 12V DC Power Supply: Choose a high-quality, certified power adapter (look for safety markings like the Philippine Standard PS mark, ICC stickers, or equivalent international safety standards) with the correct wattage rating.
- Solderless Quick Connectors: Acquire L-shape connectors for 90-degree corners, T-shape connectors for multi-directional splits, or straight gapless connectors to join two cut segments.
- Mounting Hardware: Prepare heavy-duty double-sided mounting tape, renter-friendly adhesive strips, or aluminum mounting channels complete with mounting clips and end caps.
- Preparation and Safety Tools: Keep 70% isopropyl alcohol and clean microfiber cloths ready for surface preparation. You will also need sharp scissors to cut the strips, wire strippers for any custom wiring, and a digital multimeter to verify polarity and voltage.
Step-by-Step Installation Process
Step 1: Prepare and Clean the Mounting Surface
The longevity of your LED installation depends heavily on how well the adhesive backing bonds to the mounting surface. Before touching any materials, isolate the power in your working area by unplugging nearby appliances or turning off the corresponding circuit breaker to eliminate any risk of electrical shock.
Thoroughly clean the target mounting surface—whether it is finished wood, painted drywall, metal, or glass—using a microfiber cloth saturated with isopropyl alcohol. This step is crucial because everyday household dust, cooking grease, and skin oils form a microscopic barrier that prevents adhesive tape from sticking properly. Avoid using generic household spray cleaners, as they often leave behind a thin chemical residue that degrades the adhesive over time.
Allow the cleaned surface to dry completely before proceeding. In humid tropical environments, moisture can linger on surfaces longer than expected, so give it several minutes to air dry. Applying adhesive backing to a damp surface is the single most common cause of LED strips sagging and peeling off within a few weeks of installation.
Step 2: Cut, Align, and Connect the LED Strips
Once the surface is prepared, lay out your LED strips and measure them against your installation path. If a strip is too long, you must locate the designated cut lines, which are typically spaced every 3 to 5 centimeters along the strip and marked with copper contact pads or small scissor icons. Cutting anywhere else will sever the internal copper traces that distribute electricity, permanently ruining that entire section of the strip.
To navigate corners or extend your lighting run, utilize solderless quick connectors rather than attempting to solder wires in a tight condo space. Open the plastic clasp of the connector, slide the cut end of the strip underneath the metal contact pins, and snap the cover shut. You must ensure that the positive (+) and negative (-) markings on the LED strip align perfectly with the corresponding markings on the connector and the adjacent strip segment. Reversing the polarity will prevent the lights from illuminating.
Never bend an LED strip at a sharp 90-degree angle to turn a corner. Forcing a sharp bend puts immense physical stress on the flexible circuit board, which can snap the delicate copper traces inside and cause the segments beyond the bend to fail. Instead, use an L-shape corner connector or create a gentle, rounded loop with the strip to transition directions safely.
Step 3: Mount the Strips and Conceal the Wiring
With your strips cut and connected, you are ready to mount them. Peel back a small section of the adhesive backing—about 10 to 15 centimeters—at the beginning of your strip. Align it carefully with your marked path, press down firmly with your fingers, and gradually peel away the remaining backing paper as you work your way along the surface. Pressing firmly ensures the pressure-sensitive adhesive activates and forms a strong bond.
Aesthetically managing your wiring is what separates a messy DIY job from a clean, professional finish. Use adhesive-backed cable clips to secure loose wires along the undersides of cabinets or behind furniture. For highly visible areas, install paintable plastic cord covers (raceways) to hide the wires running from the end of the LED strip down to your power adapter.
Always leave a small “service loop” of slack wire near the power connection point. This extra length ensures that there is no tension pulling on the solderless connectors or the power jack. It also provides valuable wiggle room if you need to adjust, repair, or replace any components in the future without tearing down the entire installation.
Step 4: Connect the Power Supply and Test the System
Before plugging your system into the wall, perform a final visual inspection of all connections. Verify that the positive and negative terminals match consistently from the power adapter all the way to the end of the strip. If you have a digital multimeter, set it to continuity mode to check that there are no short circuits between the positive and negative copper pads.
Connect the output jack of your 12V DC power adapter to the starting connector of your LED strip. Once the low-voltage side is secure, plug the power adapter into your standard 220V wall outlet and switch it on. Testing the lights at this stage allows you to verify that every segment illuminates evenly before you finalize any wire concealment or apply permanent mounting clips.
While working with 12V DC power is exceptionally safe because the low voltage carries no risk of severe electrical shock, the mains side of your system requires caution. The 220V power adapter converts high-voltage AC electricity into low-voltage DC, generating heat in the process. Always place the power adapter in a well-ventilated area, away from flammable materials, and completely clear of water sources like kitchen sinks, bathroom basins, or open windows prone to rain splashes.
Condo-Specific Mounting Solutions and Electrical Safety
Condominium living requires balancing personal design preferences with strict property management rules and safety guidelines. If you are renting your unit, avoiding damage to walls and cabinetry is paramount to securing the return of your security deposit. Instead of using the aggressive adhesive tape that comes pre-applied to many LED strips—which can rip paint and drywall off when removed—consider mounting your strips inside lightweight aluminum channels secured with damage-free, removable adhesive strips.
Using aluminum extrusion channels is highly recommended even for unit owners. High-density or high-brightness 12V LED strips generate localized heat during extended use. Aluminum channels act as highly efficient heat sinks, drawing heat away from the delicate light-emitting diodes and dissipating it into the air. This thermal management significantly prolongs the operational lifespan of your LEDs and protects sensitive condo surfaces, such as wood laminates or delicate acrylic finishes, from heat-induced warping or discoloration.
When planning your installation, it is critical to recognize your personal DIY limits and understand when to seek professional assistance. Simple plug-and-play installations that connect directly to an existing wall outlet are safe and permissible for self-installation. However, if your lighting design requires cutting into your condo’s fixed 220V wiring, running cables behind concrete walls, mounting heavy suspended fixtures, or installing in-wall dimmer switches, you must stop immediately.
Modifying fixed electrical wiring in a high-density residential building carries significant risks of electrical fires or short circuits that could affect neighboring units. Always consult your building’s property management office to verify their specific renovation guidelines and electrical permit requirements. For any work involving fixed wiring, damp environments like bathrooms, or complex ceiling integrations, hire a licensed electrician to ensure all work complies with the Philippine Electrical Code (PEC).
Troubleshooting Common 12V LED Strip Issues
If your newly installed lights do not function as expected, you can resolve most issues using a systematic diagnostic approach.
If the entire strip fails to turn on, start at the power source. Verify that the wall outlet is active by plugging in a known working device, such as a phone charger. Next, inspect the connection between the power adapter and the LED strip to ensure it is seated firmly. If the outlet is active and the connections are tight, unplug the adapter and double-check your polarity; a reversed positive and negative connection is the most common reason a strip remains dark.
If only a portion of your LED strip lights up, the issue lies at a connection point or a physical break in the circuit. Unplug the power supply and inspect the solderless connector immediately preceding the unlit section. Ensure the copper pads on the strip are aligned perfectly with the metal pins inside the connector and that the clasp is fully closed. If the connection is secure but the segment remains dark, look closely for any physical damage, such as a sharp bend or a tear in the flexible strip.
Flickering lights or a noticeable drop in brightness toward the end of a long run indicate a phenomenon known as voltage drop. Because thin copper traces inside LED strips offer electrical resistance, the voltage gradually decreases as electricity travels further from the power source. To resolve voltage drop on runs longer than 5 meters, you can use thicker gauge extension wires to minimize resistance, or run a parallel power wire from your adapter to feed power to both ends of the LED strip simultaneously.
Frequently Asked Questions (FAQ)
Can I cut 12V LED strip lights anywhere along the strip?
No. You must only cut 12V LED strip lights at the designated cut lines, which are clearly marked with copper pads or scissor icons. Cutting through any other section of the strip will sever the internal electrical circuit, rendering that entire group of LEDs inoperable and voiding the manufacturer’s warranty.
Do I need an aluminum channel for my condo LED strips?
While not strictly mandatory for low-power decorative accent lighting, aluminum channels are highly recommended. They act as heat sinks to extend the lifespan of high-density 12V strips, protect the diodes from dust and physical damage, and feature frosted covers that diffuse the light to eliminate harsh, visible hot spots.
Community discussion
Share your experience or ask a question. Comments are reviewed before publication.