
Installing a magnetic ceiling light on a track system involves mounting a specialized track to your ceiling, connecting it to a compatible power source, and snapping the magnetic light fixtures directly into the track channel. This modern lighting solution offers unparalleled flexibility, allowing you to slide, swap, and adjust fixtures without rewiring. However, achieving a safe and reliable setup requires careful attention to system compatibility, structural integrity, and electrical safety standards. By following a systematic installation process, you can transform your space with a clean, minimalist lighting design that is both functional and highly adaptable.
Before handling any components, it is essential to understand that magnetic track systems are integrated assemblies where the track, power supply, and fixtures must work in harmony. Unlike traditional line-voltage track lighting, many magnetic systems operate on low-voltage direct current (DC), which requires a dedicated driver to convert your home’s alternating current (AC) power. Planning your layout and verifying your equipment specifications beforehand will prevent installation errors and ensure your new lighting system operates safely for years to come.
Pre-Installation Checks and Safety Boundaries
Before purchasing or installing any components, you must verify the technical specifications of your magnetic track system. Start by checking the product labels on both the track and the light fixtures to confirm their voltage ratings, which are typically 24V DC or 48V DC. Connecting a low-voltage magnetic fixture directly to a standard 220V AC home power supply will instantly destroy the components and pose a severe electrical hazard. Ensure that the total wattage of all the fixtures you plan to install on a single track run does not exceed the maximum wattage rating of your power driver, leaving a safety margin of at least 20 percent to prevent overloading.
Products mentioned in this guide
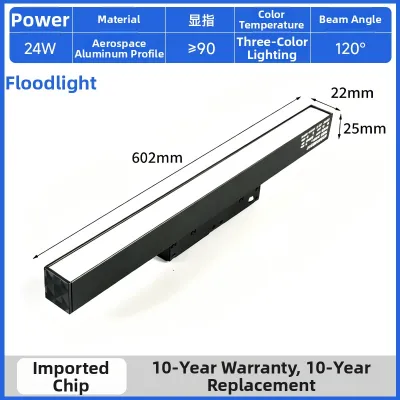
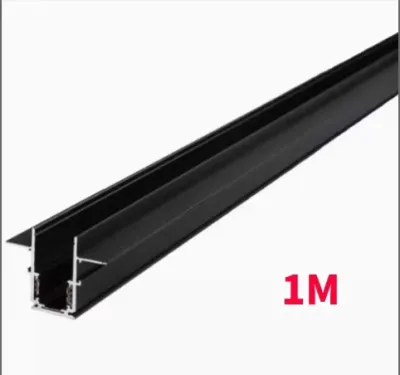
Prices are valid at publication and may change. Please refer to the product page for the latest price.
Physical compatibility is equally critical because magnetic track profiles are not universally standardized. Inspect the track channel width, depth, and the configuration of the internal copper conductors to ensure they match the magnetic connector design of your specific light fixtures. Even if a fixture physically fits inside a track, the electrical contact points may not align correctly, leading to poor performance or short circuits. Always verify that the components carry recognized electrical safety certifications suitable for your region, which indicates they have undergone rigorous testing for fire and shock resistance.
Safety must be your absolute priority throughout this project. Before touching any electrical wiring or mounting hardware, locate your home’s main service panel and switch off the circuit breaker dedicated to the installation area. Never rely solely on a wall switch to cut the power, as switches can sometimes be wired incorrectly, leaving live current at the ceiling box. If you encounter outdated wiring, lack a clear understanding of low-voltage driver connections, or feel uncomfortable working on a ladder, stop immediately and contact a licensed electrician to complete the installation.
Tools and Materials Required
Having the correct tools on hand before you begin will streamline the installation process and ensure a secure, professional finish. Gather basic hand tools, including a Phillips-head screwdriver, a flathead screwdriver, a reliable measuring tape, and a pencil for marking mounting points on the ceiling. A high-quality spirit level or a laser level is indispensable for ensuring your track runs perfectly straight, especially when installing long linear configurations or multi-track layouts.

For safety and verification, you must use a reliable non-contact voltage tester to confirm that the electrical wires are completely dead before beginning any wiring work. Personal protective equipment, such as safety glasses to protect your eyes from falling ceiling debris and insulated gloves, should be worn throughout the process. Additionally, a sturdy ladder that allows you to reach the ceiling comfortably without stretching is essential for maintaining balance and control.
When it comes to the mounting hardware and electrical connectors, rely exclusively on the specialized components provided in the manufacturer’s original kit. Standard drywall screws or generic anchors may not provide the specific grip or load capacity required for the track profile. Using non-original power feeds, joiners, or end caps can compromise the electrical insulation and physical stability of the system, potentially voiding your warranty and creating safety hazards.
Mounting the Track to the Ceiling
The physical installation of the track requires a stable, load-bearing surface to support the weight of the track and the magnetic fixtures. Begin by using a stud finder to locate the ceiling joists, as securing the track directly into wooden or metal framing provides the strongest support. If your layout requires mounting the track between joists on a plasterboard or drywall ceiling, you must select heavy-duty hollow-wall anchors, such as toggle bolts or threaded metal anchors, that are rated for the combined weight of the entire system. In homes with solid concrete ceilings, which are common in the Philippines, you will need a rotary hammer drill and appropriate masonry wall plugs to secure the track.
Position the track against the ceiling along your marked layout line and use a pencil to mark the mounting screw holes. Use your level to double-check that the alignment is perfectly straight before drilling any pilot holes. Once the holes are prepared, insert the appropriate anchors and begin securing the track to the ceiling, starting from one end and working your way to the other. Tighten the screws firmly, but avoid over-tightening, which can warp the aluminum track profile and prevent the magnetic fixtures or power connectors from sliding smoothly into the channel.
After the track is mounted, perform a physical stability check by gently tugging on the track at various points along its length. The track should remain completely flush against the ceiling without any visible sagging, flexing, or movement. If you notice any instability, or if the ceiling material crumbles or cracks during installation, stop immediately. Do not attempt to mount fixtures on an unstable track; instead, consult a structural professional or a qualified contractor to reinforce the ceiling support before proceeding.
Wiring and Power Connection
Connecting the electrical supply to your magnetic track system requires careful routing and strict adherence to electrical codes. The process begins by routing the track’s power feed cable—which connects to the low-voltage driver—to your ceiling junction box. If your system uses an external driver, this unit must be installed in an accessible, well-ventilated location, such as inside a ceiling cavity or a nearby utility closet, to allow for heat dissipation in warm, tropical climates. Ensure the driver is wired correctly, with the AC input connected to your home’s electrical supply and the DC output connected to the track’s power feed terminal.
Before making any wire connections, use your non-contact voltage tester directly on the wires inside the ceiling junction box to verify that the power is completely off. Once zero voltage is confirmed, connect the wires using approved wire connectors or terminal blocks, matching the positive and negative polarities precisely as indicated in the manufacturer’s instructions. For low-voltage DC systems, reversing the polarity can damage the driver or prevent the LED fixtures from illuminating. Ensure all wire connections are tight, with no bare copper exposed, and carefully tuck the wires back into the junction box before securing the cover plate.
Because fixed electrical wiring carries inherent risks of fire and electrical shock, all hardwired connections should be performed by a licensed electrician. A professional installer will ensure that the wiring complies with local electrical codes, uses the correct wire gauge for the current load, and incorporates proper grounding. This is especially important in high-humidity environments where improper insulation or loose connections can degrade rapidly over time, leading to safety hazards or premature system failure.
Attaching the Magnetic Light to the Track
With the track securely mounted and the power feed connected, you can begin attaching the magnetic light fixtures. Before inserting a fixture, inspect its magnetic base and the internal channel of the track to ensure they are clean and free of dust, drywall debris, or packaging materials. Align the magnetic connectors on the fixture precisely with the internal conductive copper strips running along the inside of the track. Most magnetic fixtures are designed to be directional, meaning they must be oriented correctly to make proper electrical contact.
Gently push the fixture straight into the track channel until you feel the magnets engage with a firm, positive pull. The fixture should sit completely flush against the track surface without any visible gaps. Some heavy or adjustable fixtures feature secondary mechanical locks, such as sliding tabs or safety clips, to prevent accidental release. Ensure these locking mechanisms are fully engaged and clicked into their secure positions before letting go of the fixture.
Once the fixture is in place, perform a quick physical stability check by gently wiggling it. The light should remain firmly anchored to the track without wobbling, tilting, or sliding out of position under its own weight. If the fixture feels loose or fails to sit flush, remove it immediately and inspect the track channel for obstructions or misalignment of the magnetic plates. Never force a fixture into the track, as this can bend the conductive contacts or damage the internal track structure.
Post-Installation Testing and Adjustments
After all fixtures are securely mounted, you can proceed to restore power and test the system. Return to your main service panel and switch the circuit breaker back to the on position. Turn on the wall switch to illuminate the lights; if your system is connected to a dimmer switch, verify that the dimming function operates smoothly across its entire range without causing the lights to flicker or drop out. Ensure that the dimmer switch is specifically rated for the type of driver (such as 0-10V, TRIAC, or DALI) used in your magnetic track setup.
If you need to adjust the position or beam angle of the fixtures, do so gently and with care. Many magnetic spotlights feature swiveling heads or adjustable arms that allow you to direct light precisely where it is needed. When adjusting these fixtures, support the base of the light with one hand while adjusting the light head with the other to avoid applying excessive lateral force to the magnetic joint. Applying too much force can break the magnetic seal, causing the fixture to detach from the track and fall.
Leave the lights on for several minutes and observe their performance closely. Check for any unusual signs of malfunction, such as buzzing sounds, rapid flickering, or excessive heat buildup around the track or the driver. While LED fixtures and drivers naturally generate some heat, they should never become too hot to touch comfortably. If you notice any of these issues, turn off the power immediately at the wall switch and investigate the cause before continuing use.
Troubleshooting Common Installation Issues
If your magnetic lights fail to turn on after installation, follow a systematic troubleshooting process to identify the issue safely. Start by checking the main circuit breaker to ensure it has not tripped, and verify that the wall switch is in the on position. If only a single fixture fails to light up while others on the same track function correctly, remove the inactive fixture and re-insert it, ensuring it is oriented correctly and making full contact with the conductive strips. You can also try placing the fixture in a different section of the track to determine if the issue lies with the fixture itself or a specific spot on the track.
A weak magnetic hold or a fixture that sits crookedly is usually caused by dust, debris, or minor physical obstructions inside the track channel. Turn off the power, remove the fixture, and use a dry, clean microfiber cloth to gently wipe the internal surfaces of the track and the magnetic contacts on the fixture. Avoid using wet cloths, liquid cleaners, or abrasive materials, as moisture and scratches can damage the copper conductors and lead to corrosion or electrical shorts. Ensure the track profile has not been warped by over-tightened mounting screws, which can pinch the channel and prevent the fixture from seating fully.
There are certain situations where troubleshooting must stop for your own safety. If you detect a persistent burning smell, see sparks, hear loud buzzing from the driver, or experience a circuit breaker that repeatedly trips immediately after being reset, do not attempt further adjustments. Turn off the power at the main breaker immediately and contact the manufacturer or a licensed electrician to diagnose and resolve the underlying electrical issue.
Frequently Asked Questions (FAQ)
Can I mix different brands of magnetic lights on the same track?
Mixing different brands of magnetic lights on the same track is generally not recommended and should be avoided unless both manufacturers explicitly confirm compatibility. Because magnetic track lighting systems are not governed by a single universal standard, different brands often use proprietary track profiles, varying channel depths, and unique spacing for their internal copper conductors. Even if a fixture from one brand physically snaps into the track of another due to magnetic attraction, the electrical contacts may not align, which can cause electrical arcing, flickering, or permanent damage to the fixtures and the power driver. To ensure safe operation and maintain your product warranties, it is best to use tracks, drivers, and fixtures from the same manufacturer.
Is it safe to install magnetic track lights in high-humidity areas?
Standard magnetic track lights are typically designed for dry indoor environments and are not safe for installation in high-humidity or wet areas, such as bathrooms, outdoor patios, or open kitchens prone to heavy steam. High humidity and airborne moisture can cause rapid corrosion of the exposed copper conductive strips inside the track, leading to poor electrical contact, short circuits, or premature system failure. Before planning an installation in any area exposed to moisture, check the Ingress Protection (IP) rating on the product labels; only fixtures and tracks with a specific waterproof or moisture-resistant certification (such as IP44 or higher) are safe for damp environments. For standard indoor tracks, ensure they are installed in well-ventilated, dry spaces to maintain electrical safety and prolong the lifespan of the system.

Community discussion
Share your experience or ask a question. Comments are reviewed before publication.