
Installing a solar lighting system in your garden is an excellent way to enhance outdoor aesthetics and improve pathway safety without dealing with complex electrical wiring. By capturing sunlight during the day and converting it into nighttime illumination, these systems offer an energy-efficient solution for walkways, flowerbeds, and patio areas.
In tropical environments like the Philippines, where high humidity, heavy monsoon rains, and intense sunlight are common, proper installation is key to long-term performance. Setting up your system correctly ensures the fixtures can withstand local weather conditions while maximizing their daily energy intake. This comprehensive guide walks you through the entire process, from initial layout planning and tool preparation to physical mounting, performance optimization, and routine maintenance.
Planning Your Garden Lighting Layout
Before unboxing any equipment, map out your garden layout to ensure your lights receive adequate sunlight. Walk through your outdoor space during peak daylight hours—typically between 10:00 AM and 3:00 PM—to identify areas that receive direct, unobstructed sunlight. Take note of tall structures, perimeter walls, and dense tree canopies, such as mango or palm trees, which cast long shadows as the sun moves. A solar panel requires direct exposure to charge its internal battery efficiently; placing a fixture in a permanently shaded corner will result in weak, short-lived nighttime illumination.
Products mentioned in this guide
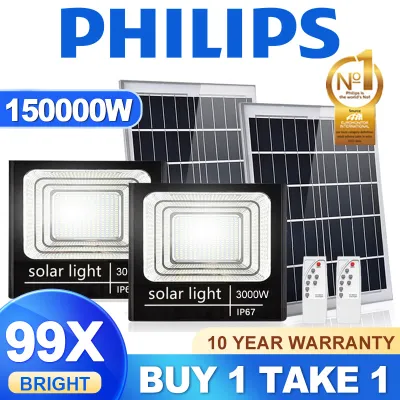
69 Lazada user ratings
Naihatid ang proyekto kaagad at dumating ng mas maaga kaysa sa inaasahan. Ito ay mahusay na nakaimpake sa bubble paper. Walang mga problema …Read full reviewShow less
Naihatid ang proyekto kaagad at dumating ng mas maaga kaysa sa inaasahan. Ito ay mahusay na nakaimpake sa bubble paper. Walang mga problema sa panahon ng transportasyon ng mga solar panel. Napakakatulong ng nagbebenta, mabilis na tugon, perpektong packaging, packaging (solar panel, led lamp, remote control, bracket, baterya at turnilyo/bolt). Maraming salamat!
Thanks poh na received ko na po maganda ginamit ko agad, walang damage yung apat gumagana lahat,Especially easy to install. The store has pr…Read full reviewShow less
Thanks poh na received ko na po maganda ginamit ko agad, walang damage yung apat gumagana lahat,Especially easy to install. The store has prepared the screws and the batteries of the remote control. solar lights ay ginagawang maliwanag ang basketball court ng komunidad. legit store. Thank you store for such attentive service.💖💖💖💖💖
Legit PHILIPS, Salamat sa nagbebenta sa pagpapaalala sa akin na mas malaki ang wattage, mas angkop ito para sa mga hardin at bakuran. Marami…Read full reviewShow less
Legit PHILIPS, Salamat sa nagbebenta sa pagpapaalala sa akin na mas malaki ang wattage, mas angkop ito para sa mga hardin at bakuran. Maraming salamat sa mga produkto at serbisyo ng nagbebenta😘, ito ay mahusay. Kahit mawalan ng kuryente, pwede pa rin maglaro ang mga bata sa bakuran.Salamat.
Mabilis po dumating and maayos po yung item Maraming salamat po it looks good. It is also well-packaged. Saka mukha namang matibay, sana tal…Read full reviewShow less
Mabilis po dumating and maayos po yung item Maraming salamat po it looks good. It is also well-packaged. Saka mukha namang matibay, sana talaga magtagal sya since it's useful for some emergencies or sudden brown-outs. Thank you also seller for responding my queries🥰🥰🥰.
Nice packaging ang works well I placed another order again this time I order 3000W. I hope it's much way better since this 3000w I ordered f…Read full reviewShow less
Nice packaging ang works well I placed another order again this time I order 3000W. I hope it's much way better since this 3000w I ordered first has an excellent quality. Thank you
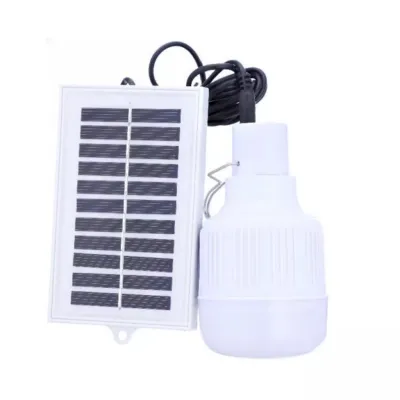
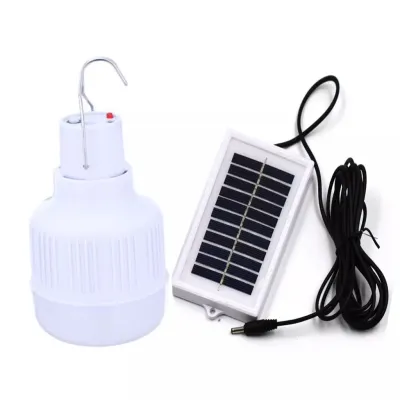
2,946 Lazada user ratings
Quality:Ang ganda ng quality, hindi halatang mumurahin lang. Appearance:Kung ano ang nasa pictures, 'yon din ang mare-receive mo. Performanc…Read full reviewShow less
Quality:Ang ganda ng quality, hindi halatang mumurahin lang. Appearance:Kung ano ang nasa pictures, 'yon din ang mare-receive mo. Performance:Lahat naman gumagana and walang damage. Thank you, seller. Will order again.
Quality:Superb Appearance:Light and sturdy Performance:All levels of the fan is sufficient. No problem with charing, easy to use and lightwe…Read full reviewShow less
Quality:Superb Appearance:Light and sturdy Performance:All levels of the fan is sufficient. No problem with charing, easy to use and lightweight. True to color.
Provides emergency lighting, Easy to adjust brightness levels, Versatile lighting options, Bright and powerful LED lights, napakaganda ng it…Read full reviewShow less
Provides emergency lighting, Easy to adjust brightness levels, Versatile lighting options, Bright and powerful LED lights, napakaganda ng item sana magtagal to
Quality:good Appearance:cute Performance:gumana naman may magagamit na kami sa harap ng bahay namin pag brown out,order po uli.
diko pa sya nagamit kase panay ulan samin kaya diko alam kung ok sya wala araweh pero sana ok naman
Prices are valid at publication and may change. Please refer to the product page for the latest price.
Next, determine the spacing of your lights based on their intended function. For pathway markers, space the fixtures evenly—typically 1.5 to 2.5 meters apart—to create a continuous, safe guiding path without causing harsh glare. For accent lighting, such as highlighting a specific garden feature or shrub, position the light closer to the target object and angle it upward or downward depending on the fixture design.
Before driving any stakes into the ground, check for underground hazards. In residential yards, shallow irrigation lines, water pipes, or outdoor electrical conduits may run just beneath the soil surface. Carefully inspect your garden layout or consult your home’s utility map to avoid puncturing these lines when installing ground spikes.
Tools and Materials Needed
Having the correct tools on hand ensures a smooth, uninterrupted installation process. Start by verifying that your solar lighting system package is complete. Check the manufacturer’s packing list to confirm you have all solar panels, light fixtures, rechargeable batteries, mounting brackets, and ground spikes.

For ground-spike installations, you will generally need a rubber mallet and a small garden trowel or watering can to prep hard soil. If you are mounting fixtures to concrete walls, wooden fences, or brick pillars, gather a power drill, masonry or wood drill bits, a level, a pencil for marking, and a manual screwdriver. Wear sturdy work gloves to protect your hands when handling rough ground spikes or drilling into masonry, and use protective eyewear to prevent debris from entering your eyes.
Step-by-Step Installation Process
Transitioning from planning to physical setup requires a systematic approach to ensure each component is configured correctly. Following a structured sequence prevents common mistakes, such as installing a defective unit or damaging components during mounting.
Unboxing and Pre-Installation Checks
Begin by carefully unboxing all components on a flat, clean surface. Inspect each solar panel, light housing, and lens for any signs of shipping damage, cracks, or manufacturing defects. Moisture ingress is a major cause of failure in humid tropical environments, so any physical crack in the housing can compromise the unit’s weatherproofing.
Verify the system’s voltage, battery interface, and electrical certification labels on the packaging to ensure they match your outdoor installation environment. Read the manufacturer’s instruction manual thoroughly before proceeding. Locate the main power switch, which is often a small toggle switch, a push button, or a pull-tab located on the underside of the light cap or near the battery compartment.
Many solar lights are shipped with the switch in the “OFF” position or with a plastic battery-insulating tab that must be removed before the unit can charge or operate. Perform a quick functionality test before installing the fixtures. Turn the power switch to the “ON” position and completely cover the solar panel with your hand, a piece of cardboard, or a dark cloth to simulate nighttime conditions. If the light turns on, the internal sensor and LED are functioning correctly; if it does not, verify that the battery is seated properly in its compartment and try again.
Mounting and Positioning the Lights
The physical installation method depends entirely on the type of solar light fixture you are using. Keep in mind that decorative style, perceived color temperature (such as warm white versus cool daylight), and spatial lighting effects are highly subjective preferences; choose options that complement your existing garden design.
For ground-spike lights, never force the plastic or metal spike directly into dry, hard-packed clay or soil, as this can easily bend or snap the stake. Instead, use a watering can to thoroughly soften the soil in the designated spot, or use a small trowel to dig a narrow pilot hole. Insert the spike straight down into the softened ground, press the soil firmly around the base to secure it, and then gently slide the light fixture onto the spike.
For wall-mounted or fence-mounted lights, hold the mounting bracket or the fixture itself against the surface and use a level to ensure it is perfectly straight. Mark the screw holes with a pencil, then drill pilot holes using the appropriate drill bit for your wall material. Insert plastic wall anchors if you are mounting onto concrete or brick, align the bracket, and secure it tightly with screws using a manual screwdriver to avoid overtightening and cracking the plastic housing.
For freestanding or bollard lights, assemble the support poles securely according to the manufacturer’s instructions, ensuring all threaded joints are tight to prevent water from seeping inside. Place the base on a stable, level surface; if you are installing on uneven soil, you may need to compact the ground or place a flat paving stone underneath to prevent the light from tilting over time.
If your system features a separate solar panel connected to the light fixtures via a cable, mount the panel in the spot that receives the most direct sunlight throughout the day. Adjust the tilt angle of the panel—typically between 15 and 45 degrees depending on your latitude—to maximize solar energy capture, and tighten the adjustment knobs securely to prevent wind from shifting its position.
If your solar system includes a hybrid backup with fixed wiring or requires working at heights to mount panels on a high roof, always isolate the power source, follow the manufacturer’s installation instructions strictly, and consult a qualified professional to handle the electrical connections safely.
Optimizing Performance and Sunlight Exposure
To get the most out of your solar lighting system, you must actively manage the environment surrounding the solar panels. Regularly trim back overhanging tree branches, ornamental shrubs, or climbing vines that grow over the panels and cast shadows. Even a small amount of partial shade on a solar panel can significantly reduce its charging efficiency, leading to shorter runtimes at night.
Many modern solar lights feature adjustable operating modes to help balance brightness with battery capacity. If your fixtures have settings such as motion-sensor mode, dusk-to-dawn mode, or adjustable dimming levels, select the setting that best matches your security and aesthetic needs. For instance, using a motion-sensor setting in low-traffic garden areas conserves battery power, ensuring the light remains functional even after consecutive overcast days.
Before relying on your new lights for nightly illumination, allow the batteries to receive a full initial charge. Turn the fixtures to the “OFF” position (or leave them in the recommended charging state according to the manual) and let them sit in direct sunlight for 12 to 24 hours. This initial deep charge helps condition the rechargeable batteries, maximizing their overall lifespan and performance.
Maintenance and Troubleshooting
Outdoor solar lights are constantly exposed to environmental elements, requiring routine care to maintain their efficiency. Dust, pollen, bird droppings, and mineral spots from garden sprinklers can accumulate on the solar panel surface, blocking sunlight and reducing charging capacity. Wipe the panels clean every few weeks using a soft, damp microfiber cloth and mild soapy water; avoid abrasive scrubbers or harsh chemical cleaners that could scratch the protective coating.
Over time, all rechargeable batteries degrade and lose their ability to hold a full charge. While high-quality solar lights save on monthly electricity bills, budget for replacement rechargeable batteries every few years to keep the system running efficiently. Check the manufacturer’s manual for the exact battery specifications, such as size (typically AA or AAA), chemistry (NiMH or Li-ion), voltage, and milliampere-hour (mAh) capacity, and always replace old batteries with matching specifications to prevent damage to the internal circuitry.
If a light fails to turn on, systematically troubleshoot the issue before assuming the fixture is broken. First, verify that the power switch is in the “ON” position and that the battery is making clean contact with the metal terminals inside the compartment. Next, check if nearby ambient light sources, such as streetlights or porch lamps, are shining directly onto the solar panel, tricking the internal sensor into thinking it is still daytime.
If you observe severe moisture buildup inside the lens or battery compartment, turn off the unit, remove the battery, and allow the components to dry completely in a shaded, well-ventilated area. Inspect the rubber gaskets or seals for damage; if the seals are torn or if the electrical wiring is corroded, stop DIY repairs. Consult the manufacturer’s customer support or a qualified professional to avoid safety hazards or voiding your warranty.
Frequently Asked Questions (FAQ)
Do solar garden lights work on cloudy or rainy days?
Yes, solar garden lights can still charge on cloudy or rainy days, but their efficiency is significantly reduced. Solar panels utilize diffuse light to generate electricity when direct sunlight is blocked by clouds. However, because the energy input is lower, the battery will not reach a full charge, resulting in dimmer light output and a shorter runtime during the night. During extended rainy seasons, you may notice the lights turning off after only a few hours.
Can I install solar lights in heavily shaded areas?
Installing standard all-in-one solar lights directly in heavy shade is not recommended, as the integrated panels will not receive enough sunlight to charge the batteries. If you want to illuminate a shaded garden path or a dark patio under a thick canopy, choose a solar lighting system with a detached solar panel. This design allows you to mount the light fixtures in the shade while running a weather-resistant cable to a separate solar panel positioned in a sunny, unobstructed location.
How do I know when to replace the rechargeable batteries?
You will know it is time to replace the rechargeable batteries when the lights exhibit a noticeable drop in performance that cleaning the panels does not resolve. Common signs include a runtime that lasts only one or two hours after a sunny day, dim or flickering LEDs, or a complete failure to turn on. Before purchasing replacements, open the battery compartment and check the manufacturer’s label for the exact battery type, voltage, and capacity to ensure full compatibility and safe operation.
Community discussion
Share your experience or ask a question. Comments are reviewed before publication.