
Installing aluminum profiles for LED strip lights is an excellent way to achieve a clean, professional, and modern lighting effect in your home. These metal channels act as a protective housing, shielding the delicate circuitry of the LED tape from dust and physical contact while serving as a crucial heat sink to prolong the lifespan of your lights. By diffusing the harsh, individual light points of raw LED tape into a smooth, continuous glow, aluminum profiles elevate simple accent lighting into a premium architectural feature.
The installation process involves measuring the space, cutting the aluminum channel and its plastic diffuser cover to size, mounting the channel securely, laying down the LED strip, and snapping the cover in place. While the physical mounting is straightforward, achieving a flawless finish requires careful preparation, precise cutting, and strict adherence to electrical safety guidelines. Whether you are highlighting kitchen cabinets, illuminating a ceiling cove, or adding under-shelf lighting, this step-by-step guide will walk you through the entire process safely and efficiently.
Essential Tools and Materials to Prepare
Before beginning your installation, gather all the necessary tools and verify that your materials are fully compatible. Having everything ready prevents mid-project delays and ensures a cleaner, more precise result.
Products mentioned in this guide
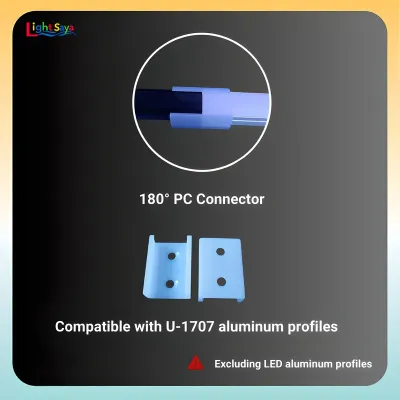
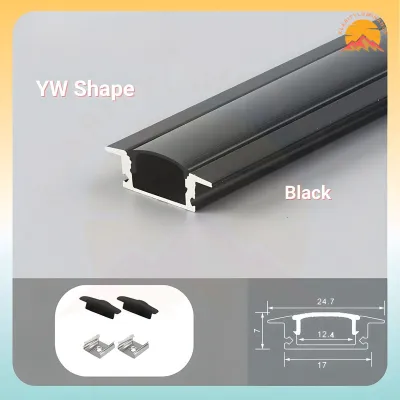
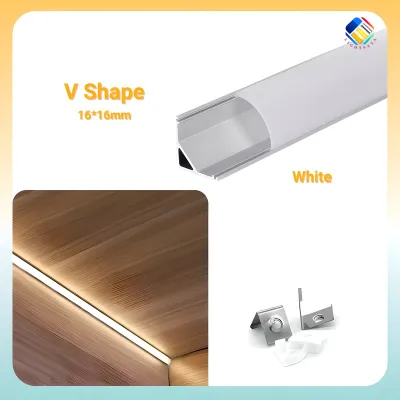
Prices are valid at publication and may change. Please refer to the product page for the latest price.
For measuring and marking, you will need a tape measure, a pencil, and a spirit level. If you are mounting profiles along a long wall or ceiling, a laser level can help maintain perfect alignment.
Cutting aluminum requires tools that can produce clean edges without bending the metal. A hacksaw with a fine-toothed blade (24 to 32 teeth per inch) is the standard manual choice, while a miter saw with a non-ferrous metal blade offers faster, more precise cuts. For the plastic diffuser covers, a utility knife or fine-toothed hand saw works well.
Your choice of mounting hardware depends on the surface. For wood or drywall, small mounting screws or clips are ideal. If you are installing on tile, glass, or concrete, use a high-quality, heat-resistant double-sided mounting tape or strong construction adhesive.
Crucially, verify component compatibility before starting. Check the manufacturer’s specifications to ensure the internal width of the aluminum profile is slightly wider than your LED strip. Additionally, inspect product labels on both the LED strip and the power supply to confirm their voltage ratings match perfectly.
Step 1: Measure, Mark, and Cut the Aluminum Profile
Accurate measurements are the foundation of a professional installation. Begin by measuring the exact length of the installation area using your tape measure.

When calculating your cuts, account for the thickness of the end caps. If you plan to use end caps on both sides, subtract their combined thickness from your total measurement before marking the channel. Mark the cutting line clearly on the back or side of the aluminum profile with a pencil.
To cut the aluminum channel, secure it firmly to a workbench using a C-clamp or a vice. Place a scrap piece of wood or a soft cloth under the clamp to prevent scratches. Cut slowly along your mark, keeping the saw blade perpendicular to the channel for a straight edge.
Once cut, use a fine metal file or medium-grit sandpaper to smooth down the rough edges. Removing these burrs is a critical safety step, as sharp metal edges can easily slice through the protective backing and delicate circuitry of your LED strip, causing a short circuit.
The plastic diffuser cover must be cut separately from the aluminum channel to prevent cracking. Slide the cover out of the profile before cutting. Mark the same length on the cover and use a fine-toothed saw or a utility knife. If using a utility knife, score the plastic deeply several times along a straight edge, then carefully snap it along the scored line.
Step 2: Prepare the Surface and Mount the Channel
A secure mount relies heavily on how well you prepare the installation surface. Dust, grease, and moisture can severely compromise adhesives and make mechanical mounting difficult.
Start by thoroughly cleaning the mounting surface. Wipe away any dust, dirt, or oily residue using a clean cloth dampened with isopropyl alcohol or a mild, non-corrosive cleaner. Allow the surface to dry completely before proceeding. If you are working in a high-humidity environment, ensuring a bone-dry surface is critical for long-term stability.
Next, decide on your mounting method. If you are using mounting clips, space them evenly along the marked line—typically one clip every 50 to 80 centimeters is sufficient. Secure the clips using the appropriate screws. If you prefer a direct mount, drill small pilot holes through the bottom of the channel and screw it directly to the surface. For glass, tile, or rental properties, apply a continuous strip of heavy-duty, heat-resistant double-sided tape to the back of the profile, pressing it firmly against the surface.
Always use a spirit level to check the alignment of your channel or clips before final tightening. Even a slight tilt can become highly noticeable once the LED strip is illuminated.
If your installation requires drilling into walls or ceilings, stop and verify the path of any hidden utilities. Use a stud finder with live-wire detection to avoid drilling into electrical cables or water pipes. For complex installations, such as recessed mounting into concrete ceilings, working at significant heights, or routing wires through structural walls, always consult a qualified professional to ensure structural integrity and safety.
Step 3: Wire and Insert the LED Strip Safely
Electrical safety must be your top priority. Before handling any wiring, turn off the main power supply at your home’s circuit breaker. Do not rely solely on a wall switch, as the circuit may still carry live current.
Verify that your power supply is fully compatible with your LED strip. Check the labels on both devices to ensure the output voltage of the driver matches the input voltage of the strip. Additionally, confirm that the total wattage of your LED strip does not exceed 80 percent of the power supply’s maximum rated capacity. This safety margin prevents the driver from overheating and extends the system’s operational life.
Plan your wire routing carefully. Most aluminum profiles feature end caps with pre-drilled holes or knockouts for wire entry. Feed the input wires of the LED strip through the end cap before sticking the strip down. If routing wires through the back of the profile, drill a small hole in the aluminum base, file the edges smooth, and use a rubber grommet to protect the wires from chafing.
To install the LED strip, peel away a small section of the adhesive backing. Align the strip with the center of the aluminum channel and press down firmly but gently, working your way from one end to the other. Avoid pressing directly on the delicate LED diodes or resistors, as localized pressure can damage the internal connections. Never stretch the strip tightly, and avoid making sharp 90-degree bends; instead, use specialized solderless corner connectors if you need to navigate tight corners.
Step 4: Attach the Diffuser and Test the Setup
With the LED strip securely in place, you can now install the diffuser cover to protect the LEDs and soften the light output.
Depending on the design of your aluminum profile, the diffuser cover will either slide into the side tracks or snap directly onto the front of the channel. For snap-on covers, start at one end of the profile and gently press the cover into the channel until you hear a click. Work your way down the entire length of the profile, applying even pressure with your thumbs. Avoid using excessive force, as this can crack the plastic or dislodge the aluminum channel.
Once the diffuser is fully secured, install the end caps on both ends of the profile to seal the system and hide any exposed wiring.
Now it is time to test your installation. Restore power at the main circuit breaker and turn on the light switch. Observe the light output carefully, checking for uniform brightness along the entire length of the profile.
If you notice dark spots, flickering, or if the strip fails to turn on, immediately turn off the power at the breaker before troubleshooting. Check all wire connections, ensure the polarity (positive to positive, negative to negative) is correct, and verify that the power supply is receiving input voltage. If you observe visible hotspots, you may need to adjust the positioning of the LED strip inside the channel, or consider using a high-density LED strip to achieve a perfectly seamless glow.
Long-Term Maintenance and Safety Checks
To keep your ambient lighting system looking pristine and operating safely, establish a simple routine for periodic maintenance.
Every few months, perform a quick visual inspection of your aluminum profiles. Look for any signs of dust accumulation, physical damage, or yellowing of the plastic diffuser cover. In tropical climates with high humidity, check for any signs of moisture ingress inside the profile, especially if installed in kitchens, bathrooms, or semi-outdoor spaces.
When cleaning the profiles, always turn off the power at the breaker first. Wipe the exterior of the aluminum channel and the diffuser cover with a soft, dry microfiber cloth. For stubborn dirt, use a slightly damp cloth with a mild, non-abrasive soap solution. Never use harsh chemical solvents or abrasive scrubbing pads, as these can scratch the aluminum finish or degrade the plastic diffuser.
Be alert to warning signs that indicate potential electrical issues. If you notice unusual heat radiating from the profile, hear buzzing or humming sounds from the power supply, or experience persistent flickering, immediately disconnect the power. These symptoms can indicate an overloaded circuit, a failing driver, or a loose connection. Do not attempt to repair complex electrical faults yourself; consult a licensed electrician to inspect and resolve the issue. Always refer to the manufacturer’s specific care and safety instructions for your particular model of LED strip and aluminum profile.
Frequently Asked Questions (FAQ)
Can I install aluminum profiles on uneven or curved surfaces?
Standard rigid aluminum profiles are designed for flat, stable surfaces to ensure proper heat dissipation and secure mounting. If you attempt to mount a rigid profile on a curved wall, the adhesive or mounting clips may fail over time due to mechanical tension. For curved architectural features, look for specialized flexible or bendable aluminum profiles designed specifically to follow contours. If your wall has minor surface textures, using mechanical mounting clips with screws is highly recommended over double-sided tape, as the clips can bridge small gaps and provide a much more secure hold.
Do I need a professional electrician to wire the LED strips?
For simple, low-voltage (12V or 24V) plug-and-play LED strip kits that connect directly to a standard wall outlet via a pre-assembled power adapter, a professional electrician is generally not required. You can safely complete this installation yourself by carefully following the manufacturer’s instructions. However, if your project involves hardwiring the power supply directly into your home’s mains voltage (220V-240V), routing cables behind drywall or concrete walls, or installing wall-mounted dimmer switches, you must hire a licensed electrician. This ensures full compliance with the Philippine Electrical Code and guarantees a safe, hazard-free installation.
Community discussion
Share your experience or ask a question. Comments are reviewed before publication.