
Achieving a clean, immersive gaming setup requires more than just placing a high-performance PC on your desk. Properly installing and routing an RGB LED light strip behind your gaming desk transforms your space into a glare-free, visually striking environment. The secret to a professional-looking installation lies in thorough surface preparation, strategic routing to avoid visible hotspots, and robust cable management that keeps bulky adapters completely out of sight.
In tropical climates like the Philippines, high humidity levels can quickly degrade the standard adhesive backing found on most light strips. To prevent your lights from sagging or peeling off after a few weeks, you must combine proper surface cleaning with supplementary mounting hardware. By taking the time to plan your layout and secure your connections, you can create a seamless ambient glow that enhances your gameplay and reduces eye strain during late-night sessions.
Preparation and Safety Checks
Before peeling off any adhesive backing, you must prepare your workspace to ensure both physical safety and a long-lasting bond. Start by thoroughly cleaning the back edge of your desk and the rear panel of your monitor. Dust, skin oils, and ambient grime will prevent the adhesive from sticking properly, leading to premature peeling. Wipe these areas down using a microfiber cloth dampened with isopropyl alcohol, and let them dry completely before proceeding.
Products mentioned in this guide
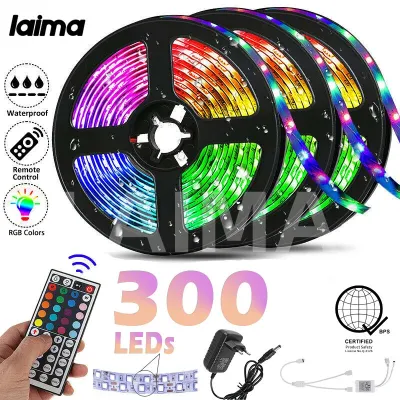
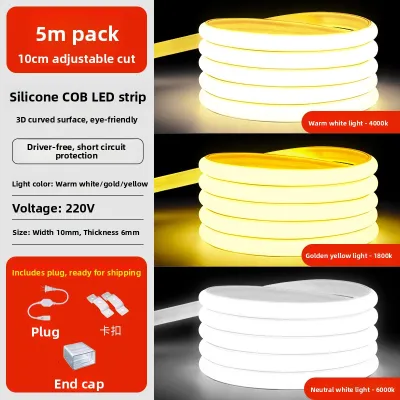
Prices are valid at publication and may change. Please refer to the product page for the latest price.
Electrical safety is equally critical when setting up your gaming lights. Always check the manufacturer labels on both the LED strip and its power adapter to verify that the input voltage matches your local electrical standards. In the Philippines, household outlets supply 220V AC, so your power supply unit must be rated to handle this input while safely stepping it down to the 12V or 24V DC required by the strip.
Next, map out your routing path before mounting any components. Ensure the strip will not run across sharp metal edges, pinch points, or heat-generating ventilation grilles on your PC or monitor. If you use an adjustable monitor arm, leave enough slack in the cable routing to accommodate the full range of motion without pulling or straining the connections. Finally, keep the power supply completely disconnected from the wall outlet during the entire physical mounting and routing process to prevent accidental short circuits.
Tools and Materials Needed
Having the right tools on hand before you begin will save you time and prevent frustration mid-installation. First, select a high-quality RGB led light strip of the appropriate length for your desk. For indoor gaming setups, standard flexible strips are ideal, but you may want to consider strips with a protective silicone coating if your room experiences high humidity.

You will also need a compatible power supply unit and controller that match the voltage and total wattage of your chosen strip. To keep the installation neat, gather cable management accessories such as adhesive cable clips, zip ties, or hook-and-loop straps. A microfiber cloth and isopropyl alcohol are essential for surface preparation.
For a truly premium look, consider investing in aluminum diffuser channels with frosted covers. These channels not only protect the delicate LED diodes from dust and physical damage but also scatter the light evenly, eliminating harsh, dotted reflections on your wall.
Step-by-Step Installation Guide
Transforming your gaming station involves a systematic approach to mounting and routing. Follow these sequential steps to mount your strips, route the cables safely, and hide the power components for a completely clean aesthetic.
Mounting the LED Strips Behind the Monitor
Adding ambient backlighting directly to your monitor reduces eye strain by minimizing the contrast between a bright screen and a dark room. Begin by measuring the perimeter of your monitor’s back panel. Depending on your preference, you can run the strip along all four sides or focus solely on the top and sides to cast a wide glow onto the wall behind.
Carefully peel away the adhesive backing a few inches at a time, pressing the strip firmly onto the cleaned plastic surface of the monitor while avoiding any ventilation grilles. If you need to make 90-degree turns at the corners, avoid bending the strip sharply; instead, create a small, loose loop or use dedicated solderless corner connectors to preserve the internal circuitry.
As you route the strip down toward the stand, leave a small amount of slack near the hinge or mounting bracket. This extra length ensures that when you tilt, swivel, or raise your monitor, the cable will not pull tight and tear the strip away from its connection point. Once the strip is mounted, route the input cable cleanly down the monitor stand, securing it with cable ties.
Routing and Mounting Strips Along the Desk Edge
The main wash of light in your gaming setup comes from the strip running along the back of your desk. For the best visual effect, position the LED strip on the underside of the desk or along the back vertical edge. This placement ensures the light source remains completely hidden from your direct line of sight when you are seated, providing a soft, indirect glow rather than a distracting glare.
Standard adhesive backings often struggle to grip textured wood, particleboard, or matte metal surfaces, especially in humid environments. To guarantee a permanent hold, reinforce the strip by placing adhesive mounting clips or small strips of heavy-duty double-sided acrylic tape every few inches. Press down firmly along the entire length of the strip to activate the pressure-sensitive adhesive.
Once the strip is secured along the desk edge, direct the connection cable toward your main cable management area. If your desk features a built-in cable tray or a wire basket underneath, route the cable directly into it.
Hiding the Power Supply and Cables
A brilliant lighting setup can easily be ruined by a cluttered mess of dangling wires and bulky power bricks. To maintain a clean, minimalist gaming station, you must actively conceal the power supply and controller. Mount the power brick to the underside of your desk using heavy-duty double-sided mounting tape or a dedicated under-desk wire basket.
Next, tackle the excess wiring. Gather the slack from the LED strip, the controller cable, and the power adapter, then bundle them neatly using zip ties or reusable hook-and-loop straps.
Route the main power cable down along one of the desk legs to keep it out of sight. You can use adhesive cable guides or a fabric cable sleeve that matches the color of your desk frame to blend the wires into the structure. Finally, plug the power supply into your wall outlet or surge protector, ensuring the cable has enough slack to prevent tension if you use a height-adjustable standing desk.
Achieving a Glare-Free and Clean Setup
Once everything is physically installed, it is time to fine-tune your setup for optimal visual comfort. Sit in your gaming chair and look toward your monitor. If you can see individual LED diodes reflecting directly off your screen or shining straight into your eyes, you will need to adjust the placement. The goal is to achieve a smooth, seamless wash of light across the wall without any visible hotspots.
If your wall has a glossy finish or if the desk sits very close to the wall, you might notice harsh, dotted reflections. You can easily resolve this by installing the strips inside aluminum diffuser channels. The frosted lenses of these channels blend the individual light points into a single, continuous bar of light, creating a much softer and more professional aesthetic.
Finally, use your controller or smart home app to adjust the brightness and color temperature. During intense gaming sessions, overly bright saturated colors can cause eye fatigue. Try lowering the brightness to around 40% to 60% and choosing colors that complement your on-screen content or your room’s existing ambient light. If you are using the setup for work or study, switching to a warm white tone can create a more relaxing and productive atmosphere.
Troubleshooting Common Installation Issues
If your lights do not behave as expected after powering them on, a few simple checks can usually resolve the issue. If a portion of your LED strip fails to light up or begins to flicker, the culprit is almost always a loose connection. Inspect the joint where the strip connects to the controller, or check any solderless clip connectors you used around corners.
Adhesive failure is another common issue, particularly in warm, humid climates. If a section of your strip begins to sag, do not rely on the original adhesive to hold it back up. Clean the affected area again with isopropyl alcohol, remove the degraded adhesive, and apply a fresh piece of high-bond double-sided mounting tape or secure the section with screw-in mounting clips for a permanent fix.
If you notice color inconsistencies—such as one section of the strip showing green while the rest is red—verify that the controller’s output pins align perfectly with the strip’s input channels. For standard RGB strips, the 12V or 24V power pin must align with the corresponding positive mark on the strip, and the R, G, and B channels must match. A misaligned connector or a bent pin inside a solderless connector will disrupt the color signals and cause mismatched lighting.
Frequently Asked Questions (FAQ)
Can I cut RGB LED strip lights to fit my exact desk size?
Yes, you can cut most RGB LED strips to match the exact dimensions of your gaming desk, but you must only cut along the designated cut lines. These lines are clearly marked on the strip, typically featuring copper pads and a small scissor icon. Cutting anywhere else will sever the internal electrical circuit, leaving the remaining portion of that section permanently dead.
Do LED strip lights damage the paint on my wall or desk?
The strong adhesive backing on many LED strips can potentially peel paint, varnish, or wood veneer when removed, especially if the surface was not primed properly. To prevent damage when removing or repositioning your lights, use a hairdryer or a heat gun on a low setting to gently warm and soften the adhesive before peeling it away slowly.
Community discussion
Share your experience or ask a question. Comments are reviewed before publication.