
Installing crystal LED strip lights in a condominium unit requires a careful balance between achieving a sophisticated ambient glow and preserving the rental or structural integrity of your walls. The most effective way to accomplish this without causing permanent damage is by utilizing high-quality, removable adhesive backing, specialized damage-free mounting clips, or lightweight temporary mounting tracks. By thoroughly preparing the mounting surface, verifying your condo’s electrical capacity, and routing cables neatly along baseboards or trim, you can elevate your living space with a brilliant, crystal-accented lighting display that is completely reversible when it is time to move out.
Preparation and Safety Checks
Before purchasing or unrolling any lighting equipment, consult your condominium’s house rules. Many condo corporations in the Philippines enforce strict regulations regarding structural modifications, drilling into concrete walls, or altering permanent electrical wiring. If you are renting, unauthorized changes can lead to penalties or the loss of your security deposit. Opting for a plug-and-play LED strip system that connects directly to an existing wall outlet is the safest and most compliant route for condo dwellers, bypassing the need for drilling or complex electrical permits.
Next, inspect the manufacturer’s specification label on the LED strip light package and the power adapter. Verify that the input voltage matches the standard utility voltage in the Philippines, which is 220V at 60Hz. Connecting a 110V-only adapter directly to a local outlet will permanently damage the driver and pose a fire hazard. Look for official safety certifications, such as the Philippine Standard (PS) mark or Import Commodity Clearance (ICC) sticker. These markings confirm that the electrical components have undergone testing for insulation, heat dissipation, and short-circuit protection.
Products mentioned in this guide
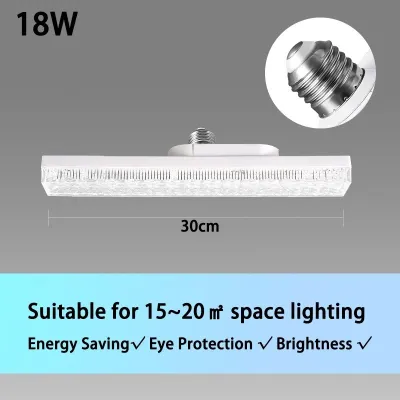
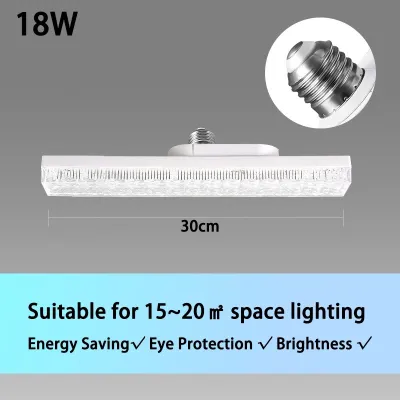
Prices are valid at publication and may change. Please refer to the product page for the latest price.
Gathering the correct tools beforehand ensures a smooth installation. You will need a measuring tape, a clean microfiber cloth, and 70% isopropyl rubbing alcohol to prepare the mounting surface. For the physical installation, prepare damage-free adhesive mounting clips, silicone mounting brackets, or lightweight plastic cable channels. Always isolate the power supply by unplugging the adapter or turning off the corresponding circuit breaker before handling any connections.
Step-by-Step Installation Process
Achieving a professional-looking installation involves a systematic workflow covering surface preparation, physical mounting, and cable management. While most plug-in LED strips are designed for straightforward DIY setup, you must recognize your limits; if your design requires structural drilling into concrete, routing cables behind drywall, or hardwiring into a junction box, stop immediately and hire a licensed electrician or a qualified professional installer.

Surface Preparation and Mounting
The longevity of your damage-free installation depends entirely on how well the adhesive bonds to the wall or ceiling surface. Dust, airborne grease from cooking, and tropical humidity can quickly degrade adhesive backing, causing the LED strip to sag or fall over time. Begin by wiping down the entire installation path with a microfiber cloth dampened with rubbing alcohol. Avoid using household spray cleaners or soapy water, as these often leave behind a thin residue that prevents the adhesive from sticking properly. Allow the surface to dry completely for at least ten to fifteen minutes before proceeding.
While the surface dries, use your measuring tape to map out the exact path of the LED strip. Use a pencil to make light, erasable guide marks along the wall or cabinet underside. It is highly recommended to test-fit the strip with its backing still on to ensure it reaches your intended power outlet without stretching. When you are ready to mount, peel back a small section of the adhesive backing—about thirty centimeters at a time—and press the strip firmly against the surface.
If your crystal LED strip features heavy decorative glass or acrylic elements, standard adhesive backing may not be strong enough to support the weight long-term, especially in humid environments. In these cases, reinforce the installation using damage-free utility clips or clear silicone mounting brackets paired with removable adhesive strips. When navigating corners or sharp turns, never bend the LED strip at a sharp ninety-degree angle, as this can crack the internal copper circuitry and cause a section of the lights to fail. Instead, create a gentle, rounded loop or use specialized solderless corner connectors recommended by the manufacturer.
Electrical Connection and Cable Routing
Once the strip is securely mounted, focus on the electrical connection and cable management. Plug the power adapter into a standard wall outlet, or connect it to a compatible smart plug if you wish to integrate the lighting into your smart home system for automated scheduling. Ensure that the total wattage of the LED strip does not exceed the maximum load rating of the outlet, the smart plug, or any extension cords you might use. Overloading a single outlet can lead to overheating and trigger your condo unit’s circuit breaker.
To keep the setup tidy, route the excess power cable along the edges of your baseboards, door frames, or cabinet corners. Use self-adhesive cable management clips or paintable plastic cable raceways to conceal the wires. Always leave a small amount of slack in the cable near the connection point to prevent tension from pulling the LED strip away from the wall.
Proper heat dissipation is critical for both the lifespan of the LEDs and the safety of your home. The power adapter and the control box must be placed in a well-ventilated area where air can circulate freely. Never tuck the power brick behind heavy curtains, under sofa cushions, or inside tight, unventilated cabinet compartments where heat can build up. Keep all electrical components away from flammable materials, indoor plants that require frequent misting, or areas prone to condensation, such as directly beneath an air conditioning unit. If you ever need to modify your condo’s existing wall switches or tap into a ceiling junction box, do not attempt to do it yourself; hire a licensed electrician to ensure compliance with the Philippine Electrical Code.
Testing and Adjusting the Ambient Lighting
With the physical installation and wiring complete, it is time to test the system and fine-tune the visual effects. Plug in the power supply and turn on the lights. Walk along the entire length of the strip to inspect for any dead LEDs, flickering sections, or loose connections. Flickering can sometimes indicate an unstable power supply, an underpowered adapter, or a loose connection at the joint where the strip connects to the controller. If you notice any issues, turn off the power immediately and verify that all connectors are firmly seated and that the adapter is plugged securely into the outlet.
If your crystal LED strip light model supports dimming or color temperature adjustments, spend some time experimenting with different settings to see how they interact with your condo’s interior. For daytime use, a cooler white light can complement natural daylight and make your living space feel bright and airy. In the evening, transitioning to a warm white tone (around 2700K to 3000K) creates a cozy, relaxing atmosphere that is perfect for winding down.
The defining feature of crystal LED lights is the way the light refracts through the decorative crystal elements, creating beautiful patterns and sparkles on adjacent surfaces. However, this refraction can sometimes result in harsh glare or distracting hot spots if the strip is positioned at an incorrect angle. Stand in different areas of the room—such as your main seating area, dining table, or entryway—to evaluate the visual impact. If you notice uncomfortable glare, you can adjust the angle of the strip, install a diffuser cover over the LEDs, or slightly reposition the decorative crystal elements to soften the light distribution and achieve a more balanced, luxurious glow.
Condo-Specific Maintenance and Care
Maintaining your crystal LED strip lights is essential for preserving their brilliant sparkle and ensuring the system operates safely for years to come. Over time, airborne dust, cooking grease, and humidity can form a dull film over the crystal elements, reducing their clarity and light refraction. Establish a regular cleaning routine by gently dusting the crystals and the LED strip with a dry, clean microfiber cloth or a soft-bristled static brush at least once a month. Always turn off and unplug the power supply before performing any cleaning or maintenance tasks to eliminate the risk of electrical shock.
If the crystal elements require a deeper clean to remove stubborn grease or smudges, always consult the manufacturer’s instructions first. Never spray liquid cleaners, glass cleaners, or water directly onto the LED strip or its electrical connections, as moisture can penetrate the protective coating and cause a short circuit or corrosion. Instead, lightly dampen a microfiber cloth with a mild, diluted soapy water solution, wring it out thoroughly until it is barely damp, and carefully wipe the individual crystal pieces.
In tropical climates where indoor humidity levels can fluctuate significantly, it is important to periodically inspect the physical integrity of your installation. High humidity can gradually weaken adhesive bonds, especially on painted concrete walls or laminate surfaces. Every few months, gently press along the length of the strip to ensure the adhesive remains firmly bonded. If you notice any sections beginning to peel or sag, do not wait for the entire strip to fall. Immediately re-secure the loose sections using fresh, high-quality damage-free mounting clips or double-sided adhesive tape designed for warm, humid environments.
Frequently Asked Questions (FAQ)
Can I install these lights on a textured condo wall?
Standard adhesive backings are designed for smooth, non-porous surfaces and will almost certainly fail on heavily textured, rough, or freshly painted condo walls. The uneven surface prevents the adhesive from making full contact, leading to peeling and sagging within a few days. To install crystal LED strips on a textured wall without drilling, you should use damage-free mounting clips paired with heavy-duty removable adhesive strips designed for rough surfaces. Alternatively, you can mount the LED strips inside lightweight aluminum channels, which can be suspended or secured using specialized damage-free adhesive mounting brackets, providing a flat, stable surface for the lights.
Do crystal LED strip lights consume a lot of electricity?
Crystal LED strip lights are highly energy-efficient compared to traditional incandescent or halogen accent lighting, but their actual power consumption depends on the length of the strip and the density of the LEDs. To verify the energy usage, check the manufacturer’s label on the packaging or the power adapter for the wattage rating, which is typically listed as watts per meter (W/m) or total wattage. To calculate the total power consumption, multiply the wattage per meter by the total length of the strip you plan to install. For example, a 5-meter strip rated at 9 watts per meter will consume 45 watts at maximum brightness, which is well within the safe capacity of any standard condo electrical outlet in the Philippines.
Community discussion
Share your experience or ask a question. Comments are reviewed before publication.