
Installing dimmable LED strip lights in your condo is an effective way to transition your living space from a bright, active daytime environment into a calming sanctuary optimized for evening relaxation. By placing these flexible light sources out of your direct line of sight—such as behind a headboard, inside a ceiling cove, or underneath low shelving—you can eliminate harsh glare and create a soft, indirect glow. When configured to emit a low-intensity, warm amber light, this ambient setup helps signal to your body that the day is ending, making it easier to wind down and prepare for a restful night of sleep.
Achieving a seamless and safe installation in a condo requires careful planning, the right combination of compatible components, and proper surface preparation. Unlike traditional standalone lamps, LED strip systems rely on low-voltage direct current (DC) power, which must be carefully matched to a compatible power adapter and dimmer controller. By following a structured installation process and adhering to electrical safety guidelines, you can transform your condo’s atmosphere while ensuring your lighting system operates reliably and safely for years to come.
Planning Your Condo Lighting Layout and Power Access
Before purchasing any lighting equipment, assess your condo’s layout to identify the most effective locations for indirect illumination. Direct light sources can cause eye strain and visual fatigue in the evening, whereas indirect lighting bounces off walls or ceilings to create a diffuse, gentle glow. Excellent locations for these strips include bedroom coves, the underside of floating shelves, behind wall-mounted television screens, or along the back of a wooden headboard. These hidden placements ensure that the individual LED chips remain invisible, leaving only a smooth, atmospheric wash of light.
Products mentioned in this guide
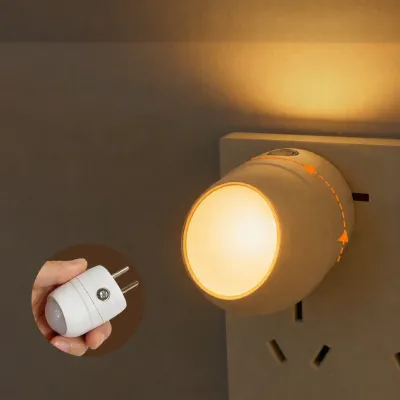
86 Lazada user ratings
I was really surprised when I got these gloves; the lining is super warm, and my hands stayed cozy all day long.
It's really bright, I thought it was a faint light!
The light is really bright and vivid at night.
Really great, love it, very good, fantastic.
Really great, I like it a lot, it's awesome.
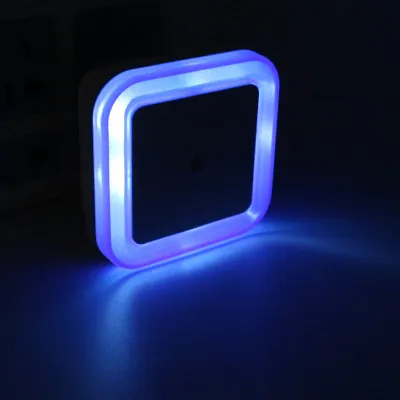
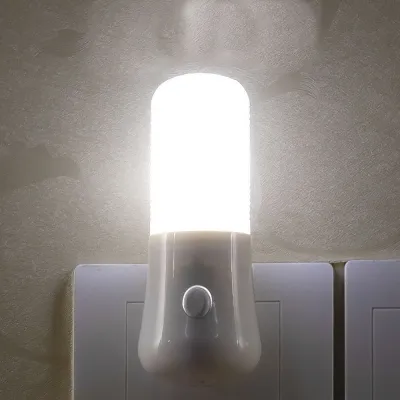
2,190 Lazada user ratings
Nice! What you see it what you get. Bright enough for a night light and color is correct too. You can turn it on and off with the switch
ang cute niya .. yung ilaw sakto lang hindi nakakasilaw sa mata .. worth it naman yung quality para sa price, sana lang tumagal
gumagana cya Ang cute Ng ilaw thank you LAZAda thank you seller and thank you rider.GOD BLESS.KEEP.SAFE!!!♥️
Ok naman lahat at umilaw. Maliwanag and i am satisfied . Sana magtagal. Thank you seller
strong and bright. malalaki light receiver. fast delivery too. thanks!
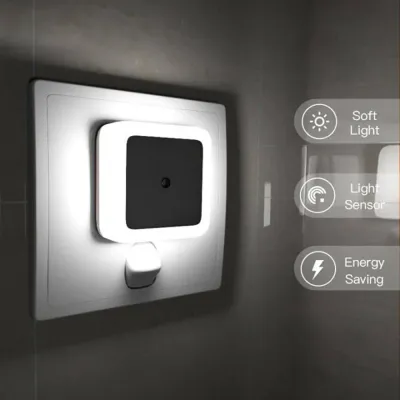
489 Lazada user ratings
🎨Design:cool and beautiful salamat order ako ulit next time. 💡Brightness:sakto lang ilaw nya salamat ulit. 🔋Energy Efficiency:matipid kasi p…Read full reviewShow less
🎨Design:cool and beautiful salamat order ako ulit next time. 💡Brightness:sakto lang ilaw nya salamat ulit. 🔋Energy Efficiency:matipid kasi pag of ang light lang nag open.
bwnwnwnnwnwbwnnwnwnnw bwnwnwnnsnsnwnssns oqkwnmsmsmsmsmmsksms oakwjsnmsmsmsmsm iananannamamamsms kqnanamnamamsmsm jqjwkwkkwkskskskke iakwksk…Read full reviewShow less
bwnwnwnnwnwbwnnwnwnnw bwnwnwnnsnsnwnssns oqkwnmsmsmsmsmmsksms oakwjsnmsmsmsmsm iananannamamamsms kqnanamnamamsmsm jqjwkwkkwkskskskke iakwkskkwksksksksk
🎨Design:kgkgogogogogigfg 💡Brightness:cififficjfigogkgog 🛡️Safety:gogogogohohohoglblv. kckck kkckk kvifjcj k kjck itijv
Smart lighting solution, High-quality plastic, 💡Brightness:5 🛡️Safety:5 🔋Energy Efficiency:5
small but terrible
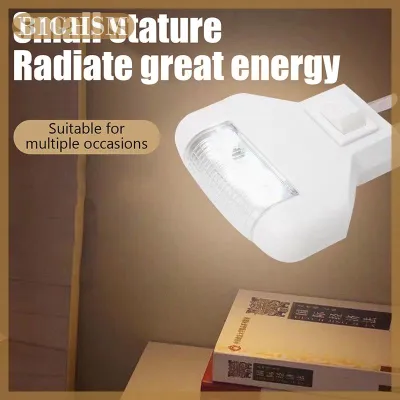
14 Lazada user ratings
Stylish home decoration, Cute plug-in night light, Easy to install and use, Dual insertion switch,
Stylish home decoration, Easy to install and use,
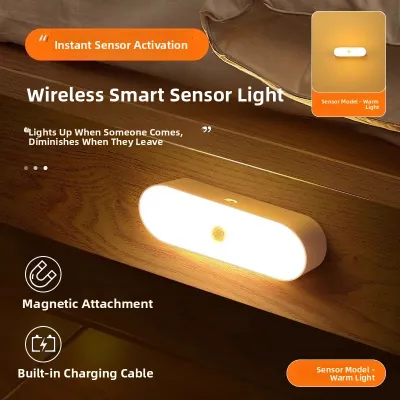
103 Lazada user ratings
Good quality plastic, Fast charging,
LED light source, Energy efficient,
Fast charging, Safe for night use,
simple design. energy efficient.
🎨Design:Energy efficient,
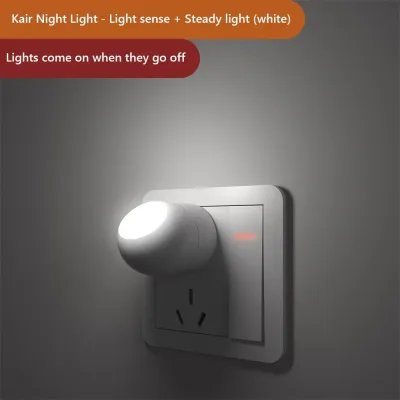
215 Lazada user ratings
I did not notice that there are variants when I ordered. 1 arrived with white light, the other has yellow light 🔋Energy Efficiency:1 dim lig…Read full reviewShow less
I did not notice that there are variants when I ordered. 1 arrived with white light, the other has yellow light 🔋Energy Efficiency:1 dim light is fine 💡Brightness:just right 🎨Design:the direction of the top can be turned around
Plug and play, Eye protection, Energy saving LED, 🎨Design:cute design 💡Brightness:will not harm your eyes 🛡️Safety:plastic material 🔋Energy E…Read full reviewShow less
Plug and play, Eye protection, Energy saving LED, 🎨Design:cute design 💡Brightness:will not harm your eyes 🛡️Safety:plastic material 🔋Energy Efficiency:cost efficient led
bery good product no damage and was packed very well will surely order again from this store thank you
small but bright and the senßor is very accurate to respond to darkness.
subra liit kasing laki lang Ng ulo Ng uten ko hahaha
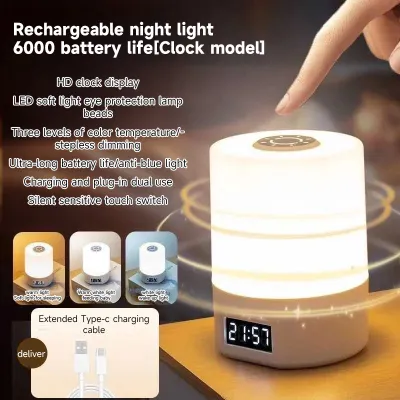
148 Lazada user ratings
Soft and warm light, Remote control feature, Touch control convenience,
Touch control convenience, Good packaging quality,
Soft and warm light, Good packaging quality,
Three-color changing, Ideal for bedrooms,
Prices are valid at publication and may change. Please refer to the product page for the latest price.
Once you have selected your installation locations, map out the path to your nearest wall outlet. Relying on temporary extension cords in a condo can create tripping hazards and clutter your living space, so it is best to position your power adapter close to an existing electrical outlet. Measure the exact distance from the start of your planned LED strip run to the outlet, keeping in mind that you will need to route the power cable neatly along baseboards or behind furniture.
Finally, review the manufacturer specifications on the product labels of your chosen LED strips. Pay close attention to the operating voltage—typically 12V or 24V DC—and the maximum continuous run length specified by the manufacturer. Running a single continuous strip longer than the recommended limit can cause voltage drop, a phenomenon where the light gradually dims and shifts color toward the end of the run due to electrical resistance. If your layout requires a long run, you may need to install a higher-voltage system, use power injection, or split the run into parallel segments powered by a single, adequately rated adapter.
Tools and Materials Checklist
A successful installation relies on gathering all necessary components and safety tools before you begin. The core electrical setup consists of three primary parts: the flexible LED strip itself, a compatible dimmer or smart controller, and a certified power adapter. When selecting these components, verify that the power adapter’s output voltage matches the strip’s input voltage exactly. Additionally, calculate the total wattage of your strip length and select an adapter that provides at least 20% more power than the strip requires; this safety margin prevents the adapter from overheating during extended use.

For the physical installation, you will need a measuring tape to confirm your layout dimensions, high-purity rubbing alcohol (isopropyl alcohol), and clean, lint-free cloths to prepare the mounting surface. You will also need sharp household scissors, but only if your specific LED strips are explicitly marked as cuttable by the manufacturer.
Depending on your mounting surface, you may want to include optional mounting aids. Aluminum diffusion channels with frosted covers are highly recommended because they protect the delicate circuit board from dust, act as a heatsink to dissipate heat, and diffuse the individual light dots into a continuous, solid bar of light. If you are mounting the strips on textured walls, wood, or underneath cabinets where the built-in adhesive might struggle to hold, mechanical mounting clips or high-strength double-sided mounting tape will provide a more secure, long-term hold.
Step-by-Step Installation Process
The physical installation of dimmable ambient lights is a straightforward process when completed in the correct sequence. By preparing your surfaces thoroughly, mounting the strips carefully, and making secure electrical connections, you can avoid common installation pitfalls such as peeling adhesive or flickering lights.
Before handling any electrical components or starting the physical mounting process, you must perform a mandatory safety step. Ensure that all relevant power sources are completely turned off, and keep the power adapter unplugged from the wall outlet throughout the entire physical assembly. Working on live low-voltage components can still cause short circuits that damage the sensitive controller or ruin the LED chips.
Preparing the Surface and Power Source
To ensure a long-lasting bond, prepare the target surface thoroughly before peeling off the adhesive backing of the LED strip. The pressure-sensitive adhesive pre-applied to most strips requires a completely clean, dry, and smooth surface to adhere properly. Even a thin layer of household dust, grease, or paint residue can cause the strip to sag or peel off within a few days of installation.
Begin by verifying that your power adapter is unplugged and set aside. Next, pour a small amount of rubbing alcohol onto a clean, lint-free cloth and wipe down the entire installation path. Avoid using standard household glass cleaners or multi-surface sprays, as these products often leave behind a thin, invisible chemical residue that prevents the adhesive from bonding effectively. Allow the cleaned surface to dry completely for several minutes. Applying the adhesive strip to a damp surface will compromise the glue and lead to premature peeling.
Mounting the Strips and Connecting the Dimmer
Once the surface is dry, you can begin mounting the LED strip. Carefully peel back a few inches of the protective backing paper at the start of the strip. Align the strip with your planned path and press it firmly onto the surface using gentle, even pressure. Work your way down the run, peeling the backing paper off in small sections to prevent the adhesive from catching dust or sticking to itself. Avoid stretching, twisting, or bending the flexible strip at sharp angles, as this can fracture the delicate copper traces inside the circuit board and cause sections of the strip to fail.
If your planned run is shorter than the full length of the strip, you must cut the material to size. Locate the designated cut marks printed on the strip, which are typically spaced every few inches and marked with copper solder pads or a small scissor icon. Cut strictly along these lines using sharp scissors. Cutting the strip at any other location will sever the internal electrical circuit, permanently disabling the remaining segment of that section.
After mounting the strip, connect it to your dimmer or smart controller. Insert the bare wire leads or plug-in connectors from the strip into the output terminals of the controller, ensuring that you match the polarity correctly (positive to positive, and negative to negative). Next, connect the input side of the controller to the power adapter. Double-check that all screw terminals are tightened securely and that there are no loose copper strands bridging the terminals, which could cause a short circuit.
Configuring Brightness and Color for Sleep Preparation
With the physical installation complete, configure your dimmable ambient lights to support your evening wind-down routine. If you installed a smart controller or a remote-controlled system, pair the device with its designated mobile application or remote control by following the step-by-step instructions in the manufacturer’s product manual. Ensure your smartphone’s Bluetooth or local Wi-Fi connection is active during this initial pairing phase.
To prepare your mind and body for sleep, adjust the brightness of your ambient lights to a low, comfortable level. High-intensity lighting in the evening can suppress the natural production of melatonin, a hormone that regulates your sleep-wake cycle. Dimming your lights to between 10% and 20% of their maximum output reduces visual stimulation, minimizes eye strain, and helps your eyes transition naturally to the darkness of the night.
If your LED system features adjustable white color temperatures, select a warm setting, preferably between 2200K and 2700K. Warm, amber-toned light mimics the natural hues of sunset, which is a common personal preference for creating a cozy, relaxing environment. Avoid cool, blue-toned white light (above 4000K) in the evening, as blue wavelengths are highly effective at promoting daytime alertness and can interfere with your ability to fall asleep.
For a truly seamless experience, utilize your smart controller’s scheduling features to automate your evening routine. You can program the lights to turn on automatically at a warm 30% brightness around sunset, gradually dim down to a soft 5% glow an hour before your scheduled bedtime, and turn off completely when it is time to sleep. This gradual transition helps establish a consistent circadian rhythm, making your evening wind-down feel effortless.
Safety Verification and Troubleshooting
Before you begin using your new lighting system regularly, perform a thorough safety inspection and functional test. Examine the entire length of the installation to ensure there are no exposed copper wires, loose plugs, or pinched sections of the strip. Verify that all cables are neatly secured and do not present a tripping hazard or rub against sharp furniture edges.
Plug the power adapter into the wall outlet and turn on the system to test the dimmer’s response. Slowly adjust the brightness from the lowest setting to the highest, checking for any signs of flickering, uneven lighting, or unresponsive zones. If you notice flickering, it is often a sign of an incompatible dimmer controller, a loose connection at the terminals, or an overloaded power adapter that cannot supply enough wattage for the length of the strip.
While low-voltage LED installations are generally safe for DIY enthusiasts, you must recognize when to seek professional assistance. If your project requires hardwiring the power supply directly into your condo’s main electrical panel, modifying existing wall switches, or running high-voltage wiring through concrete walls or ceilings, stop immediately. These tasks require proper power-isolation at the circuit breaker and must be performed by a qualified electrician to ensure compliance with local electrical codes and building safety standards.
Finally, monitor the temperature of the power adapter and the LED strip during the first hour of continuous operation. It is normal for these components to feel warm to the touch, but they should never become hot enough to cause discomfort or emit a burning odor. If you detect excessive heat, unplug the system immediately. Refer to the manufacturer’s normal operating temperature guidelines, and verify that your total strip wattage does not exceed the rated capacity of your power adapter.
Community discussion
Share your experience or ask a question. Comments are reviewed before publication.