
Installing a fancy led light strip in a modern condominium does not require drilling holes or risking your security deposit. The most reliable damage-free method involves mounting the light strips inside lightweight aluminum or plastic channels secured with removable adhesive strips, rather than sticking the light’s built-in adhesive directly to the paint. This approach protects your walls from heat and sticky residue while providing a clean, professional look.
Before starting, always review your condo lease agreement regarding wall modifications and adhesive use to ensure compliance with building policies. Taking a few minutes to verify these rules can save you from unexpected fees when your lease ends.
What You Need for a Rental-Friendly Setup
To achieve a flawless installation, gathering the right materials is essential. You will need your chosen fancy led light strip, which should be rated for your specific indoor environment. Ensure you have a compatible power adapter that matches the voltage and wattage requirements of your light strip to prevent electrical issues.
Products mentioned in this guide
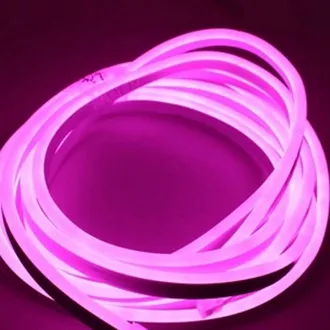
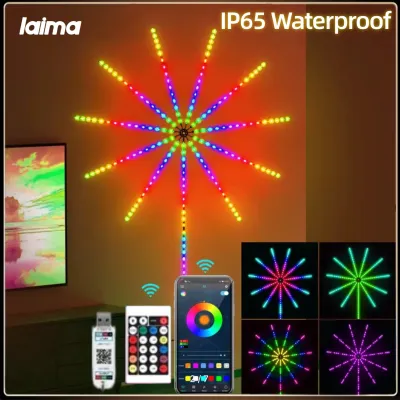
Prices are valid at publication and may change. Please refer to the product page for the latest price.
For mounting, select lightweight aluminum LED channels equipped with diffuser covers, or transparent acrylic mounting clips if you prefer a minimalist profile. Aluminum channels are highly recommended because they help distribute weight evenly and protect the wall surface.
To secure these channels without nails, acquire high-quality removable adhesive strips designed specifically for painted surfaces. For preparation and installation, keep a microfiber cloth, isopropyl alcohol (70% concentration is ideal for cleaning), a measuring tape, and sharp scissors on hand.
If your setup includes advanced features, a compatible smart controller or remote receiver will also be necessary. Always verify that all electrical components carry recognized safety certifications before plugging them into your condo’s outlets.
Step-by-Step Guide to Mounting Without Nails
The secret to a long-lasting, damage-free mount lies in thorough surface preparation. Condo walls often accumulate a thin layer of dust, grease, or moisture, especially in humid tropical climates. Start by wiping down the installation path with a microfiber cloth dampened with isopropyl alcohol.

Avoid using household glass cleaners or soapy water, as these can leave a slick residue that prevents adhesives from bonding properly. Allow the surface to dry completely for several minutes before proceeding to the next step.
Next, prepare your mounting channels or acrylic clips. Cut the aluminum channels to your desired length using a hacksaw if necessary, ensuring any rough edges are smoothed down to protect the strip lights from tearing.
Apply the removable adhesive strips evenly along the back of the channels or clips. Space the adhesive strips closely enough to support the weight of the channel and the light strip combined without sagging.
When placing the channels on the wall, press each section firmly against the surface for at least thirty seconds. This pressure activates the adhesive, creating a secure bond with the paint.
For the best results, allow the adhesive to cure without any load. Waiting a few hours before installing the actual light strips ensures the mounting system is fully stabilized and ready to support the weight.
Once the curing period is complete, gently press your fancy led light strip into the channels. If you are using acrylic clips, slide the strip through the clips carefully to avoid tearing the delicate circuitry.
Ensure the strip lies flat without twisting or buckling along the corners. Finally, snap the diffuser covers onto the aluminum channels to protect the LEDs and create a soft, even glow across the room.
Routing Power and Managing Cables Cleanly
A professional-looking installation requires careful cable management to prevent unsightly wires from dangling down your condo walls. Use small, removable adhesive cable clips to guide the power cord neatly along baseboards, door frames, or natural architectural corners.
This keeps the wiring taut and out of sight, reducing the risk of accidental snags or tripping hazards. Plan your route so that the cable reaches the outlet without being stretched too tightly.
When connecting the power supply, verify that the output voltage of your adapter matches the input voltage specified on your fancy led light strip. Mixing mismatched components can lead to overheating, permanent damage, or electrical hazards.
Plug the adapter directly into a wall outlet or a certified surge protector rather than overloading daisy-chained extension cords. This ensures a stable flow of electricity to your lighting setup.
Safety must remain a priority when positioning the power adapter. Power bricks naturally generate heat during operation and require adequate ventilation to function safely.
Avoid tucking the power adapter behind heavy sofas, under curtains, or inside tight, unventilated cabinets where heat can build up. Keep the adapter elevated off the floor if you live in an area prone to minor indoor spills or high floor-level humidity.
How to Remove the Setup Without Peeling Paint
When it is time to move out or change your decor, removing the installation safely requires patience to protect the underlying paint. Never pull the channels or clips straight off the wall, as this sudden force will likely tear the paint and drywall paper.
Instead, use a handheld hairdryer on a low or medium heat setting to gently warm the adhesive backing. The heat softens the adhesive, making it pliable and easier to release from the wall.
Once the adhesive is warm, slowly pull the tab of the removable strip parallel to the wall. Pulling downward or along the wall stretch-releases the adhesive cleanly without putting outward tension on the paint.
If you are removing acrylic clips, work slowly, applying heat to each clip individually before attempting to detach it. Rushing this step is the most common cause of paint damage.
If any sticky residue remains on the wall after removal, do not scrape it with sharp tools or abrasive sponges. Instead, apply a small amount of isopropyl alcohol to a clean microfiber cloth and gently rub the spot in a circular motion.
For stubborn spots, a dedicated adhesive remover safe for painted surfaces can be used, but always test it on an inconspicuous area first to ensure it does not discolor the paint.
If you notice the paint beginning to bubble, crack, or flake during the removal process, stop immediately. This is often a sign of poor paint adhesion to the underlying drywall or moisture damage within the wall itself. In such cases, consult your landlord or a professional painter to determine the best way to proceed without causing further cosmetic damage.
Troubleshooting Adhesion and Lighting Issues
If your LED channels or clips begin to sag or fall off the wall, several factors could be at play. High indoor humidity, common in tropical regions, can weaken adhesive bonds over time if the surface was not perfectly dry during installation.
Textured walls also reduce the surface area available for the adhesive to grip. To resolve this, ensure you are using adhesive strips rated for the specific texture of your walls, and consider dehumidifying the room during the installation and curing process.
Flickering or dimming lights usually point to an electrical or connection issue rather than a mounting problem. Check all connection points between the fancy led light strip, the controller, and the power adapter to ensure they are secure.
If the entire strip is dim, verify that the power adapter’s wattage capacity is sufficient for the total length of the LED strip you have installed. Underpowered adapters cannot supply enough current, leading to poor performance or premature failure.
Uneven lighting or visible bright spots can detract from the premium look of your installation. If the individual LED chips are too visible, adjust the position of the diffuser cover on your aluminum channel.
Using a deeper channel or a high-density LED strip with more chips per meter can also help create a seamless, continuous line of light across your condo walls.
Frequently Asked Questions (FAQ)
Can I use standard double-sided tape instead of specialized mounting strips?
Standard double-sided foam tape is not recommended for rental properties because its adhesive is designed for permanent bonding. Over time, the adhesive cures and fuses with the wall paint, making clean removal nearly impossible without peeling off layers of drywall. Specialized removable mounting strips use a stretch-release technology that stretches the adhesive horizontally to break the bond cleanly, preserving your condo’s walls and your security deposit.
Will the heat from fancy LED strip lights damage the wall paint?
While fancy LED strip lights run much cooler than traditional incandescent bulbs, they still generate a small amount of heat during prolonged use. If stuck directly to a painted wall, this continuous thermal exposure can dry out the paint, leading to discoloration, cracking, or peeling over time. Using aluminum mounting channels acts as a heat sink, drawing warmth away from the LEDs and dissipating it safely into the air, protecting both the lights and your walls.
Do I need an electrician to install plug-in LED strip lights?
No, standard plug-in LED strip light kits that use a low-voltage power adapter are designed for safe, DIY installation and do not require a licensed electrician. However, if you plan to hardwire the lights into your condo’s existing electrical circuits, install permanent wall switches, or run wiring behind drywall, you must hire a qualified professional. Modifying fixed electrical wiring without proper certification is safety-critical and often violates condo association rules.
Community discussion
Share your experience or ask a question. Comments are reviewed before publication.