
Installing hexagon LED panels is one of the most effective ways to elevate a condo gaming room, but rental restrictions and delicate wall finishes often make permanent mounting impossible. Achieving a clean, floating aesthetic requires a damage-free installation strategy that keeps your security deposit intact. By utilizing high-quality removable adhesives, planning your power routing in advance, and preparing your wall surface to withstand tropical humidity, you can create a secure, visually striking light display without drilling a single hole.
Planning Your Hexagon Layout and Power Route
Before peeling any adhesive backing, you must map out your design and electrical footprint. Condo gaming rooms in the Philippines are often compact, meaning your wall space must be carefully budgeted around existing furniture, monitor mounts, and desk setups. Start by measuring the exact width and height of the blank wall space above your gaming desk. Ensure you leave at least 10 to 15 centimeters of clearance from the top of your monitor or PC tower to prevent physical interference and heat buildup from your hardware.
To visualize the layout, use the manufacturer’s companion application, which often features an interactive layout designer. If an app is unavailable, trace your panels onto plain paper, cut out the hexagon shapes, and use low-tack painter’s tape to arrange them on the wall. This physical mockup allows you to view the design from your gaming chair and adjust the height or symmetry before committing to adhesive placement.
Products mentioned in this guide
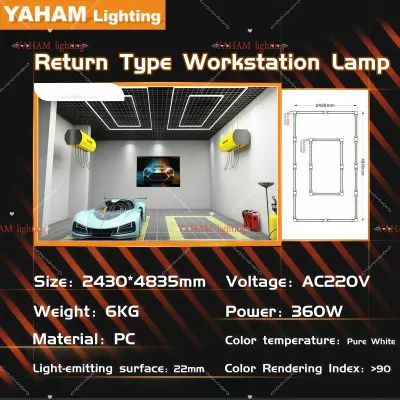
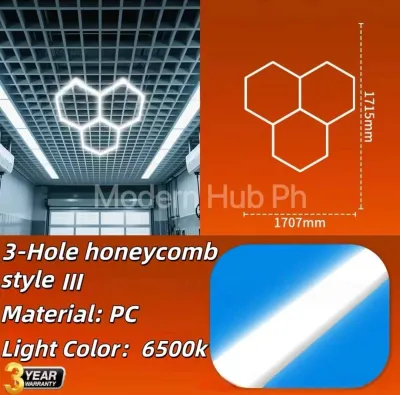
Prices are valid at publication and may change. Please refer to the product page for the latest price.
Power route planning is equally critical to prevent messy, dangling wires. Identify the nearest wall outlet and determine which hexagon panel will serve as the primary power receiver. In the Philippines, residential electrical grids operate on 220V at 60Hz, so you must verify that your panel’s power adapter is rated for this input voltage. Additionally, check the manufacturer’s manual for the maximum wattage limit of your controller. A standard controller typically supports a maximum of 18 to 21 panels; exceeding this limit can overload the adapter, cause flickering, or present an electrical hazard. Choose a bottom or corner panel closest to the outlet as your power input node to minimize the length of the exposed cable.
Essential Tools for Damage-Free Mounting
A successful, damage-free installation relies entirely on using the correct materials. Standard double-sided foam tape, mounting putty, or super glue should never be used on condo walls. These adhesives cure into a rigid bond that will tear drywall paper, pull off plaster, or chip the paint on concrete walls when removed. Instead, gather the following condo-friendly tools:

- Hexagon LED panel kit: Ensure the kit includes the necessary linking connectors (often called linkers or flex linkers) and the control unit.
- Damage-free adhesive strips: Use high-quality hook-and-loop or double-sided removable strips, such as 3M Command Strips, rated specifically for the weight of your panels. Most individual panels weigh between 70 to 150 grams, so select strips that can comfortably support this load.
- 70% Isopropyl alcohol: Essential for cleaning the wall surface. Avoid using household glass cleaners or multi-surface sprays, as they leave behind a slick residue that prevents adhesives from bonding.
- Microfiber cloth: For lint-free cleaning.
- Cable management accessories: Transparent adhesive cable clips or paintable plastic cord covers to conceal the power cable.
Step-by-Step Installation Process
Prep the Wall and Test the Connections
The primary cause of adhesive failure in tropical climates like the Philippines is surface contamination from dust, oils, and high humidity. Before mounting, wipe down the designated wall area thoroughly with a microfiber cloth dampened with 70% isopropyl alcohol. Allow the surface to dry completely for at least 10 minutes. This cleaning step is crucial for both drywall and painted concrete surfaces, as it strips away microscopic oil layers that compromise adhesive grip.
While the wall dries, perform a complete diagnostic test on your floor or desk. Lay out all your hexagon panels in your chosen pattern and insert the linking connectors according to the manufacturer’s directional arrows. Plug the power adapter into the wall outlet and connect it to the primary panel. Turn on the system to verify that every panel lights up, displays colors accurately, and responds to control inputs. Testing your components beforehand prevents the frustrating scenario of mounting your entire layout only to find a faulty connector or a dead LED node in the middle of your design.
Apply Adhesive and Mount the Panels
Once your components are verified, disconnect the power and prepare the adhesive strips. If your kit utilizes dedicated mounting plates, attach the adhesive strips directly to the back of these plates. If you are applying the strips directly to the panels, place them on the designated flat zones on the back of each hexagon, avoiding any ventilation slots or connector ports.
Begin mounting from your primary power receiver panel and work your way outward. Peel the wall-side liner off the adhesive strip, align the panel carefully using a bubble level, and press it firmly against the wall. Apply even, steady pressure across the center and edges of the panel for at least 30 seconds. This pressure activates the pressure-sensitive adhesive, forcing it into the microscopic pores of the wall surface.
After securing the first panel, insert the linking connector for the next panel before pressing it onto the wall. Repeat this process for each subsequent hexagon, ensuring the linkers slide smoothly into place without bending. Once the entire layout is mounted, do not turn on the lights immediately. Allow the adhesive to cure undisturbed for at least 1 hour—or up to 24 hours if recommended by the adhesive manufacturer—before subjecting the setup to the heat generated by operating LEDs.
Stop Condition: If you notice that your condo wall paint is already flaking, bubbling, or feels chalky to the touch, stop the installation immediately. These signs indicate poor paint adhesion to the underlying plaster or drywall. Applying adhesive strips to a compromised surface will cause the paint to peel off under the weight of the panels, resulting in wall damage and a fallen light fixture. In this scenario, consult your property manager or consider alternative mounting methods.
Manage Cables for a Clean Gaming Setup
A premium gaming setup requires clean cable management to maintain a sleek, professional look. Route the main power cable straight down from the lowest panel, keeping it as vertical as possible. Use transparent, damage-free adhesive cable clips spaced every 30 centimeters to hold the wire flush against the wall.
For a completely hidden look, run the cable behind your desk monitor mounts or align it with the vertical corner of the room. If your condo allows minor cosmetic additions, you can place the power cable inside a paintable plastic cord cover that matches your wall color. Always leave a small amount of slack in the cable right before it plugs into the wall outlet. This prevents any accidental pulling or tension from transferring up the wire and dislodging the bottom panel from its adhesive mount.
How to Avoid Wall Damage and Adhesive Failures
Adhesive failures and subsequent wall damage are highly preventable if you understand how environmental factors interact with mounting materials. In the Philippines, high relative humidity and indoor temperature fluctuations can soften adhesive backings over time. If your gaming room is prone to heat buildup, ensure the space is well-ventilated or run your air conditioning unit regularly to keep the ambient temperature stable. Excess moisture in the air can seep behind the panels, weakening the chemical bonds of standard adhesives and causing them to slide or peel away.
When it comes time to move out or redesign your gaming room, removing the panels safely is just as important as the installation. Never pull a hexagon panel straight off the wall, as this will tear the paint and drywall. Instead, use the “stretch and release” method. If you used tabbed adhesive strips, hold the panel gently with one hand and grasp the exposed release tab with the other. Pull the tab slowly and straight down, keeping it parallel to the wall surface. The strip will stretch up to several times its original length, losing its grip cleanly without damaging the paint.
If a tab breaks or if the adhesive feels incredibly stubborn, do not pry the panel off with a tool. Instead, use a hairdryer on a low, warm setting to gently warm the adhesive for 15 to 20 seconds. This softens the polymer, making it easier to release. Be cautious not to use high heat, which can warp the plastic housing of your hexagon panels or blister the wall paint. For any sticky residue left behind, apply a small amount of mild, citrus-based adhesive remover to a microfiber cloth and gently rub the spot, testing it on an inconspicuous area of the wall first to ensure it does not discolor the paint.
Testing and Syncing Your RGB Lighting
With the physical installation complete and the adhesive fully cured, plug in your power adapter and turn on your setup. Walk through a final hardware check: verify that all panels display uniform brightness, that there is no flickering, and that the power adapter does not feel excessively hot to the touch. If you experience any connectivity issues, check that all linking connectors are pushed firmly into their slots.
Next, download the companion app on your smartphone or PC to configure your lighting zones. Most modern hexagon LED systems offer advanced synchronization features that can transform your gaming experience. You can enable screen mirroring, which analyzes the colors on your gaming monitor and projects matching hues onto your wall, expanding the visual field of your games. Alternatively, you can activate audio-reactive modes that sync the light patterns to your game’s soundtrack or background music.
Finally, check for any available firmware updates within the control app. Manufacturers regularly release updates that improve color calibration, enhance connection stability with smart home ecosystems, and optimize power consumption. Keeping your system updated ensures your setup remains reliable and energy-efficient.
Frequently Asked Questions (FAQ)
Can I install hexagon LED panels on textured walls or wallpaper?
Standard damage-free adhesive strips require a smooth, flat, and non-porous surface to establish a secure bond. Textured walls, such as rough plaster, brick, or heavily textured drywall, prevent the adhesive from making full contact, which will lead to the panels falling over time. Delicate or textured wallpaper is also unsuitable, as the adhesive will bond to the paper fibers and inevitably tear or peel the wallpaper when removed. If your condo has these wall types, consider mounting the hexagon panels onto a lightweight, smooth acrylic sheet or a thin wooden board first. You can then securely lean or hang that single board using landlord-approved methods.
How do I safely remove the panels without peeling the paint?
To remove the panels safely, always use the stretch-and-release method by pulling the adhesive tabs slowly and parallel to the wall. Never pull the tabs outward or perpendicular to the surface. If a tab snaps, use a hairdryer on a low, warm setting to gently heat the adhesive backing for a few seconds to soften the bond. Once softened, slide a piece of dental floss or thin fishing line behind the panel and gently saw through the adhesive strip. Any remaining sticky residue can be cleaned off using a mild, citrus-based adhesive remover applied to a microfiber cloth.
Community discussion
Share your experience or ask a question. Comments are reviewed before publication.