
Welcoming peace, harmony, and positive energy into a living space is a deeply rooted tradition in many households. When moving into a rental condo in the Philippines, personalizing your space with a house blessing decoration set is a wonderful way to make the unit feel like home. However, strict lease agreements and concrete wall structures often make drilling or nailing impossible.
Fortunately, modern adhesive wall decals offer a beautiful, damage-free alternative that respects both your traditions and your landlord’s rules. By understanding how to prepare your walls, apply the decals correctly, and manage them in a tropical climate, you can achieve a flawless look that preserves your security deposit. High-quality vinyl sets are widely available online and in local home decor boutiques, with typical price bands ranging from ₱150 to ₱800 depending on the size and complexity of the design.
Preparing Your Rental Walls for Damage-Free Decals
Condo walls in urban areas like Metro Manila, Cebu, and Davao are typically constructed from sturdy concrete or drywall and finished with specific paint sheens. Before purchasing your house blessing decoration set, inspect the paint finish of your target wall. Smooth surfaces with a semi-gloss, satin, or eggshell finish provide the optimal grip for pressure-sensitive adhesives. Avoid applying decals to highly textured plaster, rough concrete, or walls with visible paint damage, as the uneven surface prevents the adhesive from bonding uniformly.
Products mentioned in this guide
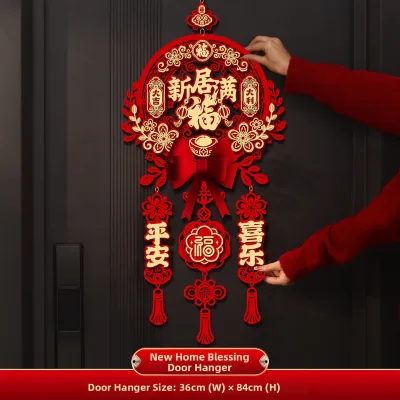

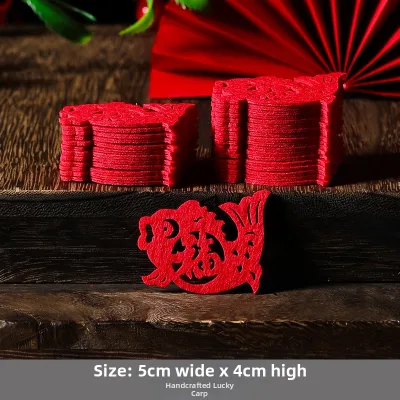
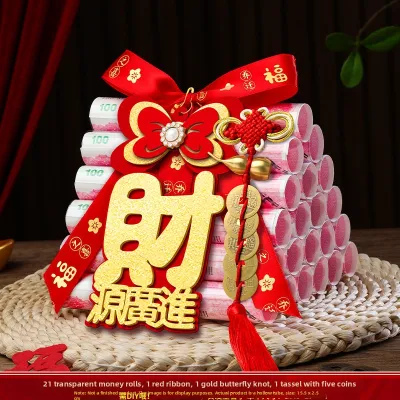
Prices are valid at publication and may change. Please refer to the product page for the latest price.
Tropical environments present unique challenges for wall adhesives due to persistent high humidity. Excess moisture trapped behind a vinyl decal can weaken the adhesive bond, causing the edges to curl or fall off over time. Avoid walls that share a boundary with damp areas, such as bathrooms, or walls directly exposed to heavy condensation from air conditioning units. If your condo has experienced recent water leaks or dampness, resolve these issues completely before attempting to install any wall decor.
A clean surface is paramount for long-term adhesion. Dust, airborne grease from cooking, and invisible oil films will prevent the decal from sticking properly. To clean the wall, mix a few drops of mild dish soap in a bucket of warm water, or use a 70% isopropyl alcohol solution if the paint manufacturer’s guidelines permit. Wipe down the entire installation area with a soft microfiber cloth, then rinse with a damp cloth. Allow the wall to dry completely for a minimum of 24 to 48 hours to ensure all surface moisture has evaporated.
While cleaning and preparing the wall, pay close attention to safety boundaries. Do not apply liquid cleaners or wet cloths near electrical outlets, light switches, or exposed wiring. If your chosen wall has light fixtures or wall sconces nearby, verify that the power is isolated at the circuit breaker before cleaning around them. Keeping moisture away from electrical components is essential to prevent shocks or short circuits.
Before starting the installation, gather the necessary tools to ensure a smooth workflow. You will need low-tack masking tape, a measuring tape, a pencil, a soft squeegee or a clean plastic card wrapped in a microfiber cloth, and a stable step stool. If your layout requires working at height to place the blessing near the top of a doorway or high on a living room wall, prioritize safety. Position your step stool on a flat, non-slip floor surface, ensure all locking mechanisms are engaged, and avoid leaning or overreaching while applying the decals.
Step-by-Step Guide to Applying House Blessing Wall Decals
Planning the Layout and Arrangement
Measure and Center: Begin by measuring the width and height of the wall space where you plan to install your house blessing decoration set. Rather than centering the decals mathematically on the wall, align them visually with key elements of your room, such as the center of a doorway, a dining table, or a low-profile console. This ensures the arrangement feels balanced and integrated into your overall interior design.

The Dry Run: Before removing any protective backing paper, use low-tack masking tape to temporarily secure the decals to the wall. This temporary placement allows you to step back and assess the visual impact from different angles and distances. You can easily adjust the spacing between individual letters, symbols, or decorative borders without risking the adhesive’s integrity.
Marking the Alignment: Once you are satisfied with the temporary layout, use a measuring tape or a bubble level to ensure the design is perfectly horizontal. Lightly mark key reference points, such as the top corners or the baseline of the letters, with a graphite pencil. Keep these marks very faint so they can be easily erased with a soft vinyl eraser once the installation is complete.
Peeling and Sticking Without Bubbles
The Hinge Method: For larger or multi-piece decals, the hinge method is highly recommended to maintain perfect alignment. Secure the top edge of the decal sheet firmly to the wall using a continuous strip of masking tape. Flip the sheet upward, peel away about two to three inches of the backing paper from the top, and cut or fold it down. Flip the sheet back down, pressing the exposed adhesive gently against the wall along your pencil guide marks.
Smooth Progressively: Slowly pull the remaining backing paper downward with one hand. Simultaneously, use your squeegee or microfiber-wrapped card in your other hand to smooth the vinyl onto the wall. Use firm, overlapping strokes starting from the center of the design and sweeping outward to the left and right. This systematic motion pushes air out from under the vinyl, preventing unsightly bubbles from forming.
Secure the Edges: Once the backing paper is fully removed, spend a few minutes reinforcing the bond. Run your squeegee over the entire decal, paying extra attention to the delicate edges, intricate script lettering, and fine decorative details of your house blessing decoration set. Pressure-sensitive adhesives require physical pressure to activate their bonding agent fully, so a thorough rub-down is essential for longevity.
Safe Removal and Maintenance Tips for Rental Walls
Maintaining your wall decals in a warm, humid climate requires a few simple habits. Dust can accumulate on the raised edges of the vinyl, so gently wipe the decals once a week with a dry, clean microfiber cloth or a static duster. Avoid using wet sponges, steam cleaners, or harsh chemical sprays directly on the decals, as liquid can seep under the edges and compromise the adhesive. To manage indoor humidity, run your air conditioner or a dehumidifier during the rainy season to keep the air dry and comfortable.
When your lease ends and it is time to move out, hasty removal can tear the vinyl or pull paint off the wall, jeopardizing your security deposit. To remove the decals safely, use a standard household hairdryer set to low or medium heat. Hold the hairdryer approximately 15 centimeters away from the wall and wave it slowly over a small section of the decal for 10 to 15 seconds. The gentle heat softens the thermoplastic adhesive, making it pliable and easier to release.
Once the vinyl is warm, slowly lift a corner with your fingernail or a plastic card. Peel the decal back slowly and steadily, keeping it at a 45-degree angle relative to the wall surface. Avoid pulling the vinyl straight outward, as this exerts maximum tension on the paint. If you encounter resistance or notice the paint beginning to lift, stop immediately, reapply heat with the hairdryer, and proceed even more slowly.
After removing the decals, you may notice a faint, tacky residue left on the wall, especially if the decals were in place for several years. To clean this safely, mix warm water with a few drops of mild dish soap. Dampen a clean microfiber cloth with the soapy water and gently rub the residue in small, circular motions. Avoid using abrasive scrubbing pads or harsh solvents like acetone, which can dissolve the wall paint and leave permanent, unsightly marks.
Troubleshooting Common Application Issues
Fixing Trapped Air Bubbles: If you notice a small air bubble after the installation is complete, do not panic or attempt to peel the entire decal off. Instead, take a fine sewing needle or a pin and gently prick the center of the bubble. Use your thumb or a soft cloth to press the trapped air out through the tiny puncture, smoothing the vinyl flat against the wall. The microscopic hole will remain completely invisible to the naked eye.
Dealing with Peeling Edges: If the edges of your house blessing decoration set begin to curl due to high humidity or minor wall texture, you can restore them without using permanent glue. Apply a tiny amount of rental-safe, removable double-sided tape or a small piece of temporary adhesive putty behind the lifting corner. Press the vinyl firmly against the wall for 30 seconds to re-establish the bond without risking damage to the underlying paint.
Misalignment Corrections: If you realize a portion of the decal is crooked during the installation, assess the situation carefully before trying to fix it. If you catch the mistake immediately while the adhesive is still fresh, you can slowly peel the section back and reposition it. However, if the decal has been pressed down firmly or has been on the wall for more than a few minutes, peeling it up can stretch or tear the thin vinyl. In many cases, a minor alignment error is far less noticeable than a warped or torn design.
Frequently Asked Questions (FAQ)
Can I use house blessing wall decals on freshly painted condo walls?
No, you should avoid applying decals to freshly painted walls. Although modern paint may feel dry to the touch within a few hours, it undergoes a chemical curing process that typically takes three to six weeks depending on the paint type and environmental humidity. Applying adhesive decals during this curing phase traps escaping solvents, which can cause the adhesive to fail, create bubbles, or chemically bond the vinyl to the paint, leading to severe damage when you eventually remove it. Always verify the curing specifications provided by the paint manufacturer.
Will the decals leave a sticky residue on textured walls?
Decals are not recommended for heavily textured walls because the adhesive cannot make full contact with the uneven surface, resulting in poor adhesion and early peeling. If a decal does manage to stick, the adhesive can settle deeply into the recesses of the texture. Over time, this can leave behind concentrated pockets of residue that are difficult to clean without aggressive scrubbing, which can damage the wall’s paint finish. For the best results, stick to smooth, flat surfaces.
Community discussion
Share your experience or ask a question. Comments are reviewed before publication.