
Installing LED strip lights is one of the most effective ways to transform a condo room into a warm, modern sanctuary. Whether you want to add a subtle under-cabinet glow in your kitchen, create a cozy backlight behind your television, or illuminate the perimeter of your bedroom ceiling, these flexible lights offer an accessible DIY project. However, achieving a clean, professional-looking installation in a condominium requires careful planning, proper surface preparation, and a clear understanding of your electrical setup.
Condo units present specific challenges that differ from traditional houses. Many high-rise residences feature concrete walls, painted plaster ceilings, and compact layouts where outlets are limited. Additionally, tropical climates and high humidity can severely impact how well adhesives hold over time. By following a systematic approach—from measuring your space and verifying electrical compatibility to preparing the mounting surface and routing cables safely—you can ensure your LED strips remain securely attached and function flawlessly.
Plan Your Layout and Check Compatibility
Before purchasing any materials, you must map out the exact path where the LED strips will run. Use a reliable measuring tape to determine the total length of the installation area. This measurement is critical for calculating the total wattage of your setup.
Products mentioned in this guide
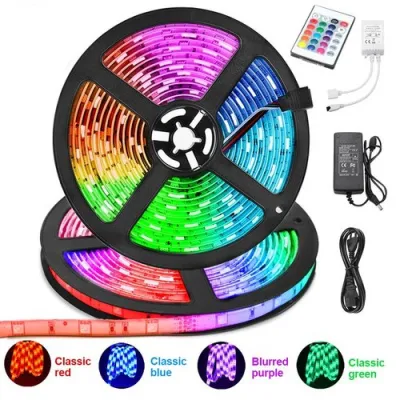
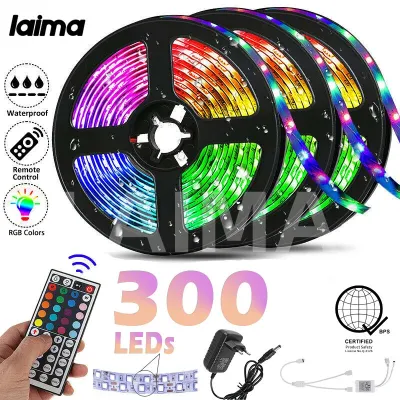
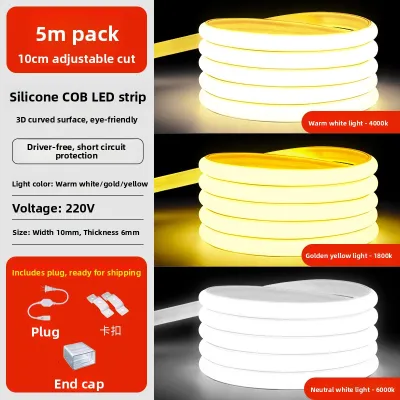
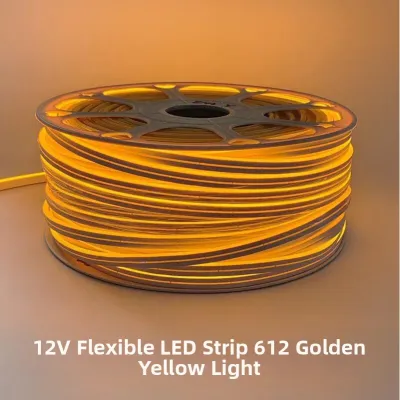
Prices are valid at publication and may change. Please refer to the product page for the latest price.
Every LED strip has a specific power consumption rating, usually listed on the product label as watts per meter. Multiply this rating by the total length of your planned run to find the total wattage. Your power adapter must have a maximum output capacity that exceeds this total wattage—ideally by a safety margin of at least 20 percent—to prevent overheating and premature failure.
Next, examine the product specifications on the packaging or label to verify electrical and environmental compatibility. Check the input and output voltage of the power adapter; most residential LED strips operate on 12V or 24V DC, which requires a compatible transformer plug to connect to standard 220V wall outlets. You must also verify the Ingress Protection (IP) rating of the strip.
For dry indoor areas like bedrooms or living rooms, a standard IP20-rated strip is sufficient. However, if you plan to install lights under kitchen cabinets near a sink, or in a bathroom where steam accumulates, you must select a strip with a higher IP rating, such as IP65, which features a protective silicone coating to resist moisture.
Finally, locate the nearest electrical outlet and plan how the power cable will reach it. In a condo, visible, dangling wires can quickly clutter a small room and create tripping hazards. Plan a routing path that utilizes existing architectural features, such as running the cable along the top of baseboards, behind furniture, or inside slim plastic cable raceways.
Ensure the power adapter can plug directly into the outlet without putting tension on the cable. Avoid using multiple daisy-chained extension cords or overloading a single outlet with high-draw appliances, which can pose a fire risk.
Prepare the Surface for Reliable Adhesion
The most common reason LED strip lights sag or fall off over time is poor surface preparation. This issue is particularly common in tropical environments where high humidity and ambient warmth can soften adhesives. To prevent this, you must thoroughly clean the mounting surface before peeling off the adhesive backing.

Wipe the entire installation path with a clean microfiber cloth dampened with isopropyl alcohol. This removes accumulated dust, airborne grease, and oily residues that standard household cleaners might leave behind. Avoid using ammonia-based glass cleaners or multi-surface sprays, as they often leave a thin film that prevents the adhesive from bonding properly. Allow the surface to dry completely.
You must also evaluate the texture and material of your condo’s walls or ceilings. Standard adhesive backings are designed for smooth, non-porous surfaces like glass, polished wood, metal, or smooth plastic. If your condo features rough concrete, textured plaster, or matte-painted drywall, the adhesive tape will only make contact with the high points of the texture, drastically reducing its holding power.
For these challenging surfaces, relying solely on the built-in tape is rarely sufficient. You should plan to use additional support, such as mounting clips spaced every 30 centimeters, or install the strips inside aluminum LED channels. These channels provide a flat surface for the adhesive and act as a heat sink to dissipate warmth, extending the lifespan of the LEDs.
Additionally, pay close attention to the condition of the paint or plaster. Avoid applying adhesive strips to freshly painted walls; paint can take several weeks to fully cure, and applying tape too early can cause the paint to peel off under the weight of the lights.
If the existing paint is already flaking, chalky, or showing signs of dampness from nearby air conditioning units, the adhesive will pull the loose paint right off the wall. Address any underlying moisture issues and scrape away loose paint before attempting installation, or choose a mounting method that does not rely on adhesive tape.
Mount, Wire, and Connect the LED Light Strips
Once your layout is planned and the surface is clean and dry, you can begin the physical installation. Start by unrolling the LED strip from its spool. It is highly recommended to test the entire strip while it is still on the spool to ensure all sections light up and display colors correctly before you mount it.
When you are ready to apply the strip, do not peel off the entire adhesive backing at once. Instead, peel back about 30 to 50 centimeters of the backing paper at a time. Align the strip carefully with your marked path and press down firmly.
Use your thumb or a soft cloth to apply steady pressure along the entire length of the strip for at least 10 to 15 seconds per section to activate the pressure-sensitive adhesive. This step is crucial for ensuring a long-lasting bond, especially in humid conditions.
If your planned layout requires a shorter run than the full length of the strip, you will need to trim it. You must only cut the strip at the designated cut marks, which are typically indicated by a scissor icon and copper solder pads spaced at regular intervals along the strip. Cutting anywhere else will sever the electrical circuit, rendering that entire section useless.
If you need to connect multiple segments—such as turning a sharp 90-degree corner around a cabinet or ceiling beam—use manufacturer-approved solderless connectors. These clip-on connectors slide over the copper pads and clamp down to establish a secure connection.
When using these connectors, always double-check the polarity: ensure the positive (+) and negative (-) markings on the strip align perfectly with the corresponding markings on the connector and the next segment. Misaligned polarity will prevent the subsequent sections from lighting up.
After mounting the strips and completing any necessary connections, route the power cable neatly to the outlet. Use small, adhesive-backed cable clips to secure the power cord along corners or baseboards, keeping it taut and out of sight.
Connect the low-voltage end of the strip to the power adapter’s controller unit, and then plug the adapter into the wall outlet. Avoid plugging multiple high-draw appliances into the same outlet adapter, and ensure the power supply is placed in an open, well-ventilated area where heat can dissipate naturally.
Test the Installation and Troubleshoot Issues
With everything physically mounted and connected, turn on the power to test your new lighting system. Observe the entire length of the strip to ensure uniform brightness and consistent color output.
If your system includes a remote control, a wall dial, or a smart home application, test all the functions, including dimming, color transitions, and power scheduling. Keep in mind that perceived color temperature and spatial effects are highly subjective; what looks bright and modern in a kitchen might feel too harsh in a bedroom, so take time to adjust the settings to match your personal preference and the room’s primary function.
If you notice any issues during testing, you can resolve most common problems with a few simple checks. If a section of the strip remains dark or flickers, the most likely culprit is a loose connection. Turn off the power, open any solderless connectors in that area, and verify that the copper pads on the strip are making direct, solid contact with the metal pins inside the connector.
If the entire strip is dim or loses brightness toward the far end, you are likely experiencing voltage drop. This occurs when the run length exceeds the manufacturer’s recommended limit for a single power feed. To fix this, you may need to split the run into shorter segments, each powered by its own adapter, or run a separate power feed to the far end of the strip.
If you notice sections of the strip beginning to sag or peel away from the wall shortly after installation, do not ignore it. High humidity can weaken the bond quickly. Reinforce these weak spots immediately by adding small plastic mounting clips or applying a short strip of heavy-duty, heat-resistant double-sided mounting tape designed specifically for electronics. Taking care of these minor issues early prevents the weight of the sagging strip from pulling the rest of the installation down.
Observe Electrical Safety and Know When to Stop
While installing low-voltage LED strip lights is generally a safe and straightforward DIY project, you must always prioritize electrical safety and recognize your personal limits. Never attempt to splice high-voltage wires, bypass built-in fuses, or modify the power adapter or controller beyond the manufacturer’s explicit instructions. Modifying electrical components can lead to short circuits, electrical shocks, or fire hazards, and may void your product warranty or violate your condominium’s safety regulations.
You must know when to stop and consult a qualified professional. If your installation plan requires hardwiring the LED strips directly into your condo’s main electrical system, installing new in-wall wiring, or adding dedicated wall switches, this is no longer a simple DIY task. Fixed wiring and modifications to your unit’s electrical panel must be handled by a licensed electrician to ensure compliance with local electrical codes and building safety standards. Additionally, if you are working at heights to install ceiling strips, always use a stable ladder and have someone assist you to prevent falls.
Finally, keep low-voltage strips and their power supplies away from direct water sources. Unless the product label explicitly carries a verified IP rating certifying it for wet locations, keep all electrical components dry. If you are installing lights in a kitchen, bathroom, or semi-outdoor balcony, ensure the power adapter is plugged into a Ground Fault Circuit Interrupter (GFCI) outlet to provide an extra layer of protection against electrical faults.
Frequently Asked Questions (FAQ)
Can I install LED light strips on a textured condo ceiling?
Standard adhesive backings generally fail on popcorn, plaster, or heavily textured condo ceilings because the uneven surface prevents the tape from making full contact. To achieve a secure and professional installation on a textured ceiling, you should use aluminum LED channels secured with small mounting screws, or utilize heavy-duty adhesive mounting clips designed specifically for uneven surfaces. These methods ensure the lights remain firmly in place without damaging the ceiling texture.
Do LED light strips consume a lot of electricity?
LED light strips are highly energy-efficient, but their exact power consumption depends on the specific product and the length of your installation. To determine the electrical load, check the product label or packaging for the wattage rating per meter. You can calculate the total wattage by multiplying this rating by the total length of the installed strip. For example, a 5-meter strip rated at 4.8 watts per meter will consume 24 watts at maximum brightness. Running this setup for several hours a day will have a minimal impact on your monthly electricity bill, costing only a few ₱ based on typical local utility rates.
Community discussion
Share your experience or ask a question. Comments are reviewed before publication.